Table of Contents
Advertisement
Quick Links
Advertisement
Table of Contents

Summary of Contents for Atek ADR 50 Series
- Page 1 Atek ADR 50 Series “LCD” NSTRUCTION IGH PERFORMANCE DIGITAL READOUTS ANUAL...
-
Page 2: Table Of Contents
Contents ATEK DIGITAL READOUT SYSTEMS........................... 3 1.1. The using advantages of ATEK Sensor' s ADR and Linear Encoder Scales ............3 1.2. ATEK Magnetic Linear Scales ..........................3 TECHNICAL PARAMETERS............................4 SYSTEM SETUP ................................8 3.1. DRO ................................... 8 3.1.1. - Page 3 3.7.3. I/O Tests ..............................19 3.8. Info .................................. 19 BASIC FUNCTIONS..............................20 4.1. Inc/ Metric Change ............................20 4.2. Absolute/ Incremental Mode .......................... 20 4.3. Axis Reset ................................ 20 4.4. Axes Set ................................21 4.5. Setting Half Value of the Display ........................21 4.6.
-
Page 4: Atek Digital Readout Systems
- To move to the next position reduces 80% of the time spent. - Pays for itself in a short time with the benefits To obtain the highest performance use linear ATEK scales. ATEK MLC series scales to the highest level of precision and reliability. Working with magnetic system that can occur within the environment dust, chips, burrs, 1.2. -
Page 5: Technical Parameters
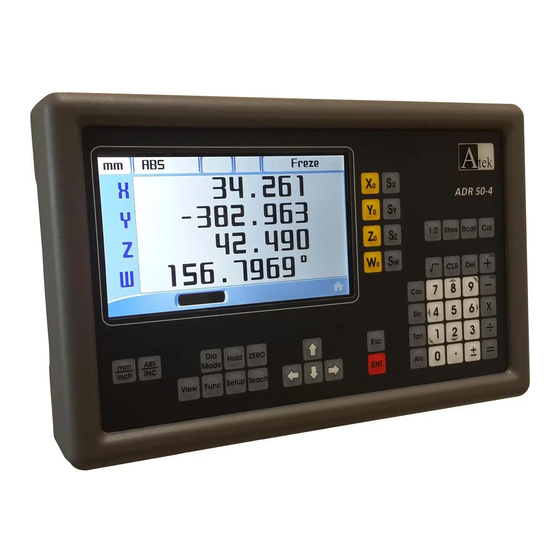
2. TECHNICAL PARAMETERS TEKNİKÖZELLİKLER Number of Axes 2, 3, 4 Display Color LCD Display accuarcy Users can define their own according to the request OptionalPush Pull or TTL Input signal A,B,Z (LineDriver A, B, Z, /A, /B, /Z) Incremental Encoder Signals Weight 2,7 Kg Power supply... - Page 6 Absolute / Incremental 2D Simulation Mode Diameter Mode Metric / Inch measurement Mode selection selection Advanced Function Menu Setup Instalation User Zeros Sleep Mode menu Calculator Memory Origin “Theach” Button Recall X Axis Selection Y Ekseni Seçim Butonu Z Axis Selection W Axis Selection X Axis reset W Axis reset...
- Page 7 WARNING! During the installation, please the machine's power off and follow the manual directions. Encoder Inputs Open RS -232 Collector Connection Outputs Buzzer Voice Fuse 1A output Power ON / connector OFF Switch Ground Power Input Connection During the connection; ...
- Page 8 Encoder Inputs (Differential) Pin Number Signal Shield Encoder Inputs Pin Number Signal Emty Emty Emty Shield RS – 232Output Port Connection Pin Number Signal Boş Boş Boş Boş Boş Shield Open Collector Output Pin Number Signal Out1 Out2 V(+) Out3 Out4 Out5 Out6...
-
Page 9: System Setup
3. SYSTEM SETUP After completing all the connections on the back of DRO then on/off switch turned “on” for opening the DRO. The DRO will display the power UP message momentarily in 3 second as shown below. Pressing the "Setup" button to toggle the system setup screen. System Setup menu options include directional move with arrow keys when in the desired option, and sub-menu with "ENT"... -
Page 10: Bench
3.1.2. Bench DRO uses of the bench will be selected. Selected according to the counter functions varies. There are 6 different option;. Milling, Lathe, Grinding, EDM, Bohrwerk ve general options are available 3.1.3. Brightness It is the display brightness menu. adjustable from 20 to 100.. Default of display is 80. After entering the desired value and save it with “ENT”... -
Page 11: Axis
3.2.1. Axis The axis select to be workedOther settings in below will be applied to the selected axis. The number of these options can X, Y, Z and W options in 4-axis ADR50 screen is present. vary according to the product used. 3.2.2. -
Page 12: Electronic Reference (Zero Position Of Scale)
3.3.1. Electronic Reference (Zero position of Scale) To find out electronic reference the choice of which axis should be selected.If selected “ALL”, Reference of all axes can be found out in same time.The reference option is selected as "Electronics", pres “ENT” button. when it comes “Bul !”... -
Page 13: Mechanical Reference (Mechanical Zeroing Position)
3.3.2. Mechanical Reference (Mechanical Zeroing Position) To find out electronic reference the choice of which axis should be selected.If selected “ALL”, Reference of all axes can be found out in same time. The reference option is selected as "Electronics", pres “ENT” button. when it comes “Bul !”... -
Page 14: Compensation (Error Correction)
3.4. Compensation (Error Correction) Compensation, error correction function at benches, are used to compensate mistakes of scales. it can be applied separately for each axis.Linear or sectional can be selected. Sectional compensation can be made up to 100 point. Error correction function can be set only with metric system, works for both measurement system. 3.4.1. -
Page 15: Segmented Compensation (Segmented Error Correction)
3.4.2. Segmented Compensation (Segmented Error Correction) If the scale makes errors in different dimensions this function is used for compensation. It can make compensation up to 100 point. Error Distance Correction Points Starting Point The starting point, zero point or mechanical zero point must have in segmented compensation function. After that determine the correction values with regular intervals. - Page 16 Second line on the "Point" line is displayed count of correction point. Scroll to the required correction point. It is shown as a “A / B”, A; count of point and B; total number of correction point. In the above example; it is understood that there are 3 correction point and at the 1.
-
Page 17: Memory
3.5. Memory Memory function is used for; parameters,back up of programs, restore the back up parameters and reset them. Also it can be return the factory defaults in this menu. 3.5.1. Paremeter On the parameter line can be back up all parameters except of parameters of language, bench and motor.In order to back up of the parameter is selected "Backup"... -
Page 18: Factory Reset
In order to backup the program, the selected "Backup" on the program line and press “ENT” botton. A query window will open. "Are you sure?" query "Yes" is selected. Parameters will be backed up. In order to erase all programs, the selected "Erase" on the program line and press “ENT” botton. A query window will open. -
Page 19: Connection
3.6. Connection This menu used for connection between computer to ADR50 to change the parameters if required. Value of Baud Rate, Parity, stop bits, and periods can be modified in this menu. 3.7. Test Test menu,ADR50 of display, keyboard, and I/O is performed the tests. The unit to be tested is selected with arrow button and starts to testing with “ENT”. -
Page 20: Keypad Test
3.7.2. Keypad Test The testing of keypad is performed with keypad on the keypad. The test is started by pressing “ENT” button on the “keypad” line then the keyboard test screen appears. Keyboard test screen when pressing the button, the display changes to blue. All the buttons are pressed and the keyboard test in the same screen, the button that is marked to be seen. -
Page 21: Basic Functions
4. BASIC FUNCTIONS 4.1. Inc/ Metric Change It can be selected Inc or Metric measurement by this button.When each press the button the measurement system will changed. Used measuring system is noted in the upper-left corner of the screen.Measurement system is changed, the values on the screen are converted according to the new system.. -
Page 22: Axes Set
4.4. Axes Set Axes value is entered manually Axis which is to be entered is selected with “axis selector button”, entered value and press “ENT”. Button to X axis, button to Y axis, button to Z axis and bu button is used for entering W axis. Select the axis to be entered by pressing a small window appears at the bottom right of the screen. -
Page 23: Imaging (X-Y Axis)
4.6. 2D imaging (X-Y Axis) The “View” button is used to display in 2D image of X and Y axes. The "View" button is pressed, the screen, the X and Y axes of the coordinate system will be located. The current position is on the left with white text to be specified and will be displayed on the yellow pointer with coordinate system. -
Page 24: Recall The Datum In Memory
Axis selection button is pressed, it opens a small window at the bottom right, and procedures that can be followed here. The last is equal to (=) or "ENT" button is pressed, the result of the operation that saves the axis. 4.9. -
Page 25: Axis Indicator Hold
During the breaks and at the end of overtime, the screen can be left in sleep mode until working again. thus, to intervene in the system is blocked such as, When on the job the user can continue from where it left off. The system is taken with the "Hold"... - Page 26 There are two different ways to exit the function. Route 1: Even though Y Axis the position is changed, continue from the hold value. Route 2: The new location is shown for changed of Y axis position. [25]...
-
Page 27: Coordinate Point Memory
4.12. Coordinate Point Memory 1,000 pieces diffrent coordinate point can be recorded in ADR50.Thus workpieces in series does not need to be repeated to enter the coordinates again.This function also can be used for lathe as a the memory of the team. This function can be used in 2 different ways. -
Page 28: Route 2
Route 2: Tables will be brought to the location stored. The "Zero" button is pressed and the desired memory record number is entered. To go to this memory number the press “ENT” button. The memory number shows in the previous screen, a "ABS"... -
Page 29: Advanced Functions
5. ADVANCED FUNCTIONS "Func" button is used to enter advanced functions menu. When "Func" button is pressed, a screen opens listing of functions, as a following. Among the options at the functions of menu can be moving with the arrow keys and when the desired options, it can be entered in submenu with "ENT"... -
Page 30: Bolt Hole
5.1. Bolt Hole Circular hole drilling (divisor) function is used to drill holes equally spaced on the circle. 2 nd Axis First Hole Starting angle Circle Diameter center Distance between center to 2nd Axis Distance 1 nd Axis between center to 1st Axis To enter the divisor menu, press "0"... - Page 31 When function starts up the simulation screen will open as the side. The current position is shown with a yellow marker. The first point to be processed are indicated with white. In the process axes are displayed the value on the left window.
-
Page 32: Linear Pattern (Hole Grid)
5.2. Linear Pattern (Hole Grid) The linear pattern function, the hole grid is creatived by user-specified number of line and columns contains the on the workpiece. 2nd Axis Length 1 Lenght 2 Angle Step 2 1st Axis Step 1 First Hole To enter the the Linear Pattern Function, press "1"... - Page 33 When function is started the simulation screen will open as on the side. The current position is shown with a yellow marker. The first point to be processed are indicated with white. The axis which will be operation values are displayed in window on the left.
-
Page 34: Radius
5.3. Radius It is used for sensitive circular cutting on workpiece. In this process, the user determines which angle to end or starting of cutting process.This function is not given only the opportunity for sensitive working on the other hands saves time and minimizes the amount of scrap. - Page 35 When all datums are entered, the preview image on the left side will be update according to these datums. Click “Start” icon then press "ENT" button to starts. When the function startup the simulation screen will be open like a the side. The current position is shown with a yellow marker.The first point to be processed are indicated with white.
-
Page 36: Rectangular Pocket
5.4. Rectangular Pocket This mode is intended to be used needs to be open a pool on the workpiece. the opening pool provides an opportunity to study for more smoothly and both the quality and faster with directing users. The starting point is the center of the pool will be opened. -
Page 37: Taper Measure
When the function startup the simulation screen will be open like a the side. The current position is shown with a yellow marker. The first point to be processed are indicated with white. The value which to be When the function startup the simulation screen will be open like a the side. - Page 38 When insert the end of the reference point to one the “ENT” button is pressed. Simulation screen is updated for the reference point 2.Insert the end of the reference point is brought 2 and in order to show of angle the press "ENT" button. Insert the end of the 2nd reference point after the “ENT”...
-
Page 39: Angle Measure
5.6. Angle Measure The angle of the workpiece can be measured with Angle Measurement function. Workpiece Point 2 Point 1 Angle To enter the the Angle Measure Function, press "5" button while on the function screen or to reach the "Angle Measure”... -
Page 40: Edm (Erosion Depth Control Function)
5.7. EDM (Erosion Depth Control Function) EDM is used to control the depth of the part to be processed. The offset value can be entered to compensate for errors arising from the electrode. It also applies to two different modes for relay position. Functions can be used in two different menus. - Page 41 When the function startup the simulation screen will be open like a side. The current position is shown with a yellow marker. The yellow line shows the value of depth, the pink line is depth + offset value.Operation is made according to value of pink.
-
Page 42: Outputs
Click “Start” icon then press "ENT" button to start. The relay remains towed until the axis value which to be process reach to value of "Offset + Depth". When the function is started, an icon will appear indicating that it was pulled on the right side of axis. The relay remains in the same position until the axis value which to be process reach to value of "Offset + Depth". -
Page 43: Mode 0
When the function is opened the eight line will be appear on the screen. But there is “Set2” line under the “Set 1” line and there is "UpHystr" line under the "DownHystr". A total of 10 lines of the variable is located. The used output is selected on the "Output N."... -
Page 44: Mode 1
Mode 1: When The value of Axis exceeds the value of set 1 the output is active. If the duration is not entered in, the output remains active, if the duration is entered, the output is remains active during the entered time and then switches to passive position. -
Page 45: Mode 4
Mode 4: When Axis value reach each of the set value the output becomes active for the period specified. While Axis value is increased or decreased it is not important to reach Set 1 value.The output becomes active in both cases. Bu When using this mode the duration must be entered. - Page 46 Main screen, Open Collector output status is indaceted on the black display at bottom. When the output is active it is indicated on this display. X axis can be selected and Set 1 value is given 10. But the output will not be active until the total value of X Axis is 17 in order to offset value is given 5 and upper rate of hysteresis is 2.
-
Page 47: User Program
5.9. User Program User's drawing and measures is saved on the program table.Later, the work piece of technical picture can be processing with the help of origins in easily and error-free. Line numbers represents the origin. There are 1000 lines.While processing it is recommended to work with "View" button and 2D image. - Page 48 ATEK SENSOR TECHNOLOGY AS Tuzla Kimya Sanayicileri Organize Sanayi Bolgesi, Melek Aras Bulvari No:67 TR-34956 Tuzla / Istanbul - TURKEY Tel: +90 (216) 399 44 04 Fax : +90 (216) 399 44 02 Web: www.ateksensor.com info@ateksensor.com E-Mail: [47]...
Need help?
Do you have a question about the ADR 50 Series and is the answer not in the manual?
Questions and answers