Table of Contents
Advertisement
Quick Links
Requirements for Use: Windows 2000, XP, Vista, Windows 7, 8
Installation of the latest version of KoldLink desktop software available free at
cargodatacorp.com.
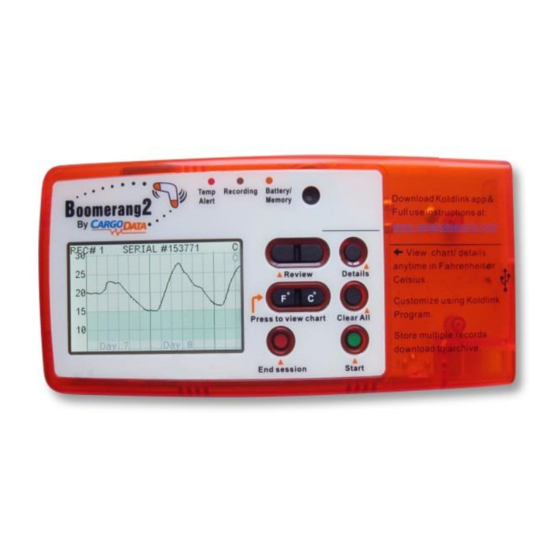
Boomerang 2 is ready for use right out of the box, however, you can custom configure Boomerang 2
specifically for your application using "Boomerang Setup" in KoldLink software.
Connect Boomerang 2 to your computer using the mini USB cord provided. Open KoldLink software and
click on "Boomerang Setup" tab found at the top left of the opening screen.
Notes about Unit ID number/Monitoring Session Number: A permanent Unit ID number is embedded
within Boomerang 2 and cannot be changed. As each monitoring session is started, a two digit session
number is automatically added to the end of the Unit ID number. For example, for Unit #801, the first
monitoring session will be will be designated 80101, the subsequent session will be 80102, etc., until
session 80199 is reached. At this point, Boomerang 2 resets session numbering to 80100. Session
numbers are shown on the display when reviewing data and allows easy record identification for
archiving.
Temperature Range Selection: Select the desired temperature range for the monitored zone. The range
can be between -20 and 120 F (default). Cargo Data suggests a minimum 3 degree separation between
the high and low limits. Selecting a desired range will enable the blinking red LED alert on the face of
Boomerang 2 when the instrument records out of range conditions. Additionally, the selected range will
be displayed within KoldLink charts as a shaded area. Any variations above or below range will be more
easily identifiable.
Boomerang 2 Use Instructions
Configure
Advertisement
Table of Contents

Related Manuals for Cargo Data Boomerang 2

Summary of Contents for Cargo Data Boomerang 2
- Page 1 Configure Boomerang 2 is ready for use right out of the box, however, you can custom configure Boomerang 2 specifically for your application using "Boomerang Setup" in KoldLink software. Connect Boomerang 2 to your computer using the mini USB cord provided. Open KoldLink software and click on "Boomerang Setup"...
- Page 2 Stop Monitoring Session: Press and hold the STOP button. Boomerang 2 will issue three beeps to confirm STOP. The green LED will discontinue blinking, and word DONE will appear on the LCD. Final data can be viewed on the LCD as instructed above.
- Page 3 Before replacing battery door, ensure the moisture protective clear gasket fits into the groove around the battery door area. Boomerang 2 will issue 5 beeps to confirm successful battery installation. If you do not hear five beeps after battery installation, remove battery, wait 30 seconds, then repeat procedure.
Need help?
Do you have a question about the Boomerang 2 and is the answer not in the manual?
Questions and answers