
Related Manuals for Atomos SHOGUN 7


Summary of Contents for Atomos SHOGUN 7
- Page 1 SHOGUN 7 User Manual EDITION 1: NOVEMBER 2019 Register your SHOGUN 7 within twelve months of purchase to upgrade to a 3 year warranty* Registering your product ensures you receive communication on all future updates...
-
Page 2: Table Of Contents
• Do not expose to liquids, rain or moisture. - Firmware updates • Do not dispose of the Shogun 7 in municipal waste and do not incinerate it, Main Screen - Information Bar always follow local regulations for safe disposal. -
Page 3: Warranty & Conditions
Software and/or the Atomos • Improper or negligent acts or omissions; Shogun 7 in whole or in part. Any failure to comply with the above or any • Repairs or attempted repairs; other terms and conditions contained herein will result in the automatic • Tampering with or modification of the goods;... -
Page 4: Introduction
This user manual will get you up to speed with all the amazing features packed into the Shogun 7 that will assist you during a shoot and speed up your workflow on set and in post production. Stay up-to-date with the latest information and software by registering your product today www.atomos.com/register... -
Page 5: What's Included
State Drive (SSD) or AtomX SSDmini, a compatible HDMI cable (Camera out/Shogun 7 in) and compatible batteries. Optional AtomX accessories such as power and accessory kits are also available. Visit the Atomos website for the latest accessory options. Not all drives are compatible with the Shogun 7. -
Page 6: What You Also Need
Shogun 7. The new AtomX SSDmini is smaller than a standard SSD, normally work in. but utilises the same SATA connection as normal HDD/SSD media and is •... -
Page 7: Hdmi / Sdi Cables
Standard 1/4” Mount/Arm Take care to use HDMI cables of the appropriate grade and take care to The Shogun 7 includes 1/4" -20 screw mounts top and bottom, along with protect them from damage. Signal issues can often result from damaged ARRI’s anti-rotational pin system for secure mounting to a wide range of... -
Page 8: Mounting Disks In The Master Caddy
The Master Caddy can’t be inserted the wrong way round. Always make Atomos recorders, however Master Caddy 1 is not forward sure that the disk connector faces the slot in the Shogun 7. Push the Master compatible with the Shogun 7 due to the compact latch design. -
Page 9: Powering The Shogun
We recommend the use of optional Atomos NP-F type batteries and the slide battery away Atomos Power Kit with the Shogun 7. The Shogun 7 can also use standard from device to remove. NP-F compatible batteries. Charge new batteries before using them, using a compatible battery charger. -
Page 10: Power On/Power Off
With a charged battery attached momentarily press the recessed circular button on the top right side of the Shogun 7 as you look at the screen to power up the unit. After a couple of seconds you will see the Shogun 7 Home Screen. -
Page 11: Shogun 7 Connections
To turn on, press the power button on the side of the unit. To shut down, hold On the side of the Shogun 7 unit is a multi-pin connector in to which the the button for at least 4 seconds (until unit turns off). LOCK: Tap to lock XLR break out cable can be connected. -
Page 12: Atomx Ssdmini, Master Caddy Ii And Screw Mounts
– even while the unit is turned on. But don’t do it while recording or you will get a corrupted file that may be unplayable. The Shogun 7 disk slot does NOT have a release latch - it is friction fit. Simply pull the SSDmini / Master Caddy II out using the top and bottom tabs on the caddy itself. - Page 13 No complicated sequences of buttons. No endless menus crowded with text. It’s optimized for our latest AtomIC hardware platform. And it’s extremely responsive with fast boot up times. Atomos Shogun 7 – User Manual Edition 1: November 2019...
-
Page 14: Best Practice
7. Using the Shogun 7 - Best Practice Understanding the basic controls and ‘housekeeping’ functions will save you time in the future. Before you start enjoying your Shogun 7 it will help to set it up with a ‘device name’ and file naming conventions. a. Format Media b. -
Page 15: Unit Name
Screen Lock Lock the Display Screen You can lock the display of the Shogun 7 by tapping the power button. This will ensure no changes can be made by mistakenly touching the screen. The screen lock function will simultaneously lock or unlock both Channels of the Shogun 7. -
Page 16: Firmware Updates
10. W hen the firmware upgrade is finished, the Shogun 7 will: a. Automatically delete ATOMSG7.FW file from your drive. b. Power itself down. 11. Turn on your Shogun 7 again with a short press of the Power Button located on the side. Swiping left to reveal more tabs, more icons, and more 12. When the Shogun 7 has booted, Press the Settings Button and then settings is a new feature of AtomOS10. -
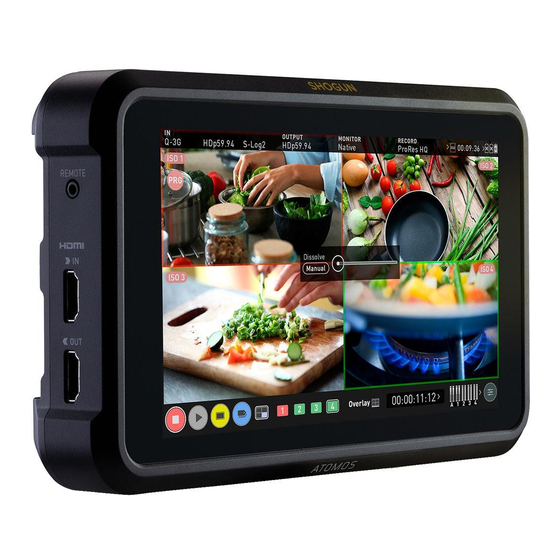
Page 17: Main Screen - Information Bar
7. Using the Shogun 7 The Main Screen - Information Bar At the top of the Shogun 7 screen is the area referred to as the Information The content of the Information Bar is dependent on what mode you are in, Bar. -
Page 18: Main Screen - Home
Shows the selected time code such as embedded, time of day or rec run. LUMA WAVEFORM: Luma Waveform is now a constant on your homescreen. Allows for greater control over monitoring without compromising the subject. Atomos Shogun 7 – User Manual Edition 1: November 2019... -
Page 19: Main Screen - Monitoring Features
Zoom X 2 Safe area Guides SETTINGS (yellow): Touch to access Monitoring Feature Settings. Set histogram sizes, Swipe left to reveal adjust transparency, LUTs, Focus Peaking and more. Desqueeze Settings Atomos Shogun 7 – User Manual Edition 1: November 2019... -
Page 20: Home Screen And Menu Functions
Standby Recording Shogun 7 uses a unit name, scene, shot and take convention to name the clips. Select the clip you want to play by touching the file name and this will start to playback. To exit the playlist simply touch close, or any other button. Touching close will take you to the previous window. -
Page 21: Information Bar - Overview
7. Using the Shogun 7 Information Bar - Adjust your settings The Information Bar of your Shogun 7 displays the settings of your input Alternatively you can access these setting by tapping the Record Settings icon. Tapping the Settings button will open... -
Page 22: Trigger
1-4 will be green. Log/HDR: Turn on to enable HDR image processing inside the Shogun 7. Bring the control of post into your shoot - record, preview and review using HDR. Camera: Tap to scroll through to the manufacturer of the camera providing the input. -
Page 23: Output (External)
ProRes RAW data rates can be obtained online from Apple ProRes whitepaper documents. * If Avid DNxHD / DNxHR is required, you must activate it first. This can be done at www.atomos.com/support Atomos Shogun 7 – User Manual Edition 1: November 2019... -
Page 24: File / Meters
In an NLE you can easily access all the recorded tracks. Atomos Shogun 7 – User Manual Edition 1: November 2019... -
Page 25: Audio / Media / Timecode
Note that not all Phantom Power HDMI sources embed Timecode. You can choose to deliver phantom power over the XLR/MIC input. Atomos Shogun 7 – User Manual Edition 1: November 2019... -
Page 26: Date And Time
Allows you to adjust the date and time shown by the pressing the camera Record Stop/Start button will make clock in the Shogun 7. This will also change the time of the Shogun 7 start and stop record simultaneously as day Timecode. -
Page 27: Info
7. Using the Shogun 7 Info Info Shows the software (firmware) version and unique device ID (DID) of your Shogun 7 device. This will be required to activate the Avid DNxHD / Avid DNxHR codec. You can also check on the Atomos website to ensure you are running the latest firmware: www.atomos.com/support... -
Page 28: Monitoring & Recording
Setting up for recording Shogun 7 Start and Stop record control can be triggered by the As soon as you connect a supported signal to the Shogun 7 input and following methods: have inserted a formatted drive the following will happen;... -
Page 29: Monitoring Features
Swipe left Monitoring Features Activation Icons Focus Peaking AtomOS 10 features a new and improved layout of Monitoring tools. Ensure your recordings are always in focus. These can be toggled on and off simply by touching the large yellow MON icon. When Monitoring tools are displayed, swipe left to reveal more icons. -
Page 30: Waveform Monitoring Tools
Just point the camera at something white and the Red, Green Full vectorscope zoom view and Blue levels should match if white balance is setup correctly on the camera. Alternate 'small' view. See next page for vectorscope size and position. Atomos Shogun 7 – User Manual Edition 1: November 2019... -
Page 31: Monitor Assist
The parts of the image in focus are highlighted by the selected color (can be adjusted by dragging the slider). To enable focus peaking then specify the mode in Focus Peaking settings. Focus Peaking Outline Atomos Shogun 7 – User Manual Edition 1: November 2019... -
Page 32: Blue Only / Zoom
• 4K 2:1 shows 1/16 of the 4K UHD image. False Color Scale To help you determine the exposure range with more accuracy, please use the scale on the left hand side of the display. Atomos Shogun 7 – User Manual Edition 1: November 2019... -
Page 33: Guides
8. Monitoring & Recording Cinema Guides Anamorphic De-Squeeze AtomOS 10 has advanced frame guides and safe areas. You can cycle Cycle through 2x 4:3 / 2x / 1.5x / 1.33x. through your required cine or TV frame guides by repeatedly pressing the guides icon. -
Page 34: Luts - Loading And Using Luts
Davinci Resolve, Photoshop or dedicated applications like LUTCalc to create you own custom Looks that can then be imported to your Atomos device. They can provide a great base or primary grade that allow you to apply an instant look to your footage. -
Page 35: Monitor
Before entering into the operation of HDR monitoring it is important to HDMI loop out of the Shogun 7. This will allow for instant preview on a larger understand the background of HDR. We advise that you read the Atomos monitor or to be used with a wireless sender. -
Page 36: Understanding Hdr And Log
The image appears washed out and desaturated as each pixel Secondly ensure you are sending a Log signal into the Shogun 7 so that contains more brightness information than SDR can display, if it were to do you are recording the HDR Log information. -
Page 37: Display
8. Monitoring & Recording Dolby Vision play out Display Engage this switch if you are feeding HDR footage to the Shogun 7 from a With this mode selected you have the option to change the screen brightness by adjusting the slider when in Native mode. At 100% camera or games console that supports HLG or PQ HDR output using the appropriate metadata flags. Ensure that Dobly Vision is supported on the... -
Page 38: Playback & Playout
1 second either forward or reverse to give you chance to analyse the clip in more detail. Recorded Files Browse recorded files Loop Tap to enable loop playback. In and out markers can also be utilized. Atomos Shogun 7 – User Manual Edition 1: November 2019... -
Page 39: Playlists
9. Playback & Playout Playback Mode One of the key elements of the Shogun 7 is the ability to utilize the monitor recorder as a play back and play out device for the content that has been recorded whilst maintaining the same visually lossless high quality images. -
Page 40: Video Format / External
Playback Auto HDR Engage this switch if you are feeding HDR images to the Shogun 7 from a camera or games console that supports HLG or PQ HDR output directly, using the Engage this switch if you are feeding HDR images to the appropriate metadata flags. If you are feeding Log... - Page 41 Meters Info For information about this menu see page 21 Shows the software (firmware) version and unique device ID (DID) of your Shogun 7 device. This will be required to activate the Avid DNxHD / Avid DNxHR codec. You Date Date can also check on the Atomos website to ensure you are For information about this menu see page 23 running the latest firmware: www.atomos.com/support...
-
Page 42: Edit
Color EDIT: Reveal/hide Edit tools. Toggle on/off SETTINGS: Noise Cut Away Close up Wide Shot There are no user accessible settings available for Edit functions in AtomOS 10.2. This may change with future firmware updates. EXPORT RESET Export Reset Atomos Shogun 7 – User Manual Edition 1: November 2019... -
Page 43: Markers & Tagging / Export
Once you clips have been tagged you can capture all the EXPORT RESET process right here on your Shogun 7, avoiding delays incurred when information and utilise the XML data to speed you edit and post production time. importing inferior and unwanted footage. You can review and tag immediately on-set with your client or director, or work through your takes SmartLog is compatible with FCPX XML (.fcpxml). - Page 44 Playlists featuring only selected recordings from your disk. More information about Playlists can be found on page 37. EXPORT A full list extended tagging options appears on page 38. RESET RESET RESET Atomos Shogun 7 – User Manual Edition 1: November 2019...
-
Page 45: Hd Pulldown
Standard Panasonic pulldown is supported, ensure in the Panasonic You will of course want the Shogun 7 to record the actual frame rate such camera settings that pulldown is not set to Advanced. -
Page 46: Connecting And Editing
Master Caddy Docking Station you may need to connect both USB connectors. This is because when it has to power a disk Eject the Master Caddy or SSD mini from your Shogun 7 and insert it into drive and its interface electronics, the Docking Station may consume the Docking Station. - Page 47 Avid Media Composer 6 support imported files from your Shogun 7 disk. Importing Shogun 7 footage into Final Cut Pro X You can import Shogun 7 footage into Final Cut Pro X (FCP X) in just a few simple steps. First, connect the Shogun 7 Docking Station to your Apple Mac using the USB 2.0 or USB 3.0 port.
- Page 48 • Double-click the unitname.FCPXML file • This will open FCP X and import the .xml file FCP X will make a event of the disk, name and reference all the footage • Select the Shogun 7 drive under Devices (in this example it is called in that event. EXCVIDEO) You will notice that on the clips you have added Smart Tags too, with •...
-
Page 49: Technical Specifications
2x 4K-SDI 12G or HD-SDI 3G/6G Construction note: Shogun 7 is designed to operate in ambient temperatures up to 40°C/104°F. If you wish to extend the temperature of operation in high temperature conditions, set the TFT brightness to a minimum. - Page 50 /atomos.global /atomosvideo @atomos.globsl @Atomos_News /AtomosVideo ® © Atomos 2019. All trademarks and registered trademarks are the property of their respective owners. Atomos Shogun 7 – User Manual Edition 1: November 2019...
Need help?
Do you have a question about the SHOGUN 7 and is the answer not in the manual?
Questions and answers