Table of Contents
Advertisement
Available languages
Available languages
Quick Links
Advertisement
Table of Contents

Related Manuals for Duramaxx 10028064


Summary of Contents for Duramaxx 10028064
- Page 1 Aquarium-Außenfi lter 10028064 10028065 10028067...
-
Page 2: Technische Daten
Sie diese, um möglichen technischen Schäden vorzu- beugen. Für Schäden, die durch Missachtung der Sicherheitshinweise und unsachgemäßen Gebrauch entstehen, übernehmen wir keine Haftung. Technische Daten Artikelnummer 10028064 Betriebsspannung 220 - 240V / 50Hz Elektrische Leistung H-Max... - Page 3 Sicherheitshinweise • Um die Gefahr von Stromschlägen zu reduzieren, entfernen Sie keine der Abdeckungen. Das Ge- rät enthält Teile, die dem Benutzer nicht zugänglich sind. • Die Gerätekennzeichnung befi ndet sich auf der Rückseite des Geräts. • Stellen Sie keine mit Flüssigkeiten gefüllten Gefäße, wie Vasen oder Gieskannen, darauf ab. •...
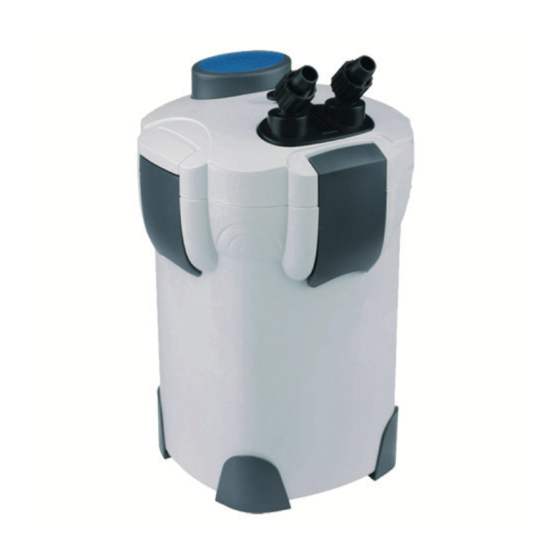
- Page 4 Komponenten / Aufbau Ein- und Ausgang Gebogenes Rohr (Ausgang) 13 Gebogenes Rohr (Eingang) Deckel Verbindungsstück Skimmer-Verbindungsstück Haupteinheit Sprüh-Rohr Eingangsrohr Leuchte Sprüh-Rohr-Abdeckung Eingangs-Abdeckung Abdeckung Drainagekorb Skimmer Saugnapf Drainagekorb Verbindungsstück Schläuche Keramikringe (optional) Aktivkohle (Optional) Biochemisch reakti- Bio-Kugeln (optional) ve Baumwolle...
- Page 5 Inbetriebnahme Wie in Abbildung 1 zu sehen, sollten zunächst die Verschluss-Schnallen (1 und 2) aufgeklappt werden, wodurch sich der Deckel vom Korpus löst. Setzen Sie den Drainagekorb ins Gehäuse ein nachdem Sie entsprechendes Filtermedium einge- legt haben. Setzen Sie den Deckel wieder auf und verschließen Sie mit den beiden Verschluss- klappen (1 und 2).
-
Page 6: Hinweise Zur Entsorgung
Das Leuchtmittel wechseln • Heben Sie vorsichtig den Deckel an und legen Sie ihn auf dem Kopf hin. • Lösen Sie die Schraube und nehmen Sie den Rahmen des Quartz-Zylinders heraus. • Drehen Sie den Zylinder langsam und vorsichtig gegen den Uhrzeigersinn und nehmen Sie ihn vorsichtig heraus. -
Page 7: Technical Data
We do not cover any damages that may arise from improper use of the item or the disregard of the safety instructions. Technical Data Article no. 10028064 Voltage 220 - 240V / 50Hz Electrical Power H-Max... -
Page 8: Important Safety Instructions
Important Safety Instructions • Read all instructions before using. • Do not let the cord hang over edge of table counter or touch hot surface. • If liquid penetrates inside the battery housing, unplug the appliance and have it checked by a qua- lifi... - Page 9 Parts Input / Output Nozzles Curved Output Bar Curved Input Bar Connector Skimmer Connector Main body Spray Bar Input Bar Light tube (10028066) Spray Bar Cover Input Cover Draining Skep Cover Skimmer Suction Cup Draining Skep Connector Pipes Ceramic Rings (optional) Active Carbon (Optional) Biochemical Cotton Bio Balls...
-
Page 10: Initial Use
Initial Use 1.According to the diagrammatic representation, the buckles (1)and(2) should be unfolded at fi rst,which will separate the main body and the lid.. Put the draning skeps with fi ltermedium into the mainbody in turn. Press the lid with your hands to connect the main body and the lid again.Then you should fasten the buckles (1) and (2) Pull the securing buckle to take out the input and output nozzle. -
Page 11: Environment Concerns
Replacing the UV Light Tube 1. Please open the lid from the main body carefully. Put the Iid in Inversion, loosen bolt and take the frame of the quartz tube out. Turn the quartz tube counterclockwise slowly. 2. Pull out the bad light tube. 3.
Need help?
Do you have a question about the 10028064 and is the answer not in the manual?
Questions and answers