
Summary of Contents for Mikas Elektronik Parapulser
- Page 1 TAKE BACK YOUR POWER M a g n e t i c P u l s e r (Based on the researches of Dr. R. C. Beck) P r o g r a m m i n g V 1.1 • 04. 2018...
-
Page 2: Table Of Contents
8.9 Test-CODE input [6] .....................8 8.10 Refill / Readout pulse reservoir ...................9 8.11 CODE-number input ....................10 8.12 Unblocking-CODE ....................10 8.13 2-, 5-, or 6-digit sequence of number input ............... 11 14. Technical data ........................12 © 2018 Mikas Elektronik Entwicklungen www.parapulser.com... -
Page 3: Programming-Mode
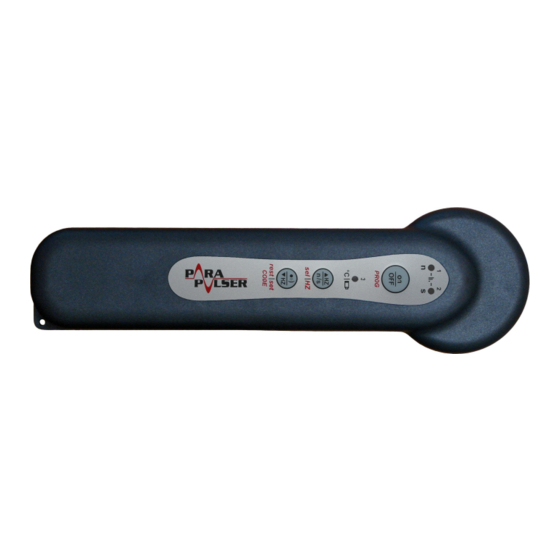
Programming manual V1.1 8. Programming-mode To be able to perform at the Parapulser a programming, adjustment or readout, Programming-mode has to be activated previously: Æ PROG-key press at switch on of the Parpulser 8 a) Programming-mode activate 3 seconds, until 3 Piep-tones are audible and all 3 LEDs (===) light up permanently. -
Page 4: Puls Frequency Programming
0 ... 9 : This number is predetermined and has to be input by the user..A : This number (0 – 9) is emitted by the Parapulser..C : The 6-digit CODE-number has to be input by the user. -
Page 5: Pulse Frequency Of Free Memory Location Readout
After selection of the free memory location to be erased, activate input-mode, see 4.) above, and just terminate it again, see b). The deleted memory location is no longer selectable dur- ing normal operation mode of the Parapulser. b) Input-mode terminate: HZ-key 2 seconds press, until “Dulip!”-signal is audible. -
Page 6: Acoustic Pulse Counter Program [11] / Readout [12]
“8 b)” on page 2. Æ (Parapulser switch on and) select counting mode “C” of the acoustic pulse counter, see “7.5” on page 13 at the Parapulser manual, to let the Parapulser generate the counting signal after the programmed amount of magnetic pulses! Readout counting value of acoustic pulse counter: 1.) Activate Programming-mode, see “8 a)”... -
Page 7: Volume Adjustment Of Operating-Signals [13] And Of The Pulse Counter [14]
Programming manual V1.1 4.) Write down the displayed number: The Parapulser now shows with help of the LEDs (===) the first digit of the up- grade-frequency. Write down this number. 5.) Remaining 3 digits readout: rest-key short press, and after each actuation, write down the via LED (===) dis- played number (0 –... -
Page 8: Upgrade-Frequenz Increase / Readout [16]
4.). 4.) Write down the displayed numbers: The Parapulser now shows with help of the LEDs (===) the first digit of the up- grade-frequency. Write down this number. 5.) Remaining digits of upgrade-frequency readout: rest-key short press, and after each actuation, write down the via LED (===) dis- played number (0 –... -
Page 9: Software Version [17] Or Serial Number [18] Readout
4.). 4.) Write down the displayed numbers: The Parapulser now shows with help of the LEDs (===) the first digit of the up- grade-frequency. Write down this number. 5.) Readout of remaining digits of software-version or serial number: rest-key short press, and after each actuation, write down the via LED (===) dis- played number (0 –... -
Page 10: Refill / Readout Pulse Reservoir
– At next switch on, the Parapulser states the fill level of the pulse reservoir with num- ber 4, that means, the fill level is at 100 %, see “6.3” on page 8 at the Parapulser manual. -
Page 11: Code-Number Input
8.11 CODE-number input Attention! If a CODE-number has been entered 3 times wrong in a row, the Parapulser blocks any further CODE-input (CODE-lock). Then, refilling the pulse reservoir or increasing the upgrade-frequency is no longer possible. A CODE-lock can be unlocked only with an un- blocking-CODE, see “8.12”... -
Page 12: 5-, Or 6-Digit Sequence Of Number Input
Programming manual V1.1 – If an unblocking-CODE is entered 3x wrongly, the Parapulser blocks the input of a second unblocking-CODE. To unlock this lock, the Parapulser hast to be repro- grammed by the manufacturer. In this case please contact the customer service, see “14.”... -
Page 13: Technical Data
Dimensions in inch (L x W x H) 1.87 lbs Overall weight Customer service: 2.0 mm center pin : +49 (0)8157 / 92 42 92 Made in Germany E-Mail : support@parapulser.de Internet : www.parapulser.de Your salesman: Mikas Elektronik Entwicklungen Bahnhofstr. 15, 82340 Feldafing info@mikas-elektronik.de www.parapulser.com...
Need help?
Do you have a question about the Parapulser and is the answer not in the manual?
Questions and answers