Frontiermedical Toto Service, Maintenance And Repair Manual
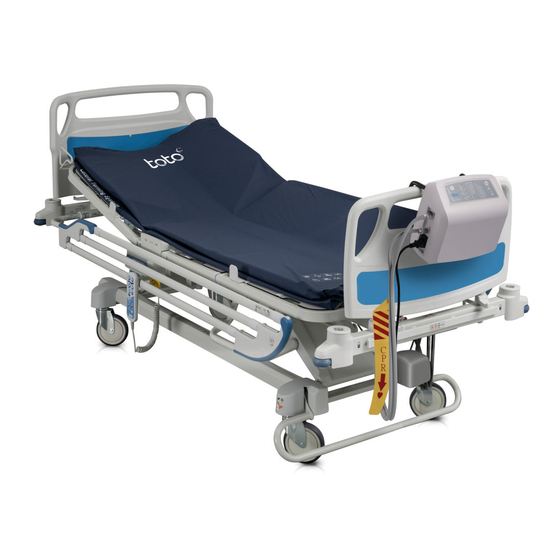
Platform & control unit
Hide thumbs
Also See for Toto:
- User manual (94 pages) ,
- Instructions for use manual (16 pages) ,
- Quick reference manual (5 pages)

Related Manuals for Frontiermedical Toto


Summary of Contents for Frontiermedical Toto
- Page 1 SERVICE AND REPAIR PROCEDURES Toto® Platform & Control Unit (110V) Service, Maintenance and Repair Manual Version 1 - August 2019...
-
Page 2: Table Of Contents
SERVICE AND REPAIR PROCEDURES Toto® Platform & Control Unit (110V) CONTENTS Introduction ............................3 Alarms and Alerts ..........................4 Service Procedure ..........................5 Service Procedure - Problem Diagnosis ....................6 Spare Parts List………………………………………………………………………………………………………………………………..7 Checking and Replacing the Fuse......................8 Testing for a Faulty PCB and ‘piggybacking’ a Working Spare ............. 9 - 10 Replacing a Faulty PCB ......................... -
Page 3: Introduction
This service and repair manual outlines the steps to carry out a service and the procedures to follow if there is a suspected fault with the Toto system. Malfunction of the control unit may be due to the failure of one of the replaceable electrical components. -
Page 4: Alarms And Alerts
SERVICE AND REPAIR PROCEDURES Toto® Platform & Control Unit (110V) ALARMS AND ALERTS Toto Touch has several low priority alarms to ensure patient safety and efficacy. Reference Alarms and Alerts Indicated by an Audible Alarm and: ‘Initialisation Failure’ Five ‘Inflate time’ LEDs and Five ‘Rest time’ LEDs Control unit fails to start. -
Page 5: Service Procedure
SERVICE AND REPAIR PROCEDURES Toto® Platform & Control Unit (110V) SERVICE PROCEDURE The following checks should be completed to determine whether or not there is system fault or failure that may require part replacements as part of the routine service procedure. To conduct these checks, you’ll require the apparatus specified below: Tamperproof Label Air Flow Bungs (Male &... -
Page 6: Service Procedure - Problem Diagnosis
SERVICE AND REPAIR PROCEDURES Toto® Platform & Control Unit (110V) SERVICE PROCEDURE - PROBLEM DIAGNOSIS If the control unit does not pass the functionality test, use the flow diagram below to diagnose the problem. 5. OPENING THE CONTROL UNIT a. Once you’ve diagnosed the problem, source the appropriate replacement parts (full list on next page). -
Page 7: Spare Parts List
SERVICE AND REPAIR PROCEDURES Toto® Platform & Control Unit (110V) SPARE PARTS LIST In order to conduct the service and repair procedures that follow, different kits are available for replacing certain parts. Below is a complete list of the kits available. -
Page 8: Checking And Replacing The Fuse
SERVICE AND REPAIR PROCEDURES Toto® Platform & Control Unit (110V) CHECKING AND REPLACING THE FUSE Control unit failures may be a result of a blown fuse. To replace, follow the steps below. Note: When replacing, only use the same fuse rating (T1AH/250V). - Page 9 SERVICE AND REPAIR PROCEDURES Toto® Platform & Control Unit (110V) TESTING FOR A FAULTY PCB (PRINTED CIRCUIT BOARD) AND ‘PIGGYBACKING’ A WORKING SPARE To determine if the PCB has failed, always test the Control unit using a working spare. When handling the PCB, anti-static gloves (or other anti-static precautions) should be used to protect the PCB from static.
-
Page 10: Testing For A Faulty Pcb And 'Piggybacking' A Working Spare
SERVICE AND REPAIR PROCEDURES Toto® Platform & Control Unit (110V) TESTING FOR A FAULTY PCB AND ‘PIGGYBACKING’ A WORKING SPARE CONTINUED Required Tools: Phillips Screwdriver Wire Clippers Heat Gun 7. Piggybacking the Spare 8. Test Required Parts: Reconnect mains power, switch... -
Page 11: Replacing A Faulty Pcb
SERVICE AND REPAIR PROCEDURES Toto® Platform & Control Unit (110V) REPLACING A FAULTY PCB When handling the PCB, anti-static gloves (or other anti-static precautions) should be used to protect the PCB from static. Required Tools: Phillips Screwdriver Needle Nose Pliers 1. -
Page 12: Standard Pressure Test
SERVICE AND REPAIR PROCEDURES Toto® Platform & Control Unit (110V) STANDARD PRESSURE TEST - TESTING AIRFLOW AND CHECKING FOR A FAULTY COMPRESSOR The control unit compressor is designed for longevity and covered by a two-year warranty from Frontier Therapeutics Inc. From time to time compressor failure can occur. -
Page 13: Replacing A Faulty Compressor
SERVICE AND REPAIR PROCEDURES Toto® Platform & Control Unit (110V) REPLACING A FAULTY COMPRESSOR Having established a fault with the compressor by following and completing the standard pressure test procedure detailed previously (steps 1 through 6), replace the faulty compressor with a new compressor. - Page 14 SERVICE AND REPAIR PROCEDURES Toto® Platform & Control Unit (110V) REPLACING A FAULTY COMPRESSOR CONTINUED Required Tools: Phillips Screwdriver Wire Clippers Needle Nosed Pliers Heat Gun 7. Removing From the Cage 8. Preparing the New 9. Secure Required Parts: Compressor...
-
Page 15: Synchronous Motor Replacement
SERVICE AND REPAIR PROCEDURES Toto® Platform & Control Unit (110V) SYNCHRONOUS MOTOR REPLACEMENT The synchronous motor runs the valve that operates the timing mechanism for the alternation cycle. If the valve becomes worn or damaged, it will no longer rotate smoothly, and its function reduces. If this happens, a distinct grinding noise can be heard. - Page 16 SERVICE AND REPAIR PROCEDURES Toto® Platform & Control Unit (110V) SYNCHRONOUS MOTOR REPLACEMENT CONTINUED Required Tools: Phillips screwdriver Wire clippers Flat Head screwdriver Heat gun 7. Removing the 3-way 8. Removing the 3-way 9. Removing the 3-way valve Required Parts:...
- Page 17 SERVICE AND REPAIR PROCEDURES Toto® Platform & Control Unit (110V) SYNCHRONOUS MOTOR REPLACEMENT CONTINUED Required Tools: Phillips Screwdriver Wire Clippers Flat Head Screwdriver Heat Gun 13. Installing a New Motor 14. Refitting the 3-way valve 15. Refitting the 3-way valve...
-
Page 18: Quick Release Connector Replacement
SERVICE AND REPAIR PROCEDURES Toto® Platform & Control Unit (110V) QUICK RELEASE CONNECTOR REPLACEMENT Both the male and female quick release connectors on the side of the control unit can be removed and replaced. For significant damage, the connector plate can also be removed and replaced. -
Page 19: Bed Hook Replacement
SERVICE AND REPAIR PROCEDURES Toto® Platform & Control Unit (110V) BED HOOK REPLACEMENT The bed hooks on the rear of the Control Unit can be replaced if they become damaged or worn. Required Tools: Phillips Screwdriver Heat Gun 1. Prepare the Control Unit 2. - Page 20 SERVICE AND REPAIR PROCEDURES Toto® Platform & Control Unit (110V) BED HOOK REPLACEMENT CONTINUED Required Tools: Phillips Screwdriver Heat Gun 7. Replacing the Bed Hooks 8. Replacing the PCB, 9. Reconnect PCB Required Parts: Compressor and other Using a Phillips Head screwdriver...
-
Page 21: Air Cell Replacement
SERVICE AND REPAIR PROCEDURES Toto® Platform & Control Unit (110V) AIR CELL REPLACEMENT In the event of puncture or damage, one or both of the platforms air cells can be replaced. Required Tools: 1. Prepare the Control Unit 2. Prepare the Platform &... -
Page 22: Cpr Deflation Valve Replacement
SERVICE AND REPAIR PROCEDURES Toto® Platform & Control Unit (110V) CPR DEFLATION VALVE REPLACEMENT In the event of damage, the CPR deflation valve can be replaced. Required Tools: 1. Prepare the Control Unit 2. Prepare the Air Hoses 3. Fitting a New CPR Valve... -
Page 23: Platform Cover Replacement
SERVICE AND REPAIR PROCEDURES Toto® Platform & Control Unit (110V) PLATFORM COVER REPLACEMENT Both the male and female quick release connectors on the side of the control unit can be removed and replaced. For significant damage, the connector plate can also be removed and replaced. -
Page 24: Troubleshooting
SERVICE AND REPAIR PROCEDURES Toto® Platform & Control Unit (110V) TROUBLESHOOTING GUIDE Problem Cause Initial Checks / Trouble Shooting No LEDs lit; no alarm. Control unit may not be Ensure that the control unit is powered by a live and active attached to a power source. -
Page 25: Electrical Safety Test And Test After Repair
SERVICE AND REPAIR PROCEDURES Toto® Platform & Control Unit (110V) ELECTRICAL SAFETY TEST AND TEST AFTER REPAIR BS EN 62353:2014—Medical electrical equipment. Recurrent test and test after repair of medical electrical equipment. These tests should be completed before the Control Unit is sent out to or returned to the user. -
Page 26: General Safety, Disposal Information
SERVICE AND REPAIR PROCEDURES Toto® Platform & Control Unit (110V) GENERAL SAFETY PRECAUTIONS Do not use this equipment in the presence of flammable anaesthetics. The air intakes for the control units are at the sides of the unit. Mount the control unit on the footboard of a bed frame to minimise the risk of accidental damage. Should the bed not have a suitable footboard, place on a solid surface such as a table, or on the floor. -
Page 27: Technical Specifications
SERVICE AND REPAIR PROCEDURES Toto® Platform & Control Unit (110V) TECHNICAL SPECIFICATION Toto Touch complies with the following EU Directives and Harmonised Standards; Directive Harmonised Standard Referenced EMC Emission Standards Medical Devices Directive (MDD) EN 60601-1:2006/A1:2013 (Electrical EN 55011:2009/A1:2010 Class B (RF) - Page 28 United Kingdom Tel: +1 800 303 9544 Tel: +44 (0) 1495 235800 Email: contactus@frontier-therapeutics.com Email: info@frontier-group.co.uk Web: www.frontier-therapeutics.com Web: www.frontier-group.co.uk Toto® lateral turning system is a registered trademark of Frontier Therapeutics Ltd © 2019 Frontier Therapeutics Limited. All rights reserved.
Need help?
Do you have a question about the Toto and is the answer not in the manual?
Questions and answers