Table of Contents
Advertisement
Advertisement
Table of Contents

Subscribe to Our Youtube Channel
Summary of Contents for URC Total Control DMS-AV TSP-2000
- Page 1 DMS-AV Home Theater Amplifier Programming and Setup via Accelerator...
-
Page 2: Table Of Contents
Pre-Programming Checklist ............................5 Using this Manual ..............................6 Program Menu Step 3 Add URC Devices ........................7 Program Menu Step 6 Network Setup URC Devices .....................8 Program Menu Step 7 AV Inputs and Outputs ......................9 Program Menu Step 8 DMS Setup/INPUTS/Configure ..................10 Downloading to DMS-AV............................21 Appendix: Optional Control for DMS-AV TV Calibration ..................22... -
Page 3: About The Dms-Av Tsp-2000
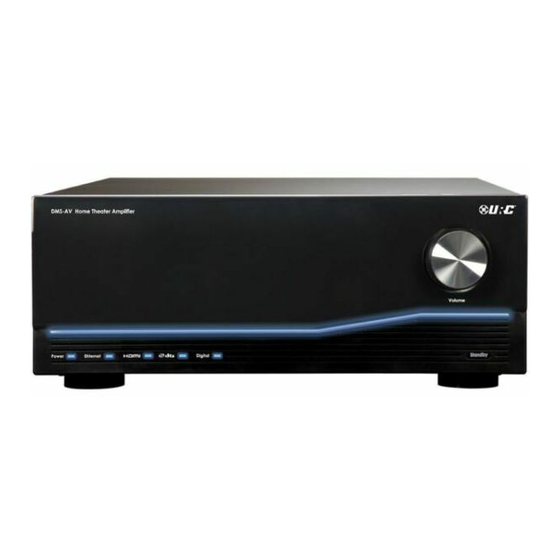
Component Video Outputs, even a Phono Input! URC’s DMS-AV (TSP-2000) provides state-of-the-art performance to every aspect of a home theater. It provides eleven audio & video inputs, as well as a Phono Input (MM), including five HDMI Inputs and seven 125-watt amplifier channels. -
Page 4: Trc-1280 - Complete A/V Control
Overview Empower your Clients In use, the DMS-AV provides easy access to powerful features via the two-way interface found on most Total Control in-wall and hand-held controllers. The end-user, at a glance, can easily determine the source, volume and other settings, without relying on a front panel display that is often hidden in a closet or otherwise unreadable. -
Page 5: Using Urc Accelerator
Accelerator. Download the software via URC’s dealer portal website: www.urccontrolroom.com If you have never had access to the site, you must contact your URC Sales Representative to be given an access code available only to URC dealers. URC provides frequent multi day hands-on trainings on Accelerator, check with your sales representative for availability. -
Page 6: Total Control System Design Checklist
Selling iPhone, iPad and Droid Total Control APPs Be careful not to oversell URC’s profitable Total Control Apps for smart phones and tablets. Yes, the apps offer all the two-way capability of a TRC-1280 in a device that your client already owns and thinks is cool. Yes, they ensure that the client can control the system with the phone they already carry around everywhere. -
Page 7: Pre-Programming Checklist
Overview Pre-programming Checklist Start with all AC power cords unplugged from their designated AC outlets. 1. Place the DMS-AV with a minimum of 3” of unobstructed air space above it. Ensure that the client cannot obstruct or spill liquid into the chassis. 2. -
Page 8: Using This Manual
This manual assumes that you have programmed with URC Accelerator before and are familiar with how to open, name, save and configure all other components in the system. For a step-by-step guide to everything besides the DMS-AV, refer to the URC Accelerator Programming Reference Manual. A PDF is included with the Accelerator installation on your PC;... -
Page 9: Program Menu Step 3 Add Urc Devices
Program Menu: Step 3 Add URC Devices Add all the URC devices present in the client’s system, including all DMS-AV Home Theater amplifiers. 1. Select the room where you will install the DMS-AV, by clicking on it in the Project Tree or selecting it using the Next and Previous buttons below the Current Room text box. -
Page 10: Program Menu Step 6 Network Setup Urc Devices
Although you can program the system with DHCP assigned to your URC devices, you run the risk of an IP conflict after a power failure or other router “glitch”. Thus, it is best to assign static IP to all URC devices. Click the DHCP column for each device including the DMS-AV, wait for the IP Status window to load (this takes a few... -
Page 11: Program Menu Step 7 Av Inputs And Outputs
You must drag the DMS-AV (named FR Audio Video Settings to make sense to the end-user) to the correct input on the Family Room TV. If you have any other TVs, or non-URC audio devices with inputs and zones to be assigned to them, make sure you complete those connections as well, before moving on to Step 8. -
Page 12: Program Menu Step 8 Dms Setup/Inputs/Configure
Programming DMS-AV in Accelerator Program Menu: Step 8 DMS Setup/INPUTS/Configure Eventually, you will give Accelerator the information it will need to set DMS-AV inputs correctly when it generates all of your Room Activity macros. Select the DMS-AV from the list Select Devices with Inputs. Once selected, the Configure option will become available. - Page 13 Programming DMS-AV in Accelerator Program Menu: Step 8 DMS Setup/INPUTS/Configure (cont’d) Simply drag the devices to the input to which they are physically connected. SNP-1 Doesn’t Need to be Connected The SNP-1 does NOT have to be connected in this step. Since the SNP-1 STREAMS over the network, it does not have to be connected to the DMS-AV.
- Page 14 Programming DMS-AV in Accelerator Program Menu: Step 8 DMS Setup/INPUTS/Configure (cont’d) In this step, you assign Video Scaling, Default AV Sync and the DMS-AV’s two DC triggers. Set each by selecting the setting and the input and clicking on the square, revealing a list box for each cell as shown below: Video Scaling This field allows for each external source to be set to its optimal resolution.
- Page 15 Programming DMS-AV in Accelerator Program Menu: Step 8 DMS Setup/INPUTS/Configure (cont’d) HDMI Bypass Mode This is a mode that transfers the native resolution of the selected source to the display monitor or projector, via the DMS-AV’s HDMI output. In HDMI Bypass mode, your client will no longer have access to the DMS-AV’s state of the art video features such as On-Screen Menus, Detail and Edge Enhancement, AV Sync, and PReP.
- Page 16 Programming DMS-AV in Accelerator Program Menu: Step 8 DMS Setup/INPUTS/Configure (cont’d) DMS Setup/Zone Settings 1. You must click and highlight the zone to view or change zone settings. 2. Click the Connect to Zone button. This will connect your laptop to the DMS-AV over the network. DMS Setup/Zone Settings/Connect to Zone/General Once you’ve connected to the DMS-AV, the Zone 1 settings window will open, with the General tab displayed.
- Page 17 Programming DMS-AV in Accelerator Program Menu: Step 8 DMS Setup/INPUTS/Configure (cont’d) On Screen Display You can turn off the superimposed and momentary display of volume and input selection. Additionally, the on- screen display transparency can be set to Low, Medium or High. The default value for the DMS-AV is Low. Power and Volume Here you set the behavior for when the DMS-AV is turned on.
- Page 18 Programming DMS-AV in Accelerator Program Menu: Step 8 DMS Setup/INPUTS/Configure (cont’d) DMS Setup/Zone Settings/Connect to Zone/Speaker Settings Click on the Speaker tab to reveal the speaker settings. This window looks like it will take a long time, thankfully, you can use the Automated Room Setup (via the on screen menus) to calibrate the optimum Crossover point, Speaker Distance and Speaker Level, then simply apply them to Accelerator in a few minutes.
- Page 19 Programming DMS-AV in Accelerator Program Menu: Step 8 DMS Setup/INPUTS/Configure (cont’d) Night Mode When the Night Mode option is enabled the sound level of compatible digital audio soundtracks will be dynamically compressed. Dynamic range compression increases low-level audio content such as dialog, making it easier to hear at low volume levels while at the same time reducing the intensity of higher-level audio content.
- Page 20 Programming DMS-AV in Accelerator Program Menu: Step 8 DMS Setup/INPUTS/Configure (cont’d) DMS Setup/Zone Settings/Connect to Zone/Hardware Settings Click the Hardware tab to navigate to the Hardware Zone 1 Settings. As in previous tabs, you will utilize list boxes to set each parameter. See notes below. HDMI Audio Output (for HDMI sources only) If your client would like to use his TV instead of the DMS-AV, set this to Pass Through.
- Page 21 Programming DMS-AV in Accelerator Program Menu: Step 8 DMS Setup/INPUTS/Configure (cont’d) DMS Setup/Zone Settings/Connect to Zone/System Toolbox System Toolbox is used to operate the DMS-AV without a remote control. You will use it to calibrate the speakers with the microphone and to calibrate the TV utilizing the DMS-AV’s Test Patterns. 1.
- Page 22 Programming DMS-AV in Accelerator Program Menu: Step 8 DMS Setup/INPUTS/Configure (cont’d) 9. If you have not set the Speaker Configuration, you must use the cursor controls to enter the number and type of speakers in the clients system via the Speaker Config menu item. 10.
-
Page 23: Downloading To Dms-Av
Programming DMS-AV in Accelerator Program Menu: Downloading Note that when you make changes to the DMS-AV setup in Accelerator after a download, some changes require that you download to the entire Total Control system, including the MRX-10, remotes and keypads. Changes made in Steps 1-7 or Step 8: Inputs or Step 8: Zone Assignment require that Step 10 and Step 12 be repeated and that all devices get a new download because both macros and user interfaces have been changed. -
Page 24: Appendix: Optional Control For Dms-Av Tv Calibration
2. When the Create a New Driver window opens, select Start Blank- Device Not Found. 3. The Choose Device Type window opens, select General Device, and then click Next. 4. When the Device Driver Edit window opens, type URC within the Brand field. - Page 25 Appendix: Optional control for DMS-AV TV Calibration 6. The Set Model Name window appears. Type a description to alert other installers, who might use this driver, that it is only for testing and the client should not see this. Then click on OK. 7.
- Page 26 Appendix: Optional control for DMS-AV TV Calibration 13. Select Audio from the IP Data From: field, Universal Remote Control as the Brand, the DMS-AV as the Model, then click on the Save All button. 14. Click the Reorder Functions button. 15.
- Page 27 2. Select Database: My Database 3. Select Module Type: 1-Way IP Database, 4. Select Category: AUX 5. Select Brand: URC 6. Select Model: DMS-AV Test Patterns Then click on Add Selected Module. Note: Check the Project Tree and delete if it is in the wrong room by right-clicking on the item, and choosing delete from the context menu, then redoing step 17.
- Page 28 Setting IP for the DMS-AV TEST Patterns Device Click on the final static IP address of the DMS-AV in the URC Devices tab of Network Setup. Select the entire IP address and hit Control-C to copy it. Now, switch to the Non URC Device tab of Network Setup. Select the empty IP address slot (A) for the DMS-AV Test Patterns device and hit Control-V to paste the IP address into the slot.
- Page 29 500 Mamaroneck Avenue Harrison, NY 10528 Phone: (914) 835-4484 Fax: (914) 835-4532 www.universalremote.com Version 1.612...
Need help?
Do you have a question about the Total Control DMS-AV TSP-2000 and is the answer not in the manual?
Questions and answers