Advertisement
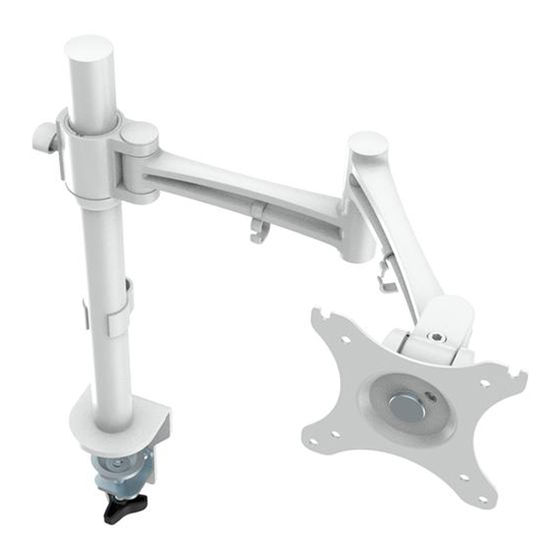
75×75
10kg
100×100
10"-30"
STEP1
Fitting the bottom support on the desk
1
4
6
C
F
STEP2
Install TV plate and fixed wreath
1
Item No.:ABL-DLB211-SR
Installation guide
-85°~15°
2
Please select the appropriate
mounting holes according to
the thickness of desk
10
1
10
2
3
4
M4x12MM
M5x12MM
A(4PCS)
B(4PCS)
Washers
4X4MM
E(8pcs)
F(1PCS)
1.Tube cover (1PCS)
2.TV plate (1PCS)
3.Fixed wreath (1PCS)
4.Tube (1PCS)
5.Cable cover (1PCS)
6.Bottom support (1PCS)
7.Adjustable clamp (1PCS)
8.Anti-Slip rubber (1PCS)
9.Cable management clips (2PCS)
10.Decorative cover(2PCS)
Not included
8
D
7
F
2
!
WARNING
Make sure the screw here
is tightly locked before
hanging up the screen
2.5X2.5mm
10
M6x20MM
M6x10MM
C(3PCS)
D(2PCS)
2
9
5X5MM
G(1PCS)
D
3
1
2.5x2.5mm
3
5
4
6
C
8
7
4x4mm
F
For desk thickness
20-100mm
Advertisement
Table of Contents

Related Manuals for ABL ABL-DLB211-SR

Summary of Contents for ABL ABL-DLB211-SR
- Page 1 2.5x2.5mm M4x12MM M5x12MM M6x20MM M6x10MM Item No.:ABL-DLB211-SR A(4PCS) B(4PCS) C(3PCS) D(2PCS) Installation guide Washers 4X4MM 5X5MM E(8pcs) F(1PCS) G(1PCS) 1.Tube cover (1PCS) 2.TV plate (1PCS) 3.Fixed wreath (1PCS) 4.Tube (1PCS) 5.Cable cover (1PCS) 6.Bottom support (1PCS) 7.Adjustable clamp (1PCS) 8.Anti-Slip rubber (1PCS) 9.Cable management clips (2PCS)
- Page 2 STEP3 Attaching TV plate to screen Use provided washers (E) to secure screws, if required. STEP4 5x5mm Adjusting screen ±180° -85°~15° Cable Use the supplied 5x5 allen key (G) to adjust the monitor CAUTION This product contains small items that could be a choking hazard if swallowed. Keep these items away from young children. ●...
Need help?
Do you have a question about the ABL-DLB211-SR and is the answer not in the manual?
Questions and answers