Table of Contents
Advertisement
Quick Links
Advertisement
Table of Contents

Subscribe to Our Youtube Channel
Summary of Contents for Logik L37S13
- Page 1 Instruction Manual Soundbar L37S13...
-
Page 2: Table Of Contents
Contents Unpacking ............................5 Product Overview ..........................6 Front View .................................. 6 Top View ..................................6 Bottom View ................................6 Side View ..................................7 Remote Control ..........................7 Battery Replacement for the Remote Control ................8 Remote Control Operation Range ....................9 Wall Mounting ..........................9 Connections ..........................11 Using the OPTICAL Connection ........................11 Using the AUX IN Connection ..........................11... - Page 3 Safety Warnings Safety • Read all the instructions carefully before using the unit and keep them for future • Always disconnect the unit from the mains reference. supply before connecting/ disconnecting other devices or moving the unit. • Retain the manual. If you pass the unit onto a third party make sure to include this • Unplug the unit from the mains socket manual.
- Page 4 CAUTION RISK OF ELECTRIC SHOCK DO NOT OPEN The lightning flash with arrowhead symbol, within an equilateral triangle, is intended to alert the user to the presence of uninsulated “dangerous voltage” within the unit’s enclosure that may be of sufficient magnitude to constitute a risk of electric shock.
-
Page 5: Unpacking
Thank you for purchasing your new Logik Soundbar. We recommend that you spend some time reading this instruction manual in order that you fully understand all the operational features it offers. You will also find some hints and tips to help you resolve any issues. -
Page 6: Product Overview
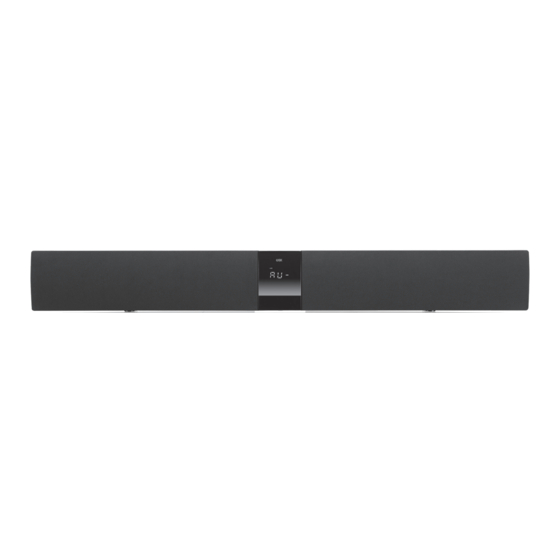
Product Overview Front View 1. Speakers 3. Display 2. Remote Control Sensor 4. Status Indicator Top View STANDBY FUNCTION VOL– VOL+ 5 6 7 8 7. VOL +/– Buttons STANDBY Button Switches the unit between ON and Adjust the volume. STANDBY modes. -
Page 7: Side View
Side View 1. LINE IN Socket Remote Control Button Switches the unit between ON and STANDBY modes. MUTE 2. MUTE Button Silences the unit or restores the sound. 3. BASS Button BASS Adjusts the bass level of the audio output. 4. -
Page 8: Battery Replacement For The Remote Control
Battery Replacement for the Remote Control 1. Press and slide the battery cover to open the battery compartment of the remote control. 2. Insert one AAA size battery (not included). Ensure the polarities (+ and –) of the battery match the (+) and (–) as indicated in the battery compartment. -
Page 9: Remote Control Operation Range
Remote Control Operation Range • The remote control sensor at the front unit is sensitive to the remote control’s commands up to a maximum of 8 metres away and within a maximum of a 30° arc. • Please note that the operating distance may vary depending on the brightness of the room. - Page 10 2. Firmly fix 1 dowel into each hole in the wall. Dowel Solid wall (i.e., Solid brick, Solid concrete, Solid wood, Solid wooden battens) Drywall, Plaster wall, Lath wall, etc. 3. Insert 1 screw into each dowel. Be sure to leave a 5 mm gap between the wall and the screw’s head.
-
Page 11: Connections
Connections Using the OPTICAL Connection 1. Use an optical cable (not included) to connect the audio device’s OPTICAL OUT socket to the unit’s OPTICAL (input) socket. OPTICAL cable (not included) Audio device COAXIAL AUX IN SUB-WOOFER OPTICAL COAXIAL AUX IN SUB-WOOFER OPTICAL Bottom view of the unit... -
Page 12: Using The Line In Connection
Using the LINE IN Connection Use a 3.5mm to 3.5mm stereo audio cable (not included) to connect the audio device’s audio output socket to the unit’s LINE IN socket. 3.5mm to 3.5mm stereo audio cable (not included) Audio device Side view of the unit Using the COAXIAL Connection Use the coaxial cable to connect the audio device’s coaxial output socket to the unit’s COAXIAL (input) socket. -
Page 13: Connecting To The Mains Supply
Connecting to the Mains Supply • This unit is designed to operate with the provided mains cable. • Connecting the unit to any other power source may damage the unit. Unwind the mains cable to its full length. Connect the mains plug to the mains socket. Make sure the mains plug is firmly inserted into the mains socket. -
Page 14: Selecting Modes
General Operation When you first connect the unit to the mains socket, the unit will be in STANDBY mode. The status indicator will light up red. STANDBY to switch the unit on. The word “HELLO“ will show on the display, and •... -
Page 15: Maintenance
If any functional abnormality is encountered, unplug the unit from the mains socket and reconnect it again. Specifications Model L37S13 Mains Supply AC 110-240V ~50/60Hz Power Consumption Speaker Output Power 20W x 2 Net Weight 3.4kg... - Page 16 For advice on where to purchase accessories, please contact the store where you purchased your equipment. All trademarks are the property of their respective owners and all rights are acknowledged. DSG Retail Ltd. (co. no. 504877) Maylands Avenue, Hemel Hempstead, Herts., HP2 7TG, UK IB-L37S13-130628V3...
Need help?
Do you have a question about the L37S13 and is the answer not in the manual?
Questions and answers