
Subscribe to Our Youtube Channel
Related Manuals for PeopleKey V30 Plus

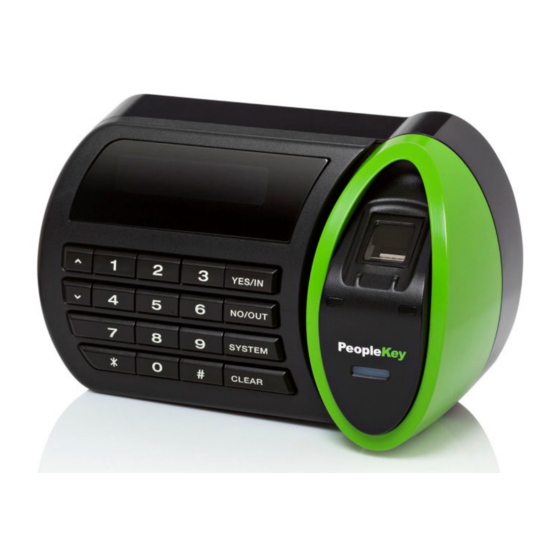
Summary of Contents for PeopleKey V30 Plus
- Page 1 Quick Start Guide 4.01 33 Lexington Drive, Bella Vista, NSW 2153, Australia 1800-015-458 International: +61 2 9960-7200...
- Page 2 4.01 33 Lexington Drive, Bella Vista, NSW 2153, Australia 1800-015-458 International: +61 2 9960-7200...
-
Page 3: Table Of Contents
Finger Scanner Maintenance ___________________________________________ 1 3 Cleaning ____________________________________________________________ 13 Users failing verifications ______________________________________________ 1 4 Steps to overcome “Verification” failures. ________________________________ 14 How to Scan on the V30 Finger Scanner _ __________________________________ 1 5 How to use the Clock In & Out Function on the V30 Plus Finger Scanner _________ 1 6 V30 Plus Procedure: __________________________________________________ 17 Handy Hints: ________________________________________________________ 17 I have injured my default finger, how do I use my alternative finger? ___________ 17 Quick Start Guide V2.016_2 (V30 Plus).Docx 29/07/2019 Page 3 of 19... -
Page 4: How To Correctly Place Your Finger On The Scanner For Best Read Quality
Finger placed correctly on the sensor glass . Finger placed correctly on the sensor glass . Slight pressure is necessary . Slight pressure is necessary . Quick Start Guide V2.016_2 (V30 Plus).Docx 29/07/2019 Page 4 of 19... - Page 5 The following images show various incorrect positioning’s of the finger onto the sensor glass. The final images shows correct placement. Quick Start Guide V2.016_2 (V30 Plus).Docx 29/07/2019 Page 5 of 19...
-
Page 6: Accessing The V30 Plus System Menu To Enrol Users
Accessing the V30 Plus System Menu to Enrol users. NOTE: Manager, Supervisor or Enroller Authority Level is required to access the System menu 1. Press “SYSTEM” Main screen (DAY DATE TIME) ENTER ID NO. (Clock in/out) 2. Enter your Personal ID Number. SYSTEM ACCESS ENTER ID NO. -
Page 7: Accessing The V30 Plus System Menu For Finger Testing
Accessing the V30 Plus System Menu for Finger testing NOTE: You must have Manager Authority Level to access the System Menu. Press “SYSTEM”. DAY DATE TIME ENTER ID NO. Enter your Personal ID Number. SYSTEM ACCESS ENTER ID NO. -
Page 8: Accessing The V30 Plus System Menu To Delete An Enrolment
Accessing the V30 Plus System Menu to Delete an Enrolment. NOTE: You must have Manager or Supervisor Authority Level to access the System Menu. Press “SYSTEM”. Main screen (DAY DATE TIME) ENTER ID NO. (Clock in/out) Enter your Personal ID Number. -
Page 9: Accessing The V30 Plus System Menu To Change Authority Level
Accessing the V30 Plus System Menu to change Authority level. NOTE: You must have Manager or Supervisor Authority Level to access the System Menu. Press “SYSTEM” (SYSTEM). Main screen (DAY DATE TIME) ENTER ID NO. (Clock in/out) Enter your Personal ID Number. -
Page 10: Accessing The V30 Plus System Menu To Change A User Threshold
Accessing the V30 Plus System Menu to change a User Threshold. NOTE: You must have Manager or Supervisor Authority Level to access the System Menu. Press “SYSTEM”. Main screen (DAY DATE TIME) ENTER ID NO. (Clock in/out) Enter your Personal ID Number. -
Page 11: Accessing The V30 Plus System Menu To Enrol Users With "Passwords
Accessing the V30 Plus System Menu to Enrol users with “Passwords” NOTE: You must have Manager, Supervisor, or Enroller Authority Level to access the System Menu. Press “SYSTEM”. Main screen (DAY DATE TIME) ENTER ID NO. (Clock in/out) Enter your Personal ID Number. -
Page 12: Accessing The V30 Web Interface
Tablet Smart Phone Depending on the Firmware version on your V30, one of the following should now be displayed. Standard V30 WEB Interface Compact V30 WEB Interface Quick Start Guide V2.016_2 (V30 Plus).Docx 29/07/2019 Page 12 of 19... -
Page 13: Finger Scanner Maintenance
Do not allow water or cleaning fluids to remain in contact with the glass or the surrounding area for long periods Do not use abrasive cleaning solutions or materials. Quick Start Guide V2.016_2 (V30 Plus).Docx 29/07/2019 Page 13 of 19... -
Page 14: Users Failing Verifications
• Re-enrol with a different Alternative finger finger. Enrol • Enrol using MPE for multiple more fingers. fingers • Adjust the users threshold setting. (V30 Plus Adjust only) threshold • Set user ID to Password password Quick Start Guide V2.016_2 (V30 Plus).Docx 29/07/2019... -
Page 15: How To Scan On The V30 Finger Scanner
Scanner. The sensor will automatically detect the placement of the finger Successful verification is The sensor light is indicated with a Green illuminated once the light. finger placement is detected. Un‐Successful verification is indicated with a RED light. On a successful scan, the transaction to the FingerLan software is recorded as a “Verify_OK” Quick Start Guide V2.016_2 (V30 Plus).Docx 29/07/2019 Page 15 of 19... -
Page 16: How To Use The Clock In & Out Function On The V30 Plus Finger Scanner
How to use the Clock In & Out Function on the V30 Plus Finger Scanner User steps Step 1. Clock In or Out Step 2. Enter ID or Pin Step 3. Place finger Step 1. “Clock In” press the “Yes/In” “Clock Out” Press the “No/Out” Step 2. Step 3. Type in ID, PIN or employee number on the keypad. -
Page 17: V30 Plus Procedure
6) Place your correct finger firmly on the sensor plate and wait for the V90 to display “REMOVE FINGER”. 7) If successful the V30 Plus will now display the word “VERIFIED” as well as light up the green LED. 8) If unsuccessful the V30 Plus will request you to “PLEASE TRY AGAIN”. - Page 18 Notes Quick Start Guide V2.016_2 (V30 Plus).Docx 29/07/2019 Page 18 of 19...
Need help?
Do you have a question about the V30 Plus and is the answer not in the manual?
Questions and answers