Table of Contents
Advertisement
Advertisement
Table of Contents

Summary of Contents for TERSUS BCPI7
- Page 1 Installation &Operation Manual Full Inverter Swimming Pool Heat Pump - 1 -...
- Page 2 BCPI7 BCPI10,BCPI13 BCPI17 BCPI21 BCPI30 BCPI30 Thank you very much for purchasing our product, please keep and read this manual carefully before you install heat pump. Thank you very much for purchasing our please keep and read this manual carefully...
-
Page 3: Table Of Contents
Rubber shock absorber Heat Pump Unit (The pipe connector has been installed on the machine) Please keep installation manual properly, and read it carefully before using. The unit must be installed by professional personnel according to the instructions in this manual. - Page 4 Installation and operation of electric devices........15 Operating Instructions................18 Wireless/Remote control...............32 Adjusting and Initial operation ..............42 Operation and maintenance..............43 Fault analysis and elimination method..........45 Technical parameters................46 After-sale service..................47 - 4 -...
-
Page 5: Accessories
1. Accessories Each unit produced by our factory comes with the following accessories: Name Qty. Installation & Operation Manual 1 PC User Guide to install the unit Wire controller 1 PC Used for the machine operation interface Drain-pipe 1 PC Used for draining the condensate water Drain-pipe connector 1 PC... -
Page 6: Safety
2. Safety Range of application: 1.Power supply: 220V-240V/1N~50Hz. 2.Ambient temperature: -15°C〜43°C : 3.Working water temperature: Min. inlet water temperature 8°C,Max. outlet Water Temperature 40°C. If the system is always used beyond the available water range, please contact with manufacturer. ● The installation should be done by the professional persons, to prevent leaking, electric shock or fire. - Page 7 THE UNIT MUST BE EARTHED PROPERLY BEFORE USAGE OR THE When installing the heat pump in a small room, make sure it is well ventilated. ● Don't put fingers or objects into the air inlet outlet as the rotating fan could cause serious injuries. ●...
-
Page 8: Heat Pump Working Principle
● When cleaning the unit, stop operation, switch off the power and disconnect the power.. 3. Heat pump unit working principle 3.1 Heat pump operation Heat pumps use heat from the sun by collecting and absorbing energy from the outside air. This energy is then compressed and transferred to the pool water. -
Page 9: Installation Of The Unit
and the whole process begins again. ➢ Developments in heat pump technology mean that today heat pumps can efficiently collect heat from the outside air even when the temperature is as low as 7-10°C. This means that for tropical and subtropical climates the pool can be maintained between 26°C and 32°C. 3.2 Air source heat pump working principle 4 way valve Water inlet... - Page 10 ● Avoid installations in locations containing mineral oil. ● Avoid installation in locations where the air contains salt or other corrosive gases. ● Avoid installation in locations with serious power supply voltage fluctuation. ● Avoid installation in unstable places, such as a car or cabin. ●...
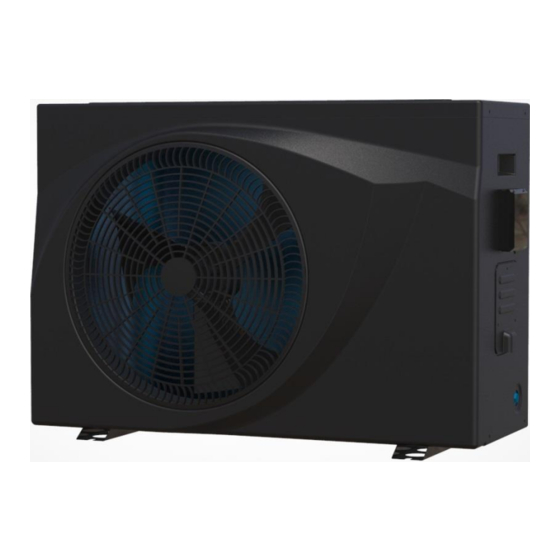
- Page 11 Please observe the space requirements indicated below for optimal operation and maintenance. Figure 2. Horizontal installation space requirements(mm) 4.4 Heat pump dimensions Figure 3 Heat pump dimensions BCPI7 BCPI10 BCPI13,BCPI17 BCPI21 - 11 -...
- Page 12 BYC-007/010T BYC-013/017/0 21TF1 4.5Exploded view Parts Parts Fan protective gill Water flow switch Front panel Titanium heat exchanger Fan blade Right structure Fan motor Manometer - 12 -...
- Page 13 Left panel Right panel Left structure Control panel Evaporator Electrical terminal cover Fan motor mount Electrical terminal block Upper structure Electrical cable support Electric box cover Electronic expansion valve Elevtrical box Reactive resistance Top cover Bottom panel Plastic net Four-way valve Middle panel Compressor 4.6 Installation base for heat pump...
- Page 14 deformation. ●Double-check that the support base is strong enough before fixing the unit. ● The heat pump will produce condensation water: remember to provide a drainage channel when making the installation base. ●Please install shock absorbers on the surface of the base. Figure 5 Lifting diagram 5.
- Page 15 ● Make sure that there is a stable water flow, to prevent excessive throttling. ● Do not handle, move or lift the unit by holding the water inlet and outlet pipe: use only the holes on the beam of the base (see Figure 5) ●...
- Page 16 ●It is recommended to install a one-way valve for each unit to prevent water back flow. ●Multiple units can be installed as part of a system, but each unit should be controlled independently. ●All pipes and valves should be insulated. 5.2.3 Connection sizes Model No. Inlet Outlet BCPI7 BCPI10 BCPI13 BCPI17 BCPI21 BCPI30 DN50...
-
Page 17: Installation Of Optional Accessories
●The water quality should be analyzed before operating the unit: PH value, conductivity, Chloride ion concentration and sulphate ion concentration should be checked. ●Acceptable water quality shown below: PH value Total hardness Conductivity Sulphate ion Chlorine ion Ammonia ion 7~8.5 <... - Page 18 must be upwards and NOT downwards. ● The flow switch must be installed on a straight pipeline, and there must be more than five times the length of the pipe diameter on either side of the flow switch (see Figure 8 below). The direction of fluid must follow the arrow on the controller.
- Page 19 3*1.5 mm² BCPI7 BCPI10 BCPI13 BCPI17 3*2.5 mm² BCPI21 BCPI30 3*4 mm² BCPI30(380V/3ph) 5*2.5 mm² Terminal Terminal cable max. 4 mm² Figure 9 7.3 Circulation pump installation The heat pump only provides a signal for the circulation pump, A separate A.C. Contactor is required to connect the circulation pump.
- Page 20 NOTE: If the pump power less than 250w, please connect the pump as this drawing Figure 10 NOTE: If the pump power > 250w, please connect the pump as this drawing Figure 11 - 20 -...
- Page 21 7.4 Electric wiring diagram COMP : COMPRESSOR GND : GROUND AMBT: AMBIENT TEMPERATURE SENSOR WFS: WATER FLOW SWITCH LOW : LOW PRESSURE SWITCH HIGH : HIGH PRESSURE SWITCH COIL: EVAPORATOR COIL TEMPERATURE OWT/INWT: INLET / OUTLET WATER SENSOR TEMPERATURE SENSOR Figure 12 Electrical wiring diagram - 21 -...
-
Page 22: Operating Instructions
8. Operating Instructions 1.ON/OFF and Lock Function 1.1 Icon definition lock--The LCD is locked If the icon is lighted 1.2 ON/OFF Operation steps Light Press this button one time to start/close the heat pump; Step1: Step2: Press the button to close the heat pump if in main menu, in other menus, press the button back to the main menu. - Page 23 1.3 Lock/Unlock Operation steps 1.3.1 Step1 (Lock): The controller will be locked when holding for 3 seconds or the controller is standby for 60 seconds. (Purpose: to prevent children playing). Any operation is without response when it is locked. (The LCD locked If the icon is lighted).
- Page 24 Icon definition ◆ Energy Conservation Mode ――Select Energy Conservation Mode to work with a highly economic effect in the heat pump compressor ◆ Heating Mode ――Select Heating Mode to continue heat the water to the setting temperature Powerful Working Mode ◆...
- Page 25 Water Pump run ◆ 4-Way valve run ◆ Water Inlet Temperature ◆ Heat Pump FAN run ◆ 2.2 Operation steps Step 1: Check icon status (The LCD locked If the icon is lighted). Step 2: Press and hold for 3s to change the status from lock to unlock. With this operation, the controller can response any other demands.
- Page 26 - 26 -...
- Page 27 3. Key Parts Working Display Key Parts - 27 -...
- Page 28 Icon definition Heat Pump Compressor run ◆ Electric Heater run ◆ Water Pump run ◆ 4-Way valve run ◆ Water Inlet Temperature ◆ ◆ Heat Pump FAN run - 28 -...
- Page 29 4. Timer Setting 4.1 Icon Definitions Multiple phase timer setting ◆ ◆ Timer ON/OFF ◆ : Time 4.2 Time setting operation steps in main menu, “hour” byte flashed at this time Step1: Enter "hour" byte setting function after press to set the “hour”. , press when “hour”...
- Page 30 when “minute” setting is finished. Step4: The setting will be saved in controller after press EXAMPLE: If you would like to set 08:15, please follow below operations: (remark: mean first operating) Step 1 Step 2 - 30 -...
- Page 31 hour minute Save Adjust First Step Step 3 minute Save Adjust - 31 -...
- Page 32 4.3 Timer Operation Steps The Phase 1 timer on/off setting: icon will be lighted, it means to enter Step1: Press and hold for 3S until the 1 phase timer setting function. The “hour” byte will be flashed to set “hour” byte when “hour” flashed Step2: Press .
- Page 33 EXAMPLE: If you have set 08:15 ON in the timer , heat pump will start to work at 08:15 every day. Timer OFF will also repeat every day. (Remark: mean the first step) Step 1 Step 2 hour Press 3S Save Adjust First phase ON timer light...
- Page 34 Step 4 Step 3 Minute Saved 1 Save Adjust First phase ON/OFF timer Saved ON timer data and then enter OFF timer setting same as Step 2 and 3 4.4 The Phase 2、3 timer on/off setting: The Phase 2、3 timer on/off setting: Different operation: After finished 1 phase ON/OFF timer setting, please don’t press key to save.
- Page 35 please press key to enter 3 phase timer setting menu. 4.5 Cancel Timer Function If the timer function already setting, Press and hold for 3S if you need to cancel Timer once the controller is unlocked 5.Browse Function Function 1: press to browse the parameters of Heat Pump, Function 2: In the main menu of Heat Pump ON, press to modify the temperature...
- Page 36 Code Description Scope Unit Ambient temperature 0.1℃ Outside coil temperature 0.1℃ exhaust temperature 0.1℃ suction pipe temperature 0.1℃ reserve 0.1℃ reserve 0.1℃ Inside coil temp (after throttle) 0.1℃ water inlet temperature 0.1℃ water outlet temperature 0.1℃ reserve reserve reserve sensor failure system failure driver failure signal output...
- Page 37 6.2. Error Code Code Description flow failure anti-freeze protection high pressure protection low pressure protection Temperature sensor before auxiliary valve Temperature sensor after auxiliary valve connection failure between control main Program board and controller connection failure between driver and main Program board After throttle temp sensor failure exhaust temperature over water inlet sensor failure...
- Page 38 water outlet temperature over in Heat Mode Outside coil temperature over in Cooling Mode Compressor drive failure Compressor current over Compressor output failure IPM current failure Heat sink temperature is too high Power overload shutdown (PFC failure) DC voltage over DC voltage lower inside coil sensor failure voltage lower...
- Page 39 Water-Heating Mode only for BCHP Automatic Mode Defrosting Mode WIFI connection status Setting Water Inlet Heat Pump Compressor Electric Heater Water Pump 4-Way valve Heat Pump FAN Wind speed steps of FAN Lock Multi-phase Timer Timer ON/OFF Time - 39 -...
-
Page 40: Wireless/Remote Control
9.Wireless / remote control WIFI Function WiFi Icon Step1: WIFI connection: The WIFI icon will flash to enter the WIFI connection status after power on. It means the WIFI is successfully connected if the WIFI icon can be lighted over 5S. You can check the connection status in your mobile APP. - Page 41 User registration When using the "smart life" software for the first time, user registration is required. Click the "Create New User" link to enter the registration interface. If you already have an account, just click login. - 41 -...
- Page 42 After entering the registration page, please follow the instructions on the page to register。 set password Enter confirmation code Enter the phone number you wa nt to register and click Next User login After successful registration, the software will jump to the login interface or directly log in successfully, enter the correct "user name"...
- Page 43 Need to select "Agree" The phone needs to be connected to the network through the WIFI network - 43 -...
- Page 44 Turn "WLAN" Connect to available Wi-Fi networks This WIFI is not the WIFI in the module but the WIFI that can be connected to the Internet; After users log in to the software, they can add devices Device binding - 44 -...
- Page 45 Click "+" or "Add Device" in the upper right corner to bind. Click to enter the "Add Device Type" interface Choose "Icon Logo" - 45 -...
- Page 46 After completing the "Select Device Type", enter the "Add Device Interface", and the network configuration methods are divided into "default mode (WI-FI fast connection)" and "compatibility mode (hotspot distribution network)" Default mode (WI-FI fast connection): Enter Wi-Fi password The remote controller simultaneously press the up key + mode key Enter...
- Page 47 Device name modified Enter the password and confirm it will jump to the connection interface Click Finish to start device control - 47 -...
- Page 48 If the network distribution fails, the APP will display the page as shown in the figure, you can choose to re-add or view the help. Select "Other Ways" Compatibility mode : in the Add Device interface Press and hold the timing key +,down key +,power key simultaneously...
- Page 49 Click Go to connect and jump to the Wi-Fi interface, select Wi-Fi with the words After selecting and connecting, SmartLife-xxxx return to the APP interface and enter network distribution process - 49 -...
- Page 50 Enter correct password and click confirm Control introduction - 50 -...
- Page 51 Successfully bound device Click to enter control Equipment details Set temperature, and current inlet water temperature display temperature adjustment Timing setting, can Switch machine set the timing on or control - 51 -...
-
Page 52: Adjusting And Initial Operation
Equipment working mode selection 10.Adjusting and Initial operation 10.1 Attention ●Do adjustment after electrical safety inspection. ●After the power is switched on, start the test running of heat pump, to see if it can function well. ●Forced operation is forbidden, because it is very dangerous to work without protector. 10.2 Preparation Before Adjustment ●Check that the system is installed correctly. -
Page 53: Operation And Maintenance
11. Operation and maintenance 11.1 The heat pump should be installed and operated by qualified professionals. To ensure the continued correct functioning of the system it is recommended that it should be checked and maintenance should be carried out at regular. During maintenance, please pay attention to the points below: ●Check that all parameters are normal during system operation. - Page 54 During leak detection and air tightness experiment, never allow oxygen, ethane or other harmful flammable gases to enter the system: only compressed air, fluoride or refrigerant can be used for such a test. 11.4 To remove the compressor, please do the following ●Turn off the power supply ●Remove the refrigerant from the low pressure end;...
-
Page 55: Fault Analysis And Elimination Method
12.Fault analysis and elimination method - 55 -... - Page 56 - 56 -...
-
Page 57: Technical Parameters
13. Technical parameters Model No. BCPI7 BCPI10 BCPI13 BCPI17 BCPI21 BCPI30 BCPI30 Heating Capacity at Air 26℃, Humidity 80%, Water 26℃ in, 28℃ out Heating Capacity(kW) 7.76~1.76 10.55~2.40 13.61~3.09 17.15~3.88 21.41~4.85 30.01~6.81 30.05~6.84 Power Input(kW) 1.12~0.11 1.52~0.15 1.95~0.19 2.46~0.24 3.08~0.30 4.30~0.42... -
Page 58: After-Sale Service
Kind of defrost by 4 way valve by 4 way valve by 4 way valve by 4 way valve by 4 way valve by 4 way valve by 4 way valve Working temperature -15~43 -15~43 -15~43 -15~43 -15~43 -15~43 -15~43 range(℃)... - Page 59 - 59 -...
Need help?
Do you have a question about the BCPI7 and is the answer not in the manual?
Questions and answers