Table of Contents
Advertisement
Quick Links
Advertisement
Table of Contents

Subscribe to Our Youtube Channel
Summary of Contents for Angenieux OPTIMO PRIME
- Page 1 User manual OPTIMO PRIME...
- Page 2 Before using the products described in this manual, be sure to read and understand all respective instructions. This instruction manual applies to all Optimo Prime lenses.
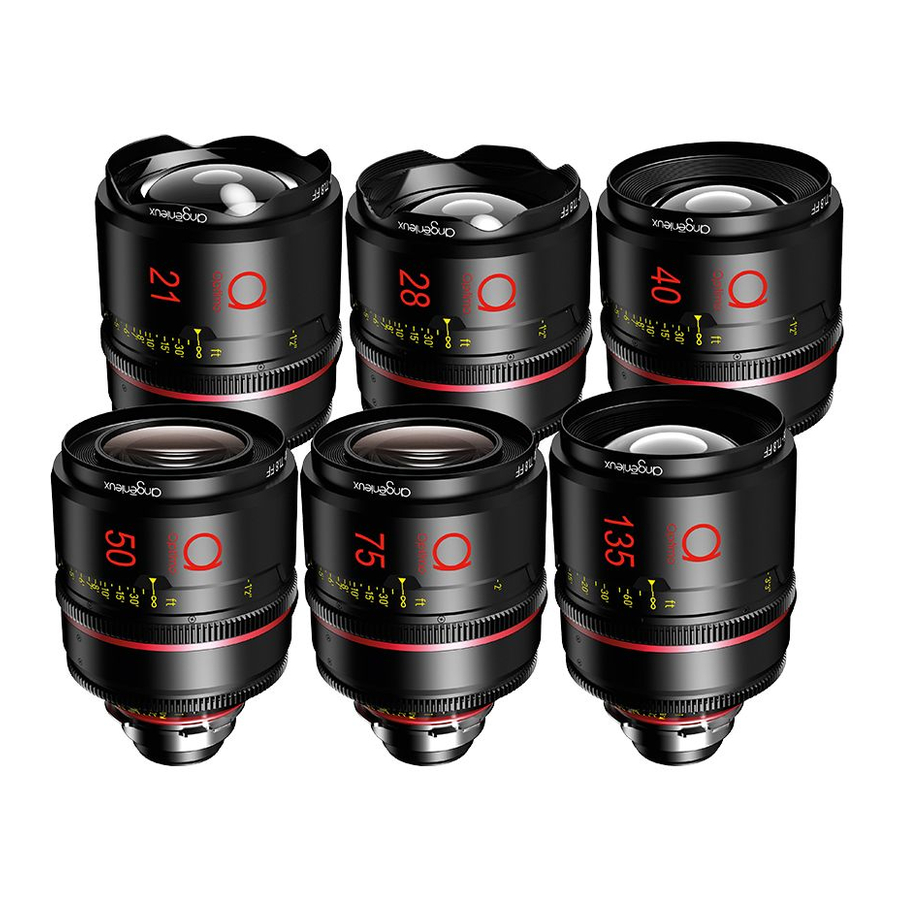
- Page 3 Band Pro Film & Digital, Inc and Jebsen Industrial Technology Co LTD. The Optimo Prime series of 12 lenses provides full frame 46.3mm image circle coverage with a consistent 1.8 T-stop for most of the lenses. To match with the legacy Optimo zooms, all Optimo Primes have identical colorimetry.
- Page 4 Infinite possibilities with IOP (Integrated Optical Palette) technology SLIVER SET IOP Inner filter (afocal area) F21, F28, F40 Diffusion, vintage look, flares… F50, F75, F135 IOP Iris sub assembly Various blade options GOLD SET Silver Set F18, F32, F100 IOP Rear filter Diffusion, vintage look, …...
-
Page 5: Table Of Contents
Contents 0 - Safety information ......................................2 1 - What’s in the box? ......................................2 2 - Technical information .......................................2 3 - General view and installation ....................................2 4 - Spare parts and optional accessories ................................2 5 - Mechanical camera compatibility ..................................2 6 - Electronics specifications ....................................2 7 - Ajustements ........................................2 8 - Maintenance recommendations..................................2 9 - Outline drawings ......................................2... -
Page 6: Safety Information
0 - Safety information CAUTION Always follow these guidelines to ensure against injury to yourself or others and damage to the system or other objects. This safety information comes in addition to the product specific operating instructions in general and must be strictly observed for safety reasons. - Page 7 RECYCLING AND ENVIRONMENT Optimo Prime series is free of chemical substances covered by European Regulation REACH in excess of the thresholds set out. Follow the guidance sets up by your local authority for recycling the Optimo Prime lenses.
-
Page 8: What's In The Box
1 - What’s in the box? Optimo Prime equipped with front and rear caps Product information and QR code link to access to the user manual Extra barrel and filter for use on S35 camera Set of 9x color shims for back focus... -
Page 9: Technical Information
2 - Technical information Focal length 18 mm 21 mm 24 mm 28 mm 32 mm 40 mm 50 mm 60 mm 75 mm 100 mm 135 mm 200 mm T-Stop at full aperture Minimum Object 1'2" 1'2" 1'2" 1'2" 1'2"... -
Page 10: General View And Installation
- Make sure the Optimo Prime PL mount (12) and camera mount are perfectly clean - Mount the Optimo Prime on the camera mount with electronic pins in the correct orientation. Lock the camera mount - Remove the front cap (0) and make sure the front element (2) is clean. -
Page 11: Spare Parts And Optional Accessories
66066496AA (additional rear barrel may be purchased 400005545) ADDITIONAL ACCESSORIES COMPATIBLE WITH ALL OPTIMO PRIMES Lemo to USB cable for computer electronic settings 0318006 Electronic setting software to be downloaded https://www.angenieux.com/service-and-support/ LPL mount Ask your local reseller or Angénieux service team IOP tooling set 66067558AA IOP inner filter / iris / rear filter Ask your local reseller or Angénieux service team... -
Page 12: Mechanical Camera Compatibility
5 - Mechanical camera compatibility The Angénieux Prime series design spirit was to keep as much as possible the same mechanical dimensions for a maximum of lenses. Due to mechanical and optical design constraints, we had no other choice than having two different types of rear mechanics to be compatible with the maximum cameras on the market. -
Page 13: Electronics Specifications
The Optimo Primes are compatible with the Cooke /i Technology version 3.0 (June 2012) and are ARRI LDS2 ready. Updates of the embedded software can be found at https://www.angenieux.com/service-and-support/#downloads or by contacting your distributor. Use the cable #0318006 to connect the lens to the USB port of the computer for software update and focus or iris data adjustments during lens maintenance. -
Page 14: Ajustements
REPLACING THE MOUNT- Please refer to the next page figure for the parts numbers into brackets. - Place the Optimo Prime on the front cap - Remove the rear filter assembly (1) by untightening the retainer (2) anticlockwise - Unscrew the eight torx screws (3) from the PL mount and remove the PL mount (4) - Page 15 ADJUSTING THE BACK-FOCUS All of our Optimo Prime lenses are set with the 52mm industry PL standard flange distance and delivered with a color shim set. If you need to adjust the back focus flange to fit more accurately to the position of the sensor on the camera, you need to modify the rear color shim thickness.
- Page 16 FEET TO METER AND METER TO FEET SWAP All of the Optimo Prime lenses have their focus scale ring engraved with both feet and metric scales. The swap of the focus scale from one system to the other must be done with cautious in a clean environment to prevent dust or particles pollution inside the lens. If your focus ring needs to be replaced please contact your local reseller or our service team at angenieuxservice@fr.thalesgroup.com...
- Page 17 THE BELOW PROCEDURE APPLIES FOR F32-F40-F50-F60-F75-F100-F135 - Unscrew and remove the front ring (1) - Untighten and remove the six Philips screws (2). Pull out the front engraved ring (3) - Untighten the seven Philips screws (6) without removing them. Pull out the focus ring (4) - Replace the focus ring or flip it by 180°...
- Page 18 THE BELOW PROCEDURE APPLIES FOR F18-F21-F24-F28 - Untighten and remove the eight Philips screws (0) holding the front ring (1). Pull out the front ring (1). Note: only four screws (0) for F18. - Untighten and remove the three Philips screws (2). Pull out the front engraved ring (3) - Untighten the seven Philips screws (6) without removing them.
- Page 19 THE BELOW PROCEDURE APPLIES FOR F200 - Untighten and pull towards the rear the front cover ring (5) - Untighten and remove the four Philips screws (0). Pull out the front engraved ring (1) - Untighten the front group retainer (2) and pull out the front group. Put the front group securely in a dust free and protected area - Pull out the fixed focus witness mark ring (3) and the front cover ring (5) - Untighten the seven Philips screws (6) without removing them.
- Page 20 If you need to control your Optimo Prime in projection, we recommend you to use the same configuration to see the correct image. If you don’t use any additional neutral glass you will have back focus issue and you may also see optical aberration such as field curvature.
-
Page 21: Maintenance Recommendations
CLEANING THE LENSES For an optimum image quality, make sure that your Optimo Prime lens is cleaned every time you use it. To clean the optics, use an optical cleaning solution and use a soft cloth. For optimum cleaning use an optical cloth and an isopropyl alcohol liquid, start with the center and clean by turning outwards. -
Page 22: Outline Drawings
9 - Outline drawings You will find in the next pages the outline drawings for all the focal lengths. Please be aware that the outline dimensions are unique for F18 and F200, are similar for F21 and F135 and are similar for F24, F28, F32, F40, F50, F60, F75, F100. -
Page 34: Engraving Distances Detail
10 – Engraving distances detail F18 to F40 FEET FEET FEET FEET Engraving Feet Inch Engraving Feet Inch Engraving Feet Inch Engraving Feet Inch -- oo Infinity -- oo Infinity -- oo Infinity -- oo Infinity --30' --30' --30' --60' --15' --15' --15'... - Page 35 F100 F135 F200 FEET FEET FEET Engraving Feet Inch Engraving Feet Inch Engraving Feet Inch -- oo Infinity -- oo Infinity -- oo Infinity --60' --60' --60' --30' --30' --30' --20' --20' --20' --15' --15' --15' --10' --10' --10' --8' --8' --8' --7'...
- Page 36 F18 to F40 METERS METERS METERS METERS Engraving Meter Engraving Meter Engraving Meter Engraving Meter -- oo Infinity -- oo Infinity -- oo Infinity -- oo Infinity --10 --10 --10 --20 --10 1,75 1,75 1,75 -1,5 -1,5 -1,5 -1,3 -1,3 -1,3 2,75 -2,5...
- Page 37 F100 F135 F200 METERS METERS METERS Engraving Meter Engraving Meter Engraving Meter -- oo Infinity -- oo Infinity -- oo Infinity --20 --20 --20 --10 --10 --10 2,75 2,75 2,75 -2,5 -2,5 -2,5 2,25 2,25 2,25 1,95 1,95 -1,9 -1,9 -1,7 1,85 1,85...
Need help?
Do you have a question about the OPTIMO PRIME and is the answer not in the manual?
Questions and answers