Table of Contents
Advertisement
Western Products, PO Box 245038, Milwaukee, WI 53224‑9538 • www.westernplows.com
October 15, 2019
Lit. No. 72451, Rev. 03
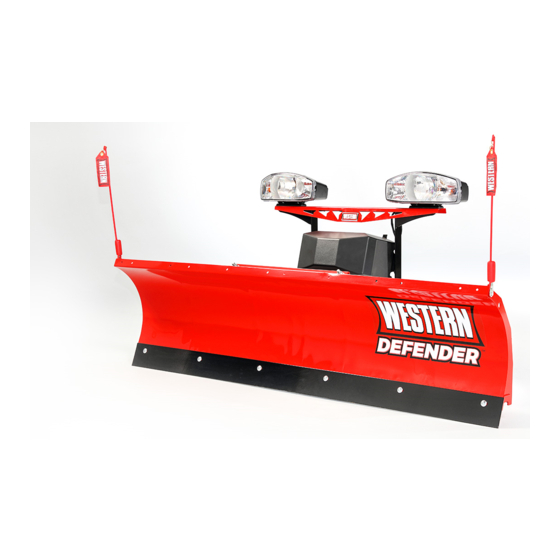
DEFENDER™ Compact Plow
Owner's Manual
Original Instructions
CAUTION
Read this document before operating or
servicing snowplow.
This manual supersedes all editions with an earlier date.
A DIVISION OF DOUGLAS DYNAMICS, LLC
Advertisement
Table of Contents

Subscribe to Our Youtube Channel
Related Manuals for Western DEFENDER


Summary of Contents for Western DEFENDER
- Page 1 Western Products, PO Box 245038, Milwaukee, WI 53224‑9538 • www.westernplows.com October 15, 2019 Lit. No. 72451, Rev. 03 DEFENDER™ Compact Plow Owner's Manual Original Instructions CAUTION Read this document before operating or servicing snowplow. This manual supersedes all editions with an earlier date.
- Page 3 OWNER INFORMATION Register your snowplow online at www.westernplows.com Owner Name: ______________________________________________________________________________ Date Purchased: ____________________________________________________________________________ Dealer Name: ______________________________________________ Phone: _________________________ Dealer Address: _____________________________________________________________________________ Vehicle Model/Year: _________________________________________________________________________ Snowplow Model/Year: _______________________________________________________________________ Snowplow Type/Size: ______________________________________________ Weight: ______________ lb/kg Ballast: No ___ Yes ___ Amount: ___________lb/kg Hydraulic Unit Serial Number: __________________________________________________________________ Blade Serial Number: ________________________________________________________________________ Lit.
- Page 4 Lit. No. 72451, Rev. 03 October 15, 2019...
-
Page 5: Table Of Contents
TABLE OF CONTENTS PREFACE ..............6 One-Touch Float ..........19 SAFETY ..............7 Blade Positions ........... 20 Safety Definitions ..........7 Snowplow Headlamp Check ....... 20 Warning/Caution and Instruction Labels ....7 Blade Drop Speed Adjustment ......21 Safety Precautions ..........8 Transporting the Snowplow ........ -
Page 6: Preface
PREFACE This manual has been prepared to acquaint you with When service is necessary, bring your snowplow to the safety information, operation, and maintenance of your local outlet. They know your snowplow best and your new snowplow. Please read this manual carefully are interested in your complete satisfaction. -
Page 7: Safety
SAFETY SAFETY DEFINITIONS WARNING/CAUTION AND INSTRUCTION LABELS WARNING Become familiar with and inform users about the Indicates a potentially hazardous situation warning/caution, serial number, and instruction labels that, if not avoided, could result in death or on the back of the blade. serious personal injury. -
Page 8: Safety Precautions
SAFETY SAFETY PRECAUTIONS HYDRAULIC SAFETY Follow all safety and operating instructions in WARNING your vehicle owner's manual. Hydraulic fluid under pressure can cause skin injection injury. If you are Improper installation and operation could cause injured by hydraulic fluid, get medical personal injury, and/or equipment and property damage. -
Page 9: Personal Safety
Wt (lb) Wt (kg) A driver's first responsibility is the safe operation of the 6'8" DEFENDER™ Compact Plow vehicle. The most important thing you can do to prevent a crash is to avoid distractions and pay attention to 7'2" DEFENDER Compact Plow the surroundings. -
Page 10: Vehicle Application Information
• The WESTERN Quick Match selection system is based on available vehicle capacity for snowplow equipment on a representative vehicle equipped with options commonly used for plowing and with 300 lb of front seat occupant weight. -
Page 11: Getting To Know Your Snowplow
ON. to the differences among vehicle models, the kits are not interchangeable. Replacement parts are available through your local WESTERN outlet. ® The vehicle mount assembly is bolted to the underside of the vehicle frame, and the receiver assembly is NIGHTHAWK™... -
Page 12: Hydraulic Unit
GETTING TO KNOW YOUR SNOWPLOW HYDRAULIC UNIT CAB CONTROLS The hydraulic system gives you full control of the WARNING snowplow from the driver's seat. Two single-acting To prevent accidental movement of the blade, hydraulic rams hold the blade at the desired angle. always turn the control OFF whenever the snowplow is not in use. -
Page 13: Mounting Snowplow To Vehicle
MOUNTING SNOWPLOW TO VEHICLE ATTACHING THE SNOWPLOW WARNING Stand Handle Keep 8' clear of the blade when it is being raised, lowered, or angled. Do not stand between vehicle and blade or directly in front Stand of the blade. If the blade hits or drops on you, Stand you could be seriously injured. -
Page 14: Operating Your Snowplow
OPERATING YOUR SNOWPLOW HAND‑HELD CONTROL Optional Control Features The control ships from the factory with the Smooth Stop WARNING feature enabled and the One-Touch FLOAT feature To prevent accidental movement of the blade, disabled. To change these default settings, see always push the ON/OFF button to switch the "Smooth Stop"... -
Page 15: Joystick Control
OPERATING YOUR SNOWPLOW JOYSTICK CONTROL Function Time‑Outs 1. Turn the vehicle ignition switch to the "ON" or To limit the amount of electrical energy required "ACCESSORY" position. from the vehicle, all control functions, except LOWER/FLOAT, time out (stop) automatically after a period of time. - Page 16 OPERATING YOUR SNOWPLOW Joystick Control Functions Raise, Lower, Float, Angle Moving the control lever straight up and down or from side to side on the control body will result in the blade movements described in the following table. Function Description of Operation Move the control lever toward the top of the control body to raise the blade and cancel RAISE...
-
Page 17: Security Guard™ System
OPERATING YOUR SNOWPLOW SECURITY GUARD™ SYSTEM NOTE: If the control is turned ON prior to completing the programming procedure, your Activation & Establishing a 4‑Digit 4‑digit security code will be cancelled. Security Code Once a 4-digit security code is established, the NOTE: Snowplow must be attached to vehicle, SECURITY GUARD system will recognize any control and all electrical connections must be connected... - Page 18 OPERATING YOUR SNOWPLOW Clearing an Established 4‑Digit Light Flash Indicators Security Code POWER – Red Function 1. Turn the vehicle ignition switch to the "ON" or Control is OFF "ACCESSORY" position. Solid ON Control is ON and active 2. If the snowplow is locked (the control power Slow Flash No communication indicator light will be flashing rapidly), unlock...
-
Page 19: Smooth Stop
OPERATING YOUR SNOWPLOW SMOOTH STOP ONE‑TOUCH FLOAT Smooth stop, or soft stop, allows the blade to coast One-touch FLOAT immediately activates the FLOAT to a stop when the button/lever is released. The mode and releases the blade to the ground, without result is smoother operation, reduction in shock to the having to hold the button or lever in LOWER. -
Page 20: Blade Positions
OPERATING YOUR SNOWPLOW BLADE POSITIONS SNOWPLOW HEADLAMP CHECK The compact plow can be used in these plowing With all electrical plugs connected, check the positions. operation of vehicle and snowplow headlamps. Straight Blade Lights Results Use straight blade for wide-path plowing or stacking Both vehicle and snowplow lamps Parking Lamps should be ON. -
Page 21: Blade Drop Speed Adjustment
OPERATING YOUR SNOWPLOW BLADE DROP SPEED ADJUSTMENT TRANSPORTING THE SNOWPLOW WARNING WARNING Keep 8' clear of the blade when it is being Position the blade so that it does not block raised, lowered, or angled. Do not stand the vehicle headlamp beams. between vehicle and blade or directly in front Do not change blade position while traveling. -
Page 22: Driving And Plowing On Snow And Ice
OPERATING YOUR SNOWPLOW DRIVING AND PLOWING ON SNOW PLOWING SNOW AND ICE WARNING WARNING Never plow snow with head out the vehicle window. Sudden stops or protruding objects Drinking and then driving or plowing is could cause personal injury. very dangerous. Your reflexes, perceptions, attentiveness, and judgment can be affected by even a small amount of alcohol. - Page 23 OPERATING YOUR SNOWPLOW Hard‑Packed Snow Clearing Parking Lots 1. On blades equipped with a shoe kit, raise the 1. Clear areas in front of buildings first. With the anti-wear shoes so that the cutting edge comes blade raised, drive up to the building. Drop the into direct contact with the pavement.
-
Page 24: Parking With Snowplow Attached
OPERATING YOUR SNOWPLOW PARKING WITH SNOWPLOW ATTACHED CHECKING HYDRAULIC FLUID LEVEL WARNING CAUTION Lower the blade when the vehicle is parked. Do not mix different types of hydraulic fluid. Keep 8' clear of the blade. Temperature Some fluids are not compatible and may changes could change hydraulic pressure, cause performance problems and product causing the blade to drop unexpectedly or... -
Page 25: Detaching Snowplow From Vehicle
DETACHING SNOWPLOW FROM VEHICLE DETACHING THE SNOWPLOW Stand Handle WARNING Keep 8' clear of the blade when it is being raised, lowered, or angled. Do not stand Stand between vehicle and blade or directly in front of the blade. If the blade hits or drops on you, Stand Lock Pin you could be seriously injured. -
Page 26: Maintenance
MAINTENANCE Your snowplow is designed for rugged, dependable • Ballast may be necessary, or beneficial, on some service. However, like the vehicle on which it is vehicles to provide maximum traction, braking, mounted, it needs regular care and maintenance. and handling. •... -
Page 27: Aiming Headlamp Beams
MAINTENANCE AIMING HEADLAMP BEAMS c. Check springs for sag or broken leaves. d. Check the functioning of any automatic vehicle Tighten headlamp fasteners to 22 ft-lb, or 30 N·m, leveling systems and specific manufacturer's once correct visual aim is achieved. instructions pertaining to vehicle preparation for headlamp aiming. -
Page 28: Changing Plow-Edge Illumination Mode
MAINTENANCE CHANGING THE BLADE‑EDGE Remove the jumper fuse from the fuse holder and re-insert it in the desired mode position as shown ILLUMINATION MODE below. Replace the fuse holder cover. On snowplows equipped with NIGHTHAWK™ LED Jumper headlamps, the EdgeView™ technology feature offers Fuse three modes for blade-edge illumination. -
Page 29: Hydraulic System
MAINTENANCE HYDRAULIC SYSTEM Breather/Fill Plug Annual Fluid Change Reservoir 1. Perform this operation with the snowplow attached to the vehicle. Park the vehicle on a hard, level surface. 2. Lower the blade to the ground. Turn the control OFF. CAUTION Change the fluid at the beginning of each plowing season. -
Page 30: Hose Or Fitting Replacement
MAINTENANCE Hose or Fitting Replacement Procedure for Installing Fittings and Hoses WARNING NOTE: Overtightening the JIC hose fitting ends Lower the blade when the vehicle is parked. will result in a fractured fitting. Keep 8' clear of the blade. Temperature changes could change hydraulic pressure, DO NOT use thread sealant/tape on hydraulic hoses causing the blade to drop unexpectedly or... -
Page 31: Fuse Replacement
MAINTENANCE FUSE REPLACEMENT VEHICLE The vehicle control harness contains one The snowplow operating vehicle shall be maintained 2A automotive-style fuse and the hydraulic unit according to manufacturer's recommendations. contains two 4A automotive-style fuses. Tire pressure shall be maintained according to manufacturer's recommendation. - Page 32 Western Products outlets or snowplow owner is granted. Western Products reserves the right under its product improvement policy to change construction or design details and furnish equipment when so altered without reference to illustrations or specifications used. Western Products or the vehicle manufacturer may require or recommend optional equipment for snow removal.
Need help?
Do you have a question about the DEFENDER and is the answer not in the manual?
Questions and answers