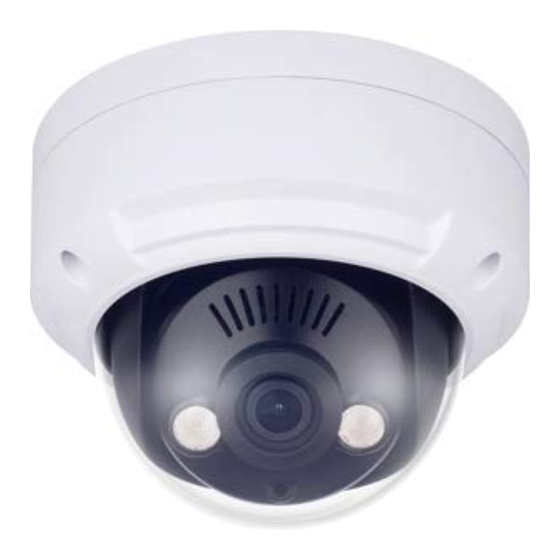
Summary of Contents for WBOX Technologies 0E-HD4MP28DM
- Page 1 4MP HD Analog Camera OSD Operation Manual Operation Guide If you have any questions, please call W Box Tech Support 1-833-574-9124 for assistance. 0E-HD4MP28DM 0E-HDD4MP28 0E-HD4MPMODM 0E-HD4MPMOEY...
-
Page 2: About This Document
Operation Guide Contents About This Document Purpose This document describes how to use the web management system for DVR and the cameras managed by DVR. Symbol Conventions The symbols that may be found in this document are defined as follows. Symbol Description Indicates an imminently hazardous situation which, if not... -
Page 3: Table Of Contents
Operation Guide Contents Contents About This Document ........................ii 1 OSD Main Menu ........................... 1 1.1 Procedure ..................................1 1.1.1 Camera Control Using Five Buttons .......................... 1 1.2 OSD Main Menu Interface ............................1 2 OSD Setting ........................... 3 2.1 AE ....................................3 2.2 AWB ..................................... -
Page 4: Osd Main Menu
Operation Guide OSD Main Menu 1.1 Procedure 1.1.1 Camera Control Using Five Buttons If your camera has four arrow buttons and one SET button, you can use the buttons to operate the OSD main menu. Figure 1-1 shows the five buttons. Figure 1-1 Five-button layout The buttons have the following functions: ⚫... - Page 5 Operation Guide Figure 1-2 OSD main menu interface ----End Issue V1.0 (2019-05-08)
-
Page 6: Osd Setting
Operation Guide OSD Setting 2.1 AE AE is intended to adjust image brightness by setting parameters such as aperture, shutter, and gain. The EXPOSURE interface includes BRIGHTNESS, EXPOSURE MODE. Procedure Step 1 Press the UP or DOWN button to select AE. Step 2 Press the SET button to open the EXPOSURE interface, as shown in Figure 2-1. -
Page 7: Awb
Operation Guide Step 4 Press the UP or DOWN button to select EXPOSURE MODE and press the LEFT or RIGHT button to select a exposure mode. The exposure mode includes GLOBE, and BLC. − BLC: Press the LEFT or RIGHT button to select BLC, press the LEFT or RIGHT button to adjust BLC value. -
Page 8: Day-Night
Operation Guide Figure 2-3 MWB interface Press the UP or DOWN button to select RGAIN, and press the LEFT or RIGHT button to set RGAIN. The default RGAIN is 40 and the setting range is 1-127. Press the UP or DOWN button to select BGAIN, and press the LEFT or RIGHT button to set BGAIN. -
Page 9: Image Enhance
Operation Guide Figure 2-4 DAY/NIGHT interface Step 2 Press the LEFT or RIGHT button to set the Mode. Step 3 Press the UP or DOWN button to select RETURN and press the SET return to the OSD main menu interface. ----End 2.4 IMAGE ENHANCE The Image Enhance interface includes CONTRAST, SHARPNESS, COLOR GAIN, DNR,... - Page 10 Operation Guide Figure 2-5 Image enhance Procedure Step 2 Press the UP or DOWN button to select IMAGE ENHANCE. Press the SET button to open the IMAGE ENHANCE interface. Step 3 Press the UP or DOWN button to select CONTRAST. Press the LEFT or RIGHT button to set the CONTRAST value.
-
Page 11: Video Output
Operation Guide 2.5 VIDEO OUTPUT The Video Output interface includes HD and VIDEO STANDRAD. Procedure Step 1 Press the UP or DOWN button to select VIDEO OUTPUT. Press the SET button to open the VIDEO OUTPUT interface, as shown in Figure 2-6. Figure 2-6 Video Setting interface Step 2 Press the UP or DOWN button to select HD, and press the LEFT or RIGHT button the interface will show more item REBOOT &&... -
Page 12: Reset
Operation Guide 2.7 RESET Press the UP or DOWN button to select RESET, and press the SET button to reset the camera OSD parameter. 2.8 SAVE-EXIT Press the UP or DOWN button to select SAVE-EXIT, and press the SET button to save the OSD settings and return to the camera's real-time video interface.

Need help?
Do you have a question about the 0E-HD4MP28DM and is the answer not in the manual?
Questions and answers