Table of Contents
Advertisement
Quick Links
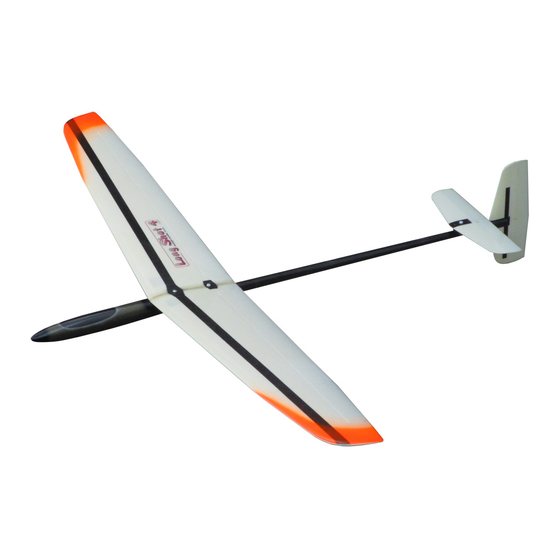
LONG SHOT 4, 4D
Building instructions
Dear customer,
You have just became owner of our RC hand launch glider (Discus Launch Glider, DLG) Long Shot 4. It is the
new version of our very successful Long Shot 3. Thank you for your decision.
The DLG models are designed to be launched by the "discus launch" method. The flyer holds the model at the
peg located in the wingtip, between forefinger and middle finger, rotates 360 deg and releases the model. The
model will climb much higher than by the classical "javelin" style launch. Another important advantage is that the
joints of your arm will not suffer pain and injuries are almost unknown.
The basic feature of the DLG of this type is the rear position of the centre of the model side area. It is achieved
with the large area of fin and rudder and low wing dihedral. This is the most important feature of the design, so do
not change these elements.
The wing is equipped with a series of airfoils AG 45xx ct designed by Mark Drela. It has very low drag, allowing a
high climb during the launch and rapid cruising while hunting thermals.
The structure makes use of the excellent properties of modern materials. The result is light and very rigid
construction. The weight of the model ready to fly can be as low as about 280 grams. The fuselage is of pod and
boom design. The pod is carbon or carbon/Kevlar shell, carbon reinforced. The boom is made of carbon/glass
composite tapered tube, which is very strong yet light.
The new version differs in the use of thicker and much more rigid tailboom. The rigidity is very important, as the
flexible tailboom consumes some launch energy. The more rigid (and heavier boom) is compensated with longer
pod.
The Long Shot 4D version of the model provides even more rigid wing. It is allowed by use of the excellent
properties of the "Disser" fabric, which is used for the wing skin. It is made of Aramide cloth and carbon mesh.
The 4D version features also boom made of HM carbon, which makes the boom even more rigid.
Assembly
You will need:
RC transmitter, at least 4 channels, computer radio and lightweight unit recommended.
Micro receiver, at least 4channels.
Note: The number channels required depends on the way the model is setup. Five channels are required on the
transmitter if 2 aileron servos are fitted in wings.
4 micro servos (6 to 9 grams). We recommend digital servos for the ailerons (9 mm thick Atlas DS09).
Another good aileron servos are the Dymond D60. The suitable servos for the tail are Dymond D47.
Power supply: 4 NiMh cells 250 mAh or similar. Or LiPo 2S with voltage controller. The weight should be about
30-35 grams
CA glue, good Epoxy.
Basic modeling tools.
Fuselage
The fuselage is loaded by very high centrifugal forces during the launch and must be very strong and rigid.
1
Advertisement
Table of Contents

Summary of Contents for Horejsi LONG SHOT 4
- Page 1 Building instructions Dear customer, You have just became owner of our RC hand launch glider (Discus Launch Glider, DLG) Long Shot 4. It is the new version of our very successful Long Shot 3. Thank you for your decision. The DLG models are designed to be launched by the “discus launch” method. The flyer holds the model at the peg located in the wingtip, between forefinger and middle finger, rotates 360 deg and releases the model.
- Page 2 Mark up (drill and file out) the aileron servo cable access hole in the wing saddle, with the centre about 30 mm behind the wing leading edge. This hole serves also as the aileron servo cables exit. The hole must be oval and as small as possible, about 12 mm wide and 18 mm long.
- Page 3 Note: It is possible that the peg/epoxy joint will loose as it is loaded. When it happens, apply drop of thin CA into the seam for the good and permanent joint. Attach the wing on the fuselage with the front screw. Square up the wings to the fuselage by temporarily fitting the boom and attaching a string line to the boom and measuring to each wingtip.
- Page 4 Aileron servos: Check that the servos you are going to use are in good condition, without any gear slop. Once fitted, servo replacement is time-consuming job. Carefully open the servo cables outlet in the wing bottom center. If necessary, use servo extensions for the aileron servos.
- Page 5 These movements can vary according to your personal preference. Flying Generally: Discus launching is not likely to harm your body in any way, but it is sensible to warm up your muscles before trying to launch at full power. If you suddenly strain your muscles when they are still stiff from driving for several hours, or if you work in an office and don't get much exercise, then it is advisable to treat your joints and muscles with care.
- Page 6 Before the first flying, complete a range test of the RC gear. The carbon used for the fuselage can influence the signal reception. If you do not have the 2.4 GHz radio, the “old fashioned” antenna run between receiver and the top of the fin still works best. Enjoy your new LONG SHOT 4! Horejsi model Ltd. Czech Republic...
Need help?
Do you have a question about the LONG SHOT 4 and is the answer not in the manual?
Questions and answers