
Summary of Contents for Halotherapy Solutions Halo STAR
- Page 1 OWNER’S MANUAL HALOTHERAPY CABINS & HALOTHERAPY + INFRARED SAUNA CABINS Phone: +1-833-200-4209 www.halotherapysolutions.com •...
-
Page 3: Table Of Contents
02 | Halo IR - - - - - - - - - - - - - - - - - - - - - - - - - - - - - - - - - - - - - - - 21 03 | Halotherapy Solutions Halogenerator - - - - - - - - - - - - - - 37... -
Page 4: Installation
Installation Choosing a location Installation requirements for your sauna are as follows: Your Halotherapy Cabin is a self-contained and freestanding unit. It should not be built into any structure without prior authorization. Please maintain a minimum of 4-inch clearance on all sides of the unit to allow air to circulate while giving access for the power cord. -
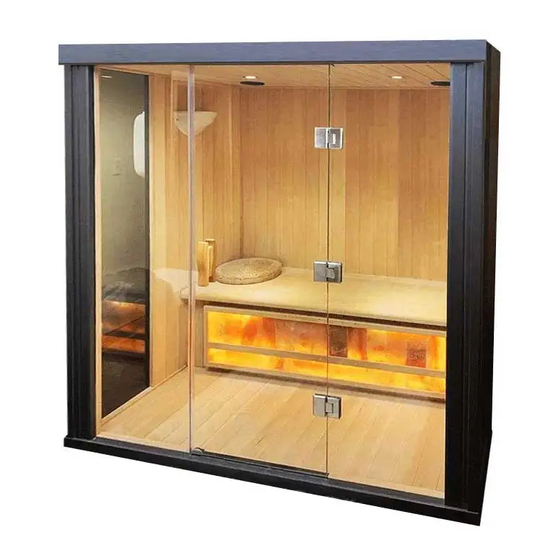
Page 5: Halo Star
Halo STAR Packaging - - - - - - - - - - - - - - - - - - - - - - - 06 Assembly Instructions - - - - - - - - - - - - - - - - - 07 halotherapysolutions.com... - Page 6 Halo STAR Packaging CONTENTS OF BOXES Box 1 of 5 Box 2 of 45 Box 3 of 5 Box 4 of 5 1. Floor Panel 1. Left Side Wall 1. Front Wall 1. Front Heaters 2. Ceiling Panel 2. Right Side Wall 2.
- Page 7 Halo STAR Assembly Instructions Assembly of the Halotherapy Cabin requires two adults to complete. Please read the instructions thoroughly before and during assembly to ensure proper installation of the unit. 1 - LOCATION OF CABIN & INSTALLATION ORDER When determining a location for your Halotherapy Cabin, please keep in mind the following: The main power cord on the cabin must be easily accessible.
- Page 8 Halo STAR Assembly Instructions Cont’d 4 - CONNECTING FIRST WALL PIECES The side wall panels connect to the back wall with the installed locking brackets. There are mating brackets on the side of each panel. Place the small left side wall with the Charging Station in the slot in the floor.
- Page 9 Halo STAR Assembly Instructions Cont’d 5 - INSTALLING UNDER BENCH SUPPORT Slide down the under bench panel by lining up its sides with the angled vertical guides on the left and right side wall panel. Be careful not to scratch the side panels when positioning the heater panel.
- Page 10 Halo STAR Assembly Instructions Cont’d 6 - CONNECT LIGHT CONNECTION UNDER BENCH Follow the connections as in the following illustration: Connect the cable coming out of the back of the under bench support to one of the left side wall connectors.
- Page 11 Halo STAR Assembly Instructions Cont’d 7 - INSTALLING THE BENCH Install the bench panel by sliding it over the horizontal bench guides on the side panels. Be careful not to scratch the adjacent panels when sliding in the bench. Push the bench all the way in until it touches the back panel and is securely in place.
- Page 12 Halo STAR Assembly Instructions Cont’d 8 - INSTALL SIDE WALL GLASS AND COLUMNS Located the two side glass pieces. Insert left glass piece and insert it into the slot at the opening of the left side wall. Locate the left front Column.
- Page 13 Halo STAR Assembly Instructions Cont’d 8 - INSTALL SIDE WALL GLASS AND COLUMNS Insert the Right Side Glass and insert it into the slot at the opening of the left side wall. Locate the right column and place the column in the slot in the floor at the left front corner of the floor securing the glass in place.
- Page 14 Halo STAR Assembly Instructions Cont’d 9 - INSTALLING THE ROOF Install the roof of the cabin by placing the roof on top of the walls and columns. halotherapysolutions.com...
- Page 15 Halo STAR Assembly Instructions Cont’d 10 - INSTALLING FRONT GLASS 9 - INSTALLING THE ROOF Located the right front glass piece and door section. The right front glass comes already attached to the door. Being careful not to knock over the right side column, slightly tip up the front corner of the roof about 6 inches.
- Page 16 Halo STAR Assembly Instructions Cont’d 10 - INSTALLING FRONT GLASS Being careful not to knock over the left side column, slightly tip up the front corner of the roof about 6 inches. Slide the Left Front Glass piece into the slot in the Light Column and then insert it into the slot in the floor. Place the roof back in place over the right and left columns making sure it is securely in place.
- Page 17 Halo STAR Assembly Instructions Cont’d 11 - SECURE THE ROOF Locate the four long Roof Screws. These screws will be used to secure the roof in place. In the front corners of the top side of the roof you will see a pre-drilled hole in each corner. Screw one screw in each corner.
- Page 18 Halo STAR Assembly Instructions Cont’d 12 - INSTALLING THE DOOR HANDLE Locate the door handle. Attach the door handle using the enclosed bolts. Insert the included decorative mushroom caps in the screw hole to cover the screws 13 - CONNECT HEATERS IN ROOF Locate the “trap”...
- Page 19 Press it a second time to turn off the light 17 - AUDIO SYSTEM Your Halo STAR Cabin is equipped with stereo speakers that can be accessed by Bluetooth. Your Halo Star Cabin is Bluetooth ready. To connect audio via Bluetooth: Open your Bluetooth enabled phone, tablet or computer and search for surrounding Bluetooth devices to find a device called Infrared Sauna.
- Page 20 Halo STAR Assembly Instructions Cont’d 18 - INSTALLATION IS COMPLETE Installation of your Halotherapy Cabin is now complete. Using a damp cloth, wipe out the cabin to remove any excess saw dust that may have settled on the wall & floor panels and the heater panels during manufacturing and shipment. Please refer to usage instructions located later on in this manual.
-
Page 21: Halo Ir
Halo STAR Halo IR Packaging - - - - - - - - - - - - - - - - - - - - - - - 22 Assembly Instructions - - - - - - - - - - - - - - - - - 23 halotherapysolutions.com... - Page 22 Halo IR Packaging CONTENTS OF BOXES Box 1 of 5 Box 2 of 45 Box 3 of 5 Box 4 of 5 1. Floor Panel 1. Left Side Wall 1. Front Wall 1. Front Heaters 2. Ceiling Panel 2. Right Side Wall 2.
- Page 23 Halo IR Assembly Instructions Assembly of the Halotherapy Sauna requires two adults to complete. Please read the instructions thoroughly before and during assembly to ensure proper installation of the unit. 1 - LOCATION OF SAUNA & INSTALLATION ORDER When determining a location for your Halotherapy Sauna, please keep in mind the following: The main power cord on the sauna must be easily accessible. The location must be dry and level.
- Page 24 Halo IR Assembly Instructions Cont’d 4 - CONNECTING FIRST WALL PIECES The side wall panels connect to the back wall with the installed locking brackets. There are mating brackets on the side of each panel. Place the small left side wall with the Charging Station in the slot in the floor.
- Page 25 Halo IR Assembly Instructions Cont’d 5 - INSTALLING UNDER BENCH SUPPORT Slide down the bench heater panel by lining up its sides with the angled vertical guides on the left and right side wall panel. Be careful not to scratch the side panels when positioning the heater panel. Push the bench heater panel all the way down until it is touching the floor panel and securely in place.
- Page 26 Halo IR Assembly Instructions Cont’d 6 - CONNECT HEATER CONNECTION UNDER BENCH Follow the connections as in the following illustration: Connect the black and white cable coming out of the back of the under bench support to one of the left side wall connectors.
- Page 27 Halo IR Assembly Instructions Cont’d 7 - INSTALLING THE BENCH Install the bench panel by sliding it over the horizontal bench guides on the side panels. Be careful not to scratch the adjacent panels when sliding in the bench. Push the bench all the way in until it touches the back panel and is securely in place. Be sure that the bench is pushed all the way back until it slides under the heater guard to secure the bench in place.
- Page 28 Halo IR Assembly Instructions Cont’d 8 - INSTALL SIDE WALL GLASS AND COLUMNS Located the two side glass pieces. Insert left glass piece and insert it into the slot at the opening of the left side wall. Locate the left front Column. Place the column in the slot in the floor at the left front corner of the floor securing the glass in place.
- Page 29 Halo IR Assembly Instructions Cont’d 8 - INSTALL SIDE WALL GLASS AND COLUMNS Insert the Right Side Glass and insert it into the slot at the opening of the left side wall. Locate the right column and place the column in the slot in the floor at the left front corner of the floor securing the glass in place.
- Page 30 Halo IR Assembly Instructions Cont’d 9 - INSTALLING THE ROOF Install the roof of the sauna by placing the roof on top of the walls and columns. halotherapysolutions.com...
- Page 31 Halo IR Assembly Instructions Cont’d 10 - INSTALLING FRONT GLASS 9 - INSTALLING THE ROOF Located the right front glass piece and door section. The right front glass comes already attached to the door. Being careful not to knock over the right side column, slightly tip up the front corner of the roof about 6 inches.
- Page 32 Halo IR Assembly Instructions Cont’d 10 - INSTALLING FRONT GLASS Being careful not to knock over the left side column, slightly tip up the front corner of the roof about 6 inches. Slide the Left Front Glass piece into the slot in the Light Column and then insert it into the slot in the floor. Place the roof back in place over the right and left columns making sure it is securely in place.
- Page 33 Halo IR Assembly Instructions Cont’d 11 - SECURE THE ROOF Locate the four long Roof Screws. These screws will be used to secure the roof in place. In the front corners of the top side of the roof you will see a pre-drilled hole in each corner. Screw one screw in each corner.
- Page 34 Halo IR Assembly Instructions Cont’d 12 - INSTALLING THE DOOR HANDLE Locate the door handle. Attach the door handle using the enclosed bolts. Insert the included decorative mushroom caps in the screw hole to cover the screws 13 - CONNECT HEATERS IN ROOF Locate the “trap”...
- Page 35 Halo IR Assembly Instructions Cont’d 14 - INSTALLING FRONT HEATERS Locate the two front heaters and two side wall heaters. These heaters will attach to the glass. Find the molex plug coming out of the bottom of one of the heaters.
- Page 36 Halo IR Assembly Instructions Cont’d 17 - INSTALLATION IS COMPLETE Installation of your sauna is now complete. Using a damp cloth, wipe out the sauna to remove any excess saw dust that may have settled on the wall & floor panels and the heater panels during manufacturing and shipment. Please refer to usage instructions located later on in this manual. halotherapysolutions.com...
-
Page 37: Halotherapy Solutions Halogenerator
Halo STAR Halotherapy Solutions Halogenerator Assembly Instructions - - - - - - - - - - - - - - - - - 38... - Page 38 HALOTHERAPY SOLUTIONS HALOGENERATOR See the accompanying Halogenerator manual for installation and operational information. halotherapysolutions.com...
-
Page 39: Using Your Halo Ir Sauna Control Panel
Using Your Halo IR Control Panel USING YOUR HALOTHERAPY CABIN When connected to the properly grounded power source, your Halo IR Cabin will turn ON to the set temperature and count-down with a few pushes of the Power button. System On/Off Sauna Session Time Press the “POWER” button once to You can set the duration of your sauna turn on the sauna. - Page 40 Using Your Halo IR Control Panel USING YOUR INFRARED SAUNA USING YOUR INFRARED SAUNA Fahrenheit & Celsius You can alternate between Fahrenheit and Celsius by pressing the F/C button on the keypad. Inside Light Press the button labeled “INSIDE” to turn on or off the Interior light. Reservation You can preset your sauna to turn on up to 36 hours in the future: Press the POWER button to turn on your sauna.
- Page 41 Using Your Halo IR Control Panel USING YOUR INFRARED SAUNA Keypad Lock The keypad can be locked to prevent it from being turned on or off or the temperature adjusted. There are two locking functions: Lock Entire Keypad: Hold down the TIME UP and TEMP DOWN buttons at the same time for 5 seconds. This will lock the entire keypad. To unlock the keypad, repeat the above step.
- Page 42 Using Your Halo IR Control Panel USING YOUR INFRARED SAUNA Chromotherapy Color light therapy can benefit your well being. Chromotherapy or Color Light Therapy is the science that uses the seven colors of the light spectrum. The seven colors have the ability to affect the vibrations of the body various frequencies. For optimal health, we all need the light of the sun. We receive light from the sun which is divided into 7 main groups of rays which are absorbed by our bodies. Chromotherapy works on various energy points to help balance your body using the full spectrum of visible light.
-
Page 43: Important Safeguards
Important Safeguards IMPORTANT SAFEGUARDS 1. READ INSTRUCTIONS - All safety and operating instructions should be read before the sauna is installed & operated. 2. RETAIN INSTRUCTIONS - The safety and operating instructions should be retained for future reference. 3. HEED WARNINGS - All warnings on the sauna should be adhered to. - Page 44 Important Safeguards IMPORTANT SAFEGUARDS 13. SERVICING - Always unplug this product from the wall outlet before servicing the product. 14. POWER SUPPLY - Do not remove power supply covers. No user-serviceable parts are located inside the power supply. 15. REPLACEMENT PARTS - When replacement parts are required, only use parts specified by the manufacturer.
- Page 45 NOTES halotherapysolutions.com...
- Page 46 NOTES halotherapysolutions.com...
- Page 47 Halo STAR halotherapysolutions.com...
- Page 48 Phone: +1-833-200-4209 www.halotherapysolutions.com •...
Need help?
Do you have a question about the Halo STAR and is the answer not in the manual?
Questions and answers