Advertisement
Quick Links
Advertisement

Related Manuals for IMAGINARIUM Techno Gears Marble Mania Extreme 2.0


Summary of Contents for IMAGINARIUM Techno Gears Marble Mania Extreme 2.0
- Page 1 ® Tecno-Figuras Laberinto de la Diversión Extremo 2.0...
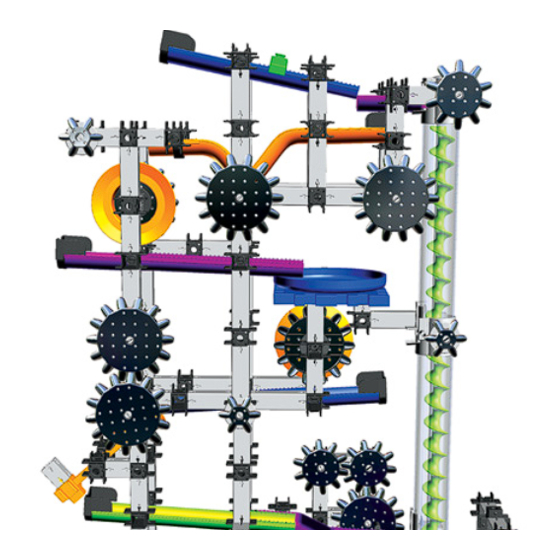
- Page 2 • A step by step guide on how to assemble Techno Gears Marble Mania Extreme 2.0 Techno Gears Marble Mania Extreme 2.0 is a constructive building experience recommended for a child to construct with an adult. Please allow a minimum of 3 to 4 hours for completion. Have great “learning fun”...
-
Page 3: Getting Started
Getting Started Battery Information for Parents and Kids Inicio Información de las baterías para padres y niños Battery Replacement Cambio De Baterías Motorized gear - Part 1 Engranaje motorizado – Parte 1 1.5 Volts 1.5 Voltios OPEN ABRIR Uses 1 “AA” (UM3/LR6) size battery not included. Requiere 1 pila tamaño “AA”... - Page 4 Getting Started Additional information for parents and kids Inicio Información adicional para padres y niños Parts Count 6 way connectors Conteo de Partes Conectores de 6 vías On the side of each construction step, a panel will show the exact number of parts needed to 6 way connectors (part ) have multiple connecting ends.
-
Page 5: Parts And Accessories
Parts and Accessories Color of pieces may vary Partes y Accesorios El color de las piezas puede variar 1 x 1 on/off switch interruptor de encendido/apagado on demand button 9 x 40 butón de movimiento 10 x 25 11 x 20 12 x 26 13 x 85 19 x 1... - Page 6 Parts and Accessories Color of pieces may vary Partes y Accesorios El color de las piezas puede variar 22 x 2 28 x 1 29 x 1 26 x 1 23 x 1 31 x 2 32 x 1 30 x 2 25 x 2 34 x 2 35 x 10...
- Page 7 Building Marble Mania Quick Tip Consejo Rápido Construye el Marble Mania 1. Make sure all base plates are facing the same direction. Motorized gear - Part 1 2. Use below diagram and paint Engranaje motorizado – Parte 1 ® marks to place connectors in proper location on base plates, ensuring 1.5 Volts...
- Page 8 14 x 6 9 x 4...
- Page 9 1 x 1...
- Page 10 4 x 3 pre-assembled item 15 27 pre-assembled item 15 27...
- Page 11 5 x 1...
- Page 12 3 x 1...
- Page 13 12 x 4 10 x 2 14 x 1 13 x 3 15 x 2...
- Page 14 14 x 2 13 x 7 10 x 1 9 x 8...
- Page 15 10 x 2 11 x 2 4 x 2 12 x 2 3 x 1 13 x 4...
- Page 17 33 x 1 9 x 2 13 x 2...
- Page 18 28 x 1 9 x 2 16 x 1 13 x 2 29 x 1...
- Page 20 30 x 2 34 x 2 25 x 2 32 x 1 31 x 2...
- Page 22 9 x 2 10 x 3 11 x 2 21 x 1 15 x 1 16 x 2 17 x1 13 x 6...
- Page 24 11 x 2 13 x 2...
- Page 25 9 x 3 10 x 2 23 x 1 14 x 2 13 x4...
- Page 26 16 x 2 17 x1 13 x 10 12 x 6 11 x 2 9 x 4 20 x 1...
- Page 28 13 x 2 10 x 2 9 x 1 22 x 1 15 x 1...
- Page 30 11 x 2 9 x 1 15 x 1...
- Page 31 12 x 1 13 x 2 10 x 1 9 x 1...
- Page 32 19 x 1...
- Page 33 12 x 8 16 x 2 10 x 2 13 x 11 9 x 2 20 x 1 17 x 1...
- Page 35 12 x 4 11 x 2 10 x 6 9 x 4 14 x 2 13 x 14...
- Page 37 15 x 1 10 x 2 13 x 2 22 x 1 9 x 1...
- Page 39 12 x 1 17 x1 11 x 4 9 x 4 24 x 1 13 x 8 16 x 2...
- Page 41 26 x 1...
- Page 42 11 x 4 45 x 1 17 x1 16 x 2 10 x 2 13 x 6 18 x 1...
- Page 44 5 x 5 3 x 4 x 10 4 x 1...
- Page 46 Congratulations! Now add some marbles and let’s play. ¡Felicitaciones! Ahora coloca las canicas y vamos a jugar. OUR WEBSITE Please visit www.marblemaniaextreme.com (http://www.marblemaniaextreme.com) to see more exciting Marble Mania Extreme 2.0 Construction Plans. If you have a favorite Marble Mania Extreme 2.0 Design, please share it with us.
-
Page 47: Helpful Hints
Helpful Hints Consejos Útiles Press to ensure Press along gear alignment between mill axis to ensure two 6-way connectors. axis alignment. Presione para asegurarse Presione a lo largo del eje que los conectores de 6 del conductor con el molino entradas están bien para asegurarse de que alineados. - Page 48 THIS PRODUCT CONFORMS TO SAFETY REQUIREMENTS OF ASTM AND EN71. ESTE PRODUCTO CUMPLE CON LOS REQUERIMIENTOS DE SEGURIDAD DE ASTM Y EN71. ® For replacement parts and for assistance with instructions please call: 1.877.839.3969 Para partes de repuesto y ayuda con las instrucciones llame al: 1.877.839.3969.
Need help?
Do you have a question about the Techno Gears Marble Mania Extreme 2.0 and is the answer not in the manual?
Questions and answers