Table of Contents
Advertisement
Quick Links
Advertisement
Table of Contents

Subscribe to Our Youtube Channel
Summary of Contents for SpaNet smartlink
-
Page 2: Table Of Contents
3.1 Finding SpaLink App on iPad 3.1 Finding SpaLink App on iPad 4. Register a user account 5. SpaLink App setup process 5.1 Place the SmartLink module into Hot Spot mode 5.2 Complete app setup process 5.2.1 Apple iOS Devices 5.2.2 Android Devices 6. -
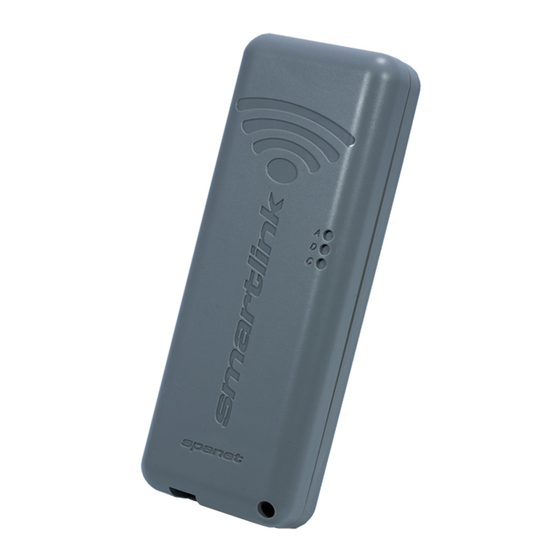
Page 3: Smartlink Module
Hole 1.2 Hardware Requirements Your SpaNET SV Series spa control must be fitted with the SV SmartLink WiFi module for the app to work. The SmartLink WiFi module requires a permanent active internet connection via a wireless router to operate. The Internet connection/router must remain... -
Page 4: Module Installation Ion
The SmartLink module has been designed as an external unit so if WiFi signal strength is weak, or your module has not been pre-fi tted to your spa follow the steps below to mount the module external to the spa cabinet: Step 1. - Page 5 Fig. 3 Step 4: Connect data cable to SV spa control The SmartLink RJ data cable MUST be connected to the EXP1 (Expand Port 1) socket on your SV spa control. The module CANNOT be connected to any other socket. The...
-
Page 6: Wifi Internet Access
Certain brand spas have features that utilise the Expand Port 1 socket. In this case when you attempt to connect the SmartLink Module the socket you need to connect to will already have a cable connected. In this situation the existing cable gets disconnected from... -
Page 7: Indicator Leds Icator Leds
WiFi scan and update the dB signal readings (Fig 4). This can be helpful if you are trying to determine the best position for mounting your SmartLink module or router. Fig. 4 2.3 Indicator LEDs Associated (Red LED) Fast Flash –... -
Page 8: Finding Spalink App On Ipad
Think of it as the portal between the SpaLink app on your phone and the SmartLink module on your spa. Your user account allows for multiple SV controllers to be confi gured on the one account, in case you own a dual-zone swim spa or more than one spa. - Page 9 Step 4: Enter your desired username. Step 5: Enter your email address. Step 6: Confi rm your email address. Step 7: Enter your desired password.
-
Page 10: Spalink App Setup Process
With the user account now registered, you need to confi gure the Internet access to your spa in the same way you would connect a laptop or TV to your WiFi router. The setup process is a one-time event that programs the SmartLink WiFi module with your WiFi router’s login credentials (SSID and password). -
Page 11: Place The Smartlink Module Into Hot Spot Mode
5.1 Place the SmartLink Module into Hot Spot Mode Standard Keypads Step 1: On you spa-side keypad, press and hold the UP + DOWN buttons simultaneously until the display shows [ MODE ]. Step 2: Press the DOWN button multiple times until display shows [WIFI]. - Page 12 Step 3: Press the OK button to enter the WIFI menu => the display will show [ HOT ]. If HOT is not displayed press the DOWN button until it is. Step 4: Press the OK button to execute the Hot Spot mode command => the display will briefly show [ WAIT ] whilst the command is carried out.
- Page 13 PLACE THE SMARTLINK MODULE INTO HOT SPOT MODE SmartTouch Keypad Step 1: On your touch panel, press the SETTINGS button in the bottom left corner of the screen => the General Settings menu will be displayed Step 2: Scroll down through the menu and then press on the WIFI menu option =>...
-
Page 14: Complete App Setup Process
5.2 Complete App Setup Process 5.2.1 Apple iOS Devices Step 1: Open app and press login. If you Step 2: Tap the New Device bar. just registered, you will already be logged into this spa list screen. Step 4: Press or slide your Apple home Step 3: Press on the X button to close the button and navigate to your Apple pop-up box but DO NOT press the Setup... - Page 15 Wait for a moment to ensure the SV network is connected properly. NOTE: If no SV network is found, repeat section 5.1 again to activate the SmartLink WiFi hot spot mode. If still unsuccessful follow Troubleshooting 7.4 Step 7: Tap SETUP bar once only to begin...
- Page 16 Step 9: Enter your router password to Step 10: You have now confi rmed the SSID access your home wireless network. and password for the WiFi network the NOTE: Take care, the app cannot check spa will connect to. Press the OK button to the password.
- Page 17 Step 13: Navigate back to app and then Step 14: The SmartLink module is now enter a name for your spa and press on connecting to your router and preparing Register to complete the setup process. to come online. The spa will show offl ine NOTE: The name can be changed after at this point.
-
Page 18: Android Devices
SV WiFi network, which matches your straight into your Android WiFi Settings. spa control’s serial number NOTE: If no SV network is found, repeat section 5.1 again to activate the SmartLink WiFi hot spot mode. If still unsuccessful follow Troubleshooting 7.4... - Page 19 Step 5: When you connect to the SV Step 6: Once connected to the SV network, Android will present a pop- network, tap the Android Back button to up advising the network does not have re-enter the SpaLink app. NOTE: DO NOT press the Home button, you MUST use the Internet access.
- Page 20 Step 9: Enter your router password to Step 10: Tap the X button to close the access your home wireless network. pop-up box. NOTE: Your device will launch NOTE: Take care, the app cannot check straight into your Android WiFi Settings. the password.
- Page 21 Step 13: Enter a name for your spa and Step 14: The SmartLink module is now press on Register to complete the setup connecting to your router and preparing process. NOTE: The name can be changed to come online. The spa will show offl ine after setup if desired.
-
Page 22: Voice Control
6. Voice Control The MySpaPool vocal skill allows you to control any spa pool fi tted with our SmartLink or SmartStream WiFi module by voice commands. Available on both Google Assistant and Amazon Alexa platforms, you can now talk to your spa to activate accessories and alter settings or ask it questions about active modes, settings and status. - Page 23 Step 3: Select your Google account. If you Step 4: The next step is to link your have multiple accounts, use the account Google account to the mySpaPool action. Start by saying “Hey Google, talk to my that is linked to your Google Home spa pool”.
- Page 24 Step 7: Now say “List my spa” and Setup Complete: The setup is now Google will list any spas setup on your complete. You can begin issuing vocal commands to your spa. i.e. “Hey Google... SpaLink app. Select the spa number ask my spa pool...
-
Page 25: How To Link Spa To Amazon Alexa
6.2 How to Link Spa to Amazon Alexa The following instructions assume your Alexa device is powered on, connected to you home WiFi network and has been linked to your Amazon Alexa account. Amazon Alexa Step 1: The first step is to open the Step 2: Use the search bar to search Amazon Alexa app and navigate to Skills for “My Spa Pool”... - Page 26 Step 3: The next step is to enable the skill, Step 4: You have now successfully linked tap on the Enable bar. the MySpaPool skill to your Amazon Alexa account. The next step is to link the SpaLink app to your Alexa account. Step 5: Open SpaLink, tap Login and then Step 6: Tap on the Login with Amazon tap on the Amazon Alexa logo at top of...
- Page 27 Step 7: With account linked, the fi nal step is to confi rm which spa to issue commands to. Start by saying, “Alexa... start my spa pool”. Setup Complete: Now say “List my spa” Change Spas: You can now issue vocal commands to your spa.
-
Page 28: Vocal Assistance Command List Ist
6.3 Vocal Assistance Command List Amazon Alexa Google Assistant ask my spa pool... ask my spa pool... Hey/OK Google... Hey Alexa... <command> <command> talk to my spa pool... Hey/OK Google... <command> Action commands Get Commands Set Commands Start my spa What’s the water Set temperature to XX’C (all pumps/blower/lights on) -
Page 29: Troubleshooting
WiFi network OR app crashes or hangs are connected to the ensure mobile data is active if on spinning wait icon SmartLink SV hot spot instead running off your phone carrier’s when attempting to of your home WiFi network cellular data... -
Page 30: Cannot See The Sv Network In Wifi Setting During Setup
The SVx-xxxx-xxxx The SmartLink WiFi module Repeat instructions from Section network is not may not be in HOT mode 5.1 – Place SmartLink module in showing in the WiFi Hot Spot Mode settings list The SmartLink module is not Complete a master reset to... -
Page 31: Input Socket Error During Setup Process
7.6 Input socket error during setup process Causes Solutions/Actions Problem “Input socket” error SmartLink module HOT mode Follow these steps in this exact when pressing on has not executed properly order: Setup bar to conduct WiFi scan during... -
Page 32: Home Wifi Network Not Detected During App Wifi Scan
4) Wait for 1-2 minutes and check spa online/offline status Check the LED indicator lights Incorrect router password entered during app setup on the SmartLink module => if the RED light is flashing it process indicates the router password was incorrectly entered during the setup process. -
Page 33: Spa Was Online But Has Dropped Offline
4) Be sure to take extra time and care when entering your router password Check the LED indicator lights on the SmartLink module => if the RED light is OFF, and GREEN light is flashing it indicates a problem with weak WiFi signal strength. -
Page 34: Legal Information
The antenna(s) used for this transmitter must not be co-located or operating in conjunction with any other antenna or transmitter. Spa Net Pty Ltd 4/103 Railway Road North, Mulgrave NSW 2756, Australia Phone: +61 2 4587 7766 Facsimile: +61 2 4587 8766 Email: service@spanet.com.au Website: www.spanet.com.au...
Need help?
Do you have a question about the smartlink and is the answer not in the manual?
Questions and answers