Table of Contents
Advertisement
Quick Links
Advertisement
Table of Contents

Summary of Contents for Research Electronics International MESA
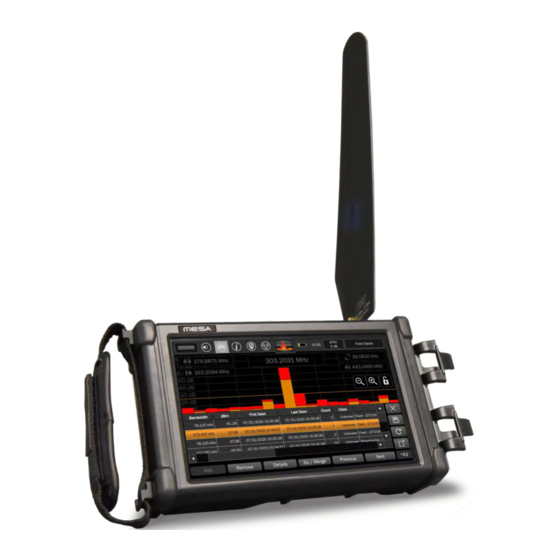
- Page 1 Mobility Enhanced Spectrum Analyzer User Manual Research Electronics International, LLC 455 Security Drive, Cookeville, TN 38506 U.S.A. (800) 824-3190 (US Only) • +1 931-537-6032 www.reiusa.net © Copyright Research Electronics International LLC.
- Page 3 7. Audio Transformer 18. Acoustic Leakage Detector 8. Directional Antenna 19. Accessory Cables, screen cleaner*, - Stored under Down Converter data storage thumb-drive 9. Down Converter Antenna 10 Multi-Carrier Probe (MCP) *Item included in the MESA Basic, but case location may vary.
- Page 4 This document is intended to provide guidance and instruction on using the MESA – Mobility Enhanced Spectrum Analyzer for finding hidden electronic devices. This manual contains proprietary information intended solely for use with the MESA product. The overall effectiveness of this product, and of any surveillance countermeasure, is dependent on the threat level and the user’s ability to properly utilize the appropriate equipment.
- Page 5 Consult the dealer or an experienced radio/TV technician for help. The Serial Number of each MESA is located on the back of the unit. Please record this number and refer to it whenever you contact your dealer or Research Electronics International concerning this product.
-
Page 6: Table Of Contents
Power Control and Charging ........................16 Audio Transformer Batteries ........................16 Connecting the Antenna & Probes ......................17 Powered Connector Cable (only included with the MESA Deluxe) ............ 17 Manual Selection of Probes ........................ 19 Display Screen Layout ..........................20 Status Bar .............................. - Page 7 How to start VNC Server ........................71 How to start VNC Viewer ........................73 Down Converter Directional Antenna Operation ................74 Updating Software ..........................75 System Menu ............................75 Brightness............................76 Version ..............................76 Network Settings ..........................76 File Prefix Settings ..........................76 ITU Region ............................
-
Page 8: Precautions
Do not forcibly stop or disrupt the operation of the fan. • There are no serviceable parts inside. Contact your dealer or Research Electronics International, LLC for repairs. Opening the unit will void the warranty. •... -
Page 9: Equipment Description
Equipment Description MESA Unit 1. Touch Screen Display - user interface for MESA 2. Battery Door (on the bottom of the unit) - conceals battery compartment 3. Speaker (on the back of the unit) - used to output audio from the unit... - Page 10 9. Headphone Jack - for connection of headphones to monitor audio from the unit. 10. USB Port - for saving files from the MESA and for possible future use as probe/accessory control. Note: Only a single USB thumb drive at a time is supported. Even if a USB hub is connected, only a single storage USB drive is supported 11.
-
Page 11: Mesa Packages
MESA Packages The MESA is available in two packages (Basic and Deluxe) with varying probes, antennas, and accessories. Below is a chart showing which probes, antennas, and accessories are included in each package (note that this is subject to change). Additional information can be found in the Probes, Antennas, and Accessories section on the following pages. -
Page 12: Probes, Antennas, And Accessories
Probes, Antennas, and Accessories Fixed Dipole Antenna (85 MHz - 6 GHz) The Fixed Dipole Antenna is a versatile, omnidirectional antenna that connects directly to the MESA unit without the need for cables. Whip Antenna (30 MHz - 6 GHz) The Whip / Dipole is a versatile, omnidirectional, near-field probe used for locating RF transmitters up to 6 GHz. - Page 13 Hot/Neutral, Neutral/Ground, and Hot/Ground. Due to power line noise and the broad frequency range that MESA searches, every outlet in an area should be inspected. The coaxial connectors on the MCP can be used to test for suspicious signals on coaxial cables. The MCP can be used to make both in-line measurements and single-ended measurements.
- Page 14 When using Band 2, the Down Converter Antenna converts signals occurring above the standard 6 GHz threshold so they can be detected and displayed on the MESA. For details on operation, see page74 . Directional Antenna (70 MHz - 500 MHz) This flag-shaped antenna provides directional coverage for lower frequency signal detection.
- Page 15 The Audio Transformer is a balanced audio coupler to provide electrical isolation for audio testing. A 3.5 mm stereo to 3.5 mm stereo cable is included with the MESA to connect the audio transformer to the MESA. Two pushbuttons provide a positive and negative bias voltage to the two banana jacks on the audio transformer.
- Page 16 The GPS Dongle is used to obtain GPS coordinates. If the GPS Dongle is connected and enabled, the MESA will tag saved files with the GPS coordinates and will store GPS coordinates for the signals in a signal list. For additional information on storing GPS information, see page 24.
-
Page 17: Operation
Power Control and Charging To turn on your MESA unit, ensure that a charged battery is in the unit or connect the supplied AC adapter and press and hold the power button (see page 8) until it begins flashing. During operation, to turn off your MESA unit, press and hold the power button until the "Power Off"... -
Page 18: Connecting The Antenna & Probes
The powered connector cable has a pin on each end that transfers power to the powered probes. When connecting the powered connector cable to the MESA, it is important to align the power pin on the cable with the power contact pad on the MESA for the connector to snap into place. - Page 19 Note: When disconnecting the powered connector cable, pull from the cable release for leverage. Do not pull from the cable. Doing so could damage or shorten the life of your cable. It is not necessary to power off the MESA when changing probes/antennas.
-
Page 20: Manual Selection Of Probes
Manual Selection of Probes The MESA detects any REI supplied antenna or probe that is connected and will automatically adjust the MESA settings, such as span or default mode, for best working with that probe. The MESA will also allow you to manually select the probe connected. -
Page 21: Display Screen Layout
(kHz, MHz, GHz) to initiate the change. If no change is desired, pressing the "x" in the upper right-hand corner of the dialog box will close it. The smallest span that the MESA can display is 25 kHz. The largest span will depend on the range of the REI probe connected. - Page 22 5. Resolution Bandwidth - This box displays the current resolution bandwidth value. This value is not manually adjustable. The MESA automatically sets the resolution bandwidth based on the frequency span. The smaller the span, the finer the resolution bandwidth will become.
-
Page 23: Status Bar
Tapping the camera icon in the status bar will take a screenshot and save it to the unit in .jpg format using an automatically generated file name based on a header specified by the user (see page 59. The captured screenshot can be viewed on the MESA using the Image Viewer (see page 61) or from any PC. -
Page 25: Gps Location
4) Press "SAVE". The current Live GPS Coordinates will be copied to the Saved GPS Coordinates. The MESA will now use these coordinates to tag saved files and to tag signals in the signal list. 5) Tap the "X" in the upper right-hand corner to close the GPS Location Dialog Box Network Status and Setup Tap the Network Icon to access the Network Status and Setup dialog. -
Page 26: Battery Life
Network Configuration on page 67. Battery Life The battery icon provides a visual representation of the remaining battery life. Tap the icon for additional details. The MESA unit can also be powered off from this screen. Setting the Time Zone, Date, and Time... - Page 27 Having accurate time and date information on the MESA is critical for ensuring that the timestamps on saved files and signal lists are accurate and reliable. Tapping the time display in the status bar will open a small dialog box with the date. Press "Edit" in this...
-
Page 28: Attenuator/Preamp
41), Mobile Bands Mode (see page 50), WiFi Mode and Bluetooth Mode (page 54). Spectrum Mode Spectrum Mode on the MESA allows you to easily monitor the RF spectrum and analyze signals that are found. This section describes the controls for navigating the spectrum and tools necessary for analyzing... - Page 29 Navigating Spectrum Mode The MESA unit is capable of scanning and displaying a large portion of the RF spectrum. To fully analyze the RF energy in a given location, it may be necessary to focus on smaller portions of the RF spectrum at a time.
- Page 30 /Start /Stop /Span Frequency Adjustment: Entering a frequency value in the Start Frequency, Stop Frequency, or Frequency Span dialog boxes will also change the frequency display accordingly.
- Page 31 As you zoom in on the spectrum, the resolution bandwidth will change. It is not possible to maintain peaks as you zoom in due to the changes in resolution bandwidth. The MESA includes the feature, cached peaks, to enable you to see peaks obtained at previous resolution bandwidths.
- Page 32 3. Notice that the resolution bandwidth has now changed to 39.0620 kHz. You will see a faint red line above the peak trace. This is the cached peak trace from the 312.50 kHz resolution. 4. Zoom in 2 more times using the Zoom In button. Notice that the resolution bandwidth has now changed to 9.7650 kHz.
- Page 33 The mode settings menu can be opened from the top left button on the screen by tapping the drawer icon in the status bar. The settings available in this menu will change depending on the Mode that the MESA is currently in. Here are the settings available in Spectrum Mode. System Menu This option provides access to system settings such as brightness, version, image viewer, audio player, network settings, prefix settings, ITU region, power down cache, factory reset.
- Page 34 When first turning on the average trace display, a slider bar will appear allowing you to specify the number of real-time traces included in the average. Persistence Trace This option toggles the display of the persistence trace. The persistence trace displays the trace data from each sweep of the receiver using fading colors to indicate how frequently and recently each signal was encountered.
- Page 35 Press the "x" to close the Waterfall display • Press the Full-Screen button to view the waterfall full screen on the MESA display • Press the File Dialog button to save an image of the waterfall to an inserted USB thumb drive •...
- Page 36 Alerts This option enables alerts whenever the signal level monitored exceeds a specified threshold. Three types of alerts are available: audio alerts, visual alerts, and haptic alerts. When the alert feature is selected from the mode menu, a dialog box appears. The following adjustments are available from the dialog box: Threshold Level - Use the slider bar to set how far above the peak trace a signal should be before it triggers an alert.
- Page 37 RSSI The MESA includes an RSSI locating feature to aid in narrowing down the physical location of a bug. RSSI stands for Received Signal Strength Indicator. The RSSI option in the Mode Settings Menu turns the RSSI feature on. The spectrum portion of the graph will be compressed and displayed on the top half of the screen.
- Page 38 You may also adjust the RSSI Window. Tap the Configuration button in the RSSI graph. Use the slider bar to adjust the window. You may also adjust the amount of time represented by the horizontal span of the graph. Tap the Configuration button in the RSSI graph.
- Page 39 The user may manually add or remove signals, but the MESA does not continue monitoring the current peak trace and the threshold level. This is why it is important to let the peak...
- Page 40 Note: The Audio Demod option is only enabled at spans below 14 MHz. When the MESA is at a span where audio demodulation is available, the circle around the volume icon in the status bar will turn orange.
- Page 41 2) With Audio Demod active and the oscilloscope visible, press the record button located to the right of the oscilloscope. 3) The MESA will begin recording audio to the inserted thumb drive. To increase the recording time, tap the record button again. With each tap of the record button, the record time will change, cycling through these 3 options: 10 sec, 1 min, 5 min.
-
Page 42: Smartbars
Tapping on the bars displays more detailed views. Also, SmartBars does not display spectrum information linearly. The MESA uses a patented process to display highly populated areas of the spectrum more prominently with more screen real estate while condensing areas of the spectrum that have no signals. - Page 43 Starting SmartBars 1. Select SmartBars from the Mode Menu at the top center of the screen. 2. From the SmartBars Signal Control dialog box, select either Fast Scan or Signal Resolution. Fast Scan mode uses a resolution bandwidth of 312.5 kHz for spans of 200 MHz and wider, which results in a faster sweep speed.
- Page 44 5. The MESA will begin collecting a reference trace for a minimum of 5 seconds. During this time, the top center of the screen will say "Referencing…" with a countdown. If desired, you may collect the reference trace for longer. Ideally, you would want to collect the reference trace outside of the area that you plan to sweep.
- Page 45 Navigating SmartBars Mode Note: The screenshots below show the Fast Scan version of SmartBars. However, navigation works the same in both modes. After starting SmartBars, the spectrum will be displayed as 20 SmartBars representing the full range of the connected probe with each SmartBar comprised of equal power normalized to the absolute power of the reference trace.
- Page 46 Tapping a SmartBar will select it. The selected peak trace bar will change to gray. The selected live trace bar will change to white. Tapping a selected SmartBar will zoom in to the portion of the spectrum represented by the span of the selected SmartBar.
- Page 47 Notice the spectrum indicators at the top of the screen (span, start frequency, stop frequency). These will change to indicate the new span. Tapping one of the sub-bars will select it. Tapping a selected sub-bar will zoom in to the portion of the spectrum represented by the span of the sub-bar displayed as a trace graph.
- Page 48 After you are finished collecting signals in the Signal Resolution SmartBars Mode, you should save the signal list. Be sure that a thumb drive is inserted into the MESA and press the File Dialog Button on the right side of the signal list. For other details regarding signal, list operations see page 59.
- Page 49 The mode settings menu can be opened from the top left button on the screen. The settings available in this menu will change depending on the Mode that the MESA is currently in. Even within the SmartBars mode, the options available in the Mode Settings Menu will change depending on whether you have SmartBars showing or whether you have zoomed in far enough so that the spectrum traces are showing.
- Page 50 Alerts This option enables alerts whenever the signal level monitored exceeds a specified threshold. It operates very similarly to the way it operates in Spectrum Mode. Three types of alerts are available: audio alerts, visual alerts, and haptic alerts. When the alert feature is selected from the mode menu, a dialog box appears. The following adjustments are available from the dialog box: Threshold Level - Use the slider bar to set how far above the initial reference trace a signal should be before it triggers an alert.
-
Page 51: Mobile Bands
the threshold, the threshold level will be based on the cleared peak. It is best to allow a peak to collect for a while before enabling the threshold level. Mobile Bands Mobile bands mode displays up to 8 bar graphs at once. Each bar graph displays power within a specified band. - Page 52 But these frequencies may not be optimal for all situations. So, there is an option in the menu for customizing mobile band frequencies. 1. Select Edit Mobile Bands from the Mode Settings Menu in the upper left corner of the screen or tap twice on the frequency range at the bottom of the bar you wish to edit (once to select and a second time to edit).
- Page 53 The mode settings menu can be opened from the top left button on the screen. The settings available in this menu will change depending on the Mode that the MESA is currently in. The following options are available in Mobile Bands Mode.
- Page 54 75. Normalize Bars This option resets the dynamic range (min & max powers) of the current bands. The MESA scans the bands and tries to pick the best initial dynamic range. The dynamic range will eventually expand for any signal exceeding the max value.
-
Page 55: Wi-Fi & Bluetooth
Wi-Fi & Bluetooth The MESA combines both a Wi-Fi/Bluetooth module and a spectrum analyzer. The module identifies a list of signals that are automatically tied to the spectrum analyzer. The module scans the wireless networks in your area and displays a list of addresses, network names, power levels, and channel... - Page 56 Display Screen Layout 1. Scan Button - Pressing Scan will activate a new scan. 2. Scan Status - indicates the current scan status. During a scan, the status will display “Scanning …” After a scan completes, the status indicates the number of networks found. 3.
- Page 57 75. WiFi/Bt Power Saver To save power and reduce its RF signature, the MESA offers a low power option. Wi-Fi/BT Power Saver holds the WiFi/Bluetooth module in reset when not in use. This slows the initial scan, but saves power when not in use and reduces the RF signature.
- Page 58 Bluetooth Mode Operation In Bluetooth mode, the unit scans for Bluetooth Classic and Bluetooth LE devices. When entering the screen, the unit scans for BT classic devices such as cell phones. Similar to Wi-Fi mode the Bluetooth mode lists device addresses, names, and power levels. If you select a table entry, the unit will display a power bar on the right.
- Page 59 To change back to Bluetooth Classic devices, select low Energy again.
-
Page 60: Additional Features
Additional Features Signal List Window A signal list allows you to store and recall frequencies of interest along with additional information such as signal amplitude, bandwidth, threat level, the number of times that signal has been seen, location, and Band ID information. Signal lists can be automatically generated through either the Generate Signal function (see page 38) or the SmartBars Signal Resolution mode (see page 47). - Page 61 ITU regions (see page 76). • Other Details - More specific band information (e.g. Amateur Radio 60 meters, Instrument Landing System, VHF Television, etc.) This information is only available if the MESA is set to ITU region 2 (see page 76). •...
- Page 62 1) With a signal list open, highlight a signal within the list that you would like to display on the spectrum by tapping it. 2) With a signal highlighted, press the "Go / Merge" button. The MESA will zoom in with the cursor on the highlighted signal.
- Page 63 2) Press the "Go/Merge" button. 3) A dialog box will appear asking if you are sure you want to merge the highlighted signals. Press "Yes" to confirm. Note: Some information may be lost when manually merging signals. For example, if two signals that have different information in the probe field are merged, the merged signal will only retain the information from one of the signals.
- Page 64 OSCOR Blue. The resulting file will use a .signals extension. Note: Some of the data fields which are available on the MESA, but not available on the OSCOR Blue and Green (e.g. Latitude, Longitude, and Altitude) will be removed from this file.
- Page 65 Open a Previously Saved Signal list It is possible to open a signal list that was previously saved on the MESA. 1) Ensure that the previously saved signal list in CSV format is on a USB thumb drive that is inserted into one of the USB ports on the MESA.
- Page 66 Image Viewer & Audio Player The Image Viewer and Audio Player are located in the System Menu. The System menu can be accessed at the top of the Mode Settings Menu in any of the five modes (Spectrum, SmartBars, Mobile Bands, Wi- Fi, Bluetooth).
- Page 67 Any images that the MESA previously stored on a USB drive can be selected from the list and viewed. The Image Viewer opens up with a list of thumbnail images for any image stored on an inserted USB thumb drive.
-
Page 68: Network Configuration
The Status subtab shows the current state of the link and VNC. When connected to a network via Ethernet cable, the Link shows “Up” when connected and “disconnected” when there is no connection. The interface subtab displays the hostname (default: MESA), MAC address, IPv4 settings, IPv6 settings. - Page 69 The VNC subtab allows users to enable a VNC server. The VNC server allows users to view and control a MESA from a remote location. When enabling the VNC server, the MESA will request the user to set a password. This password will be required at the remote viewer. After entering a password, the MESA will prompt the user to start the VNC server.
- Page 70 Setup: The Networking subtab enables/disables Ethernet. The General subtab allows users to set the hostname (for example this is the name that will show up in a list of devices connected to a router). The Ethernet MAC Address subtab allows users to set a custom MAC address, generate a random address, or restore the default address.
- Page 71 IPv4: Displays the IPv4 settings. By default, these settings are set to automatic but offer the ability to manually set the address, netmask, and gateway.
-
Page 72: How To Start Vnc Server
How to start VNC Server Users can remotely access the MESA using the built-in Ethernet port. Commercially available third-party Virtual Network Computing (VNC) software is a good tool for connecting to a device such as the MESA. Starting the MESA VNC server: 1. - Page 73 4. Select VNC Tab. 5. Set a VNC password. 6. Return to the VNC tab and enable the server. A VNC status Update window should appear and display a “VNC Server Running …” message.
-
Page 74: How To Start Vnc Viewer
The viewer will request the password set in the VNC server. The MESA server image should appear on the viewer screen. Now the MESA can be remotely controlled using a mouse. In spectrum mode, a left mouse double click on the mouse will zoom in and a right... -
Page 75: Down Converter Directional Antenna Operation
When using the upper band (Band 2), the Down Converter Antenna converts signals occurring above the standard 6 GHz threshold so they can be detected and displayed on MESA. To switch between the high and low band, while the antenna is connected, press the input select button in the top right-hand corner... -
Page 76: Updating Software
3. Insert the drive into the MESA. 4. After the MESA has a chance to read the drive, the software update screen is displayed. 5. Select Yes, and the MESA will begin a software update. The software update can take upwards of 10-15 minutes. -
Page 77: Brightness
Several system settings are available in the Systems Menu, which is located at the top of the Mode Settings Menu. Brightness This setting adjusts the brightness of the Touch Screen Display. Version The software version and unit serial number can be displayed from this dialog. Network Settings In addition to being available from the status bar, network settings are also available from the System Menu. -
Page 78: Power Down Cache Setting
4. Lift your finger off the screen to release the cursor. It will snap to the nearest peak. Note: If after using the snap to peak feature you immediately begin dragging the cursor again, the MESA will assume that you want more "exact" behavior and will not use the snap to peak feature when you release the cursor the second time. -
Page 79: Specifications
Specifications Receiver Sweep Speed >200 GHz/second Operating Freq. Range 10 kHz - 6 GHz /*12 GHz Resolution Bandwidth Variable depending on span: 0.0380 kHz to 312.5 kHz Instantaneous Bandwidth 25 MHz DANL - Noise Floor 500 kHz RBW with Pre-amp: -102 dBm Attenuation 0 dB, 10 dB, 20 dB, Auto Preamp... -
Page 80: Environmental
Environmental Operating temperature -10° to 53° C Battery charging temperature 5° to 37° C Storage temperature -20° to 60° C Note: extended storage at temperatures above 40° C could degrade battery performance and life. *Down Converter antenna (Deluxe model)
Need help?
Do you have a question about the MESA and is the answer not in the manual?
Questions and answers