
Subscribe to Our Youtube Channel
Related Manuals for Circa Enterprises Guardian HDE Series

Summary of Contents for Circa Enterprises Guardian HDE Series
- Page 1 VoIP Telephones HDE Setup & Configuration APPLICABLE FOR FIRMWARE VERSION V3.9.0 OR LATER P007451 Rev. I 20100710 7/10/2020 11:22 AM...
- Page 2 Setup & Configuration HDE-VoIP Telephones VoIP Setup & Configuration P007451 Rev. I (applicable to firmware V3.9.0 Only!) COPYRIGHT NOTICE: © 2020, Guardian Telecom, ALL RIGHTS RESERVED. This manual and related material is the copyrighted property of Guardian Telecom. No part of this manual or related materials may be reproduced or transmitted, in any form or by any means (except for internal use by licensed customers), without prior express written permission of Guardian Telecom.
- Page 3 Setup & Configuration HDE-VoIP Telephones Updating Your VoIP Product Please review www.guardiantelecom.com support pages to obtain the latest F/W or contact Guardian Telecom Support at mailto:rmateststation@guardiantelecom.com Important Safety Instructions 1. Read these instructions. 2. Keep these instructions. 3. Heed all warnings. 4.
-
Page 4: Table Of Contents
Setup & Configuration HDE-VoIP Telephones Table of Contents Typical System Installation ..................6 Supported Protocols ....................6 Supported SIP Servers ....................6 Features ........................7 Getting Started ......................8 Back-Up Server Modes ....................8 6.1. Normal Operation (SRST/MITEL) Disabled ............ 8 6.2. - Page 5 Setup & Configuration HDE-VoIP Telephones Tables Table 1 - Factory Default Settings ..................10 Table 2 - Telephone Web Page Navigation ............... 10 Table 3 - Home Page Overview ..................12 Table 4 - Device Configuration Parameters ..............15 Table 5 - Network Configuration Parameters ..............17 Table 6 - SIP Configuration Parameters ................
-
Page 6: Typical System Installation
Setup & Configuration HDE-VoIP Telephones Typical System Installation The Voice-over-IP (VoIP) Telephone is a Power-over-Ethernet (PoE 802.3af) and Voice-over-IP (VoIP) two-way communications device that easily connects into existing local area networks (LANs) with a single cable connection. The telephone is compatible with all SIP Compliant hardware or cloud based servers. Figure 1 illustrates how VoIP Telephones can be installed as part of a VoIP phone system. -
Page 7: Features
Setup & Configuration HDE-VoIP Telephones Features Standard Features on All Models • PoE 802.3af enabled (Power-over-Ethernet) or alternate power source. • Control Relay – network configurable auxiliary relay. • Compatible with SIP-based IP-PBX servers that comply with SIP RFC 3261. •... -
Page 8: Getting Started
Setup & Configuration HDE-VoIP Telephones Getting Started The Installation manual for the telephone provides information on installing and connecting the device to the server. This manual describes the steps required to customize the telephone to suit the individual’s preferences. The Discovery Utility is available on Guardian’s website at https://www.guardiantelecom.com/resources/voip-support/ needs to be installed manually by copying the executable file to a local drive. -
Page 9: Mitel Resiliency
Setup & Configuration HDE-VoIP Telephones 6.3. Mitel Resiliency The Mitel Resiliency filter allows for seamless failover between two Mitel SIP servers without user intervention. The device supports two levels of resiliency: Bronze and Silver. Bronze: The device supports multiple DNS records for a single FQDN. If the device fails to register with one server via an IP address associated with the FQDN’s DNS record, it will try other IP addresses given. -
Page 10: Reset Switch
Setup & Configuration HDE-VoIP Telephones RESET Switch • The RESET switch is used to get the IP address of the device or reset to factory defaults. • Press and release the RESET switch within a 5 second window and it will speak the IP address through the on board speaker. -
Page 11: Log In To The Configuration Home Page
Setup & Configuration HDE-VoIP Telephones 8.2. Log in to the Configuration Home Page 1. Open your browser to the Telephone’s IP address. If you do not know the IP address, the “Discovery Utility” can be used to detect all Guardian VoIP devices on the network. When opened refresh the Discovery Utility list to trigger the application to scan the network for VoIP devices. -
Page 12: Table 3 - Home Page Overview
Setup & Configuration HDE-VoIP Telephones Web Page Item Description Device Settings Device Name: Change the device name as required. Change Username: Type in this field to change the username. Change Password: Type in this field to change the password. Re-enter Password: Type the password again in this field to confirm the new password. -
Page 13: Configure The Device Parameters
Setup & Configuration HDE-VoIP Telephones 8.3. Configure the Device Parameters 1. Click the Device Configuration button to open the Device Configuration page. See Figure 4. Figure 4 - Device Configuration Page 2. On the Device Configuration page, you may enter values for the parameters indicated in Table 4. 3. - Page 14 Setup & Configuration HDE-VoIP Telephones Web Page Item Description The volume settings describe the volume set on reboot. The user can change the Volume Settings volume by using the up and down arrows, but this change is temporary and the volume will be reset when the device is rebooted.
-
Page 15: Table 4 - Device Configuration Parameters
Setup & Configuration HDE-VoIP Telephones Blink LEDn During Ring: LED for respective button will flash on receipt of call during device ringing. When this option is enabled, the LED will activate and flash when the device has Blink LEDn During Night Ring received a call and is playing a ringtone. -
Page 16: Figure 5 - Network Configuration Page
Setup & Configuration HDE-VoIP Telephones Configure the Network Parameters 1. Click the Networking button to open the Network Configuration page (Figure 5). Figure 5 - Network Configuration Page 2. On the Network Configuration page, enter values for the parameters indicated in Table 5. 3. -
Page 17: Table 5 - Network Configuration Parameters
Setup & Configuration HDE-VoIP Telephones Web Page Item Description Stored Network Settings Shows the settings stored in non-volatile memory. Select either DHCP IP Addressing or Static Addressing by marking the appropriate radio button. DHCP Addressing mode is enabled on default and the device will attempt to resolve network addressing with the local DHCP server Addressing Mode: upon boot. -
Page 18: Configure The Sip Parameters
Setup & Configuration HDE-VoIP Telephones 8.4. Configure the SIP Parameters 1. Click SIP Config to open the SIP Configuration page (Figure 6). Note: Guardian VoIP telephones are compatible with most SIP servers. Figure 6 - SIP Configuration Page 2. On the SIP Configuration page, enter values for the parameters indicated in Table 6. 3. - Page 19 Setup & Configuration HDE-VoIP Telephones Web Page Item Description When this option is enabled, the device will initialize the SIP engine Enable SIP Operation: and try to register with a SIP server or listen for incoming SIP connections. SIP Transport Protocol Allows user to select between SIP TCP or UDP mode.
- Page 20 Setup & Configuration HDE-VoIP Telephones Enter a second backup SIP server address as an IPv4 address in dotted decimal notation or a fully qualified domain name. This Backup SIP Server 2: parameter also becomes the host portion of the SIP-URI for the device's extension on the second backup SIP server.
- Page 21 Setup & Configuration HDE-VoIP Telephones The Remote SIP Port is the port number the device will use as the destination port when sending SIP messages for the Nightringer Remote SIP Port: extension. The default Remote SIP Port is 5060. The supported range is 0-65536.
-
Page 22: Table 6 - Sip Configuration Parameters
Setup & Configuration HDE-VoIP Telephones Specify the extension the device will call when someone presses Red Button Dial out Extension: the red Emergency Call button. Enter up to 64 alphanumeric characters. A Caller identification string added to outbound calls. Enter up to 64 Red Button Extension ID: alphanumeric characters. -
Page 23: Configure The Audio Parameters
Setup & Configuration HDE-VoIP Telephones 8.5. Configure the Audio Parameters Click Audio Config to open the Audio Configuration page (Figure 7). Figure 7 - Audio Configuration Page Page 23... -
Page 24: Table 7 - Audio Configuration Parameters
Setup & Configuration HDE-VoIP Telephones The Audio Configuration page is used to add custom audio to the board. User uploaded audio will take precedence over the audio files shipped with the Telephone. 2. On the Audio Configuration page, enter values for the parameters indicated in Table 7. Note: Each entry on the Audio Configuration page replaces one of the stock audio files on the board. -
Page 25: User-Created Audio Files
Setup & Configuration HDE-VoIP Telephones 8.5.1. User-created Audio Files User created audio files should be saved in the following format: RIFF (little-endian) data, WAVE audio, Microsoft PCM, 16 bit, mono, 8000 Hz You can use the free utility Audacity to convert audio files into this format, see Figure 8 through Figure 10. You may download the application at https://creativecommons.org/licenses/by/3.0/. -
Page 26: Figure 10 - Wav (Microsoft) Signed 16 Bit Pcm
Setup & Configuration HDE-VoIP Telephones When you export an audio file with Audacity, save the output as: • WAV (Microsoft) signed 16 bit PCM. Figure 10 - WAV (Microsoft) signed 16 bit PCM Page 26... -
Page 27: Configure The Event Parameters
Setup & Configuration HDE-VoIP Telephones 8.6. Configure the Event Parameters Click the Event Config button to open the Event Configuration page (Figure 11). The Event Configuration page specifies a remote server that can be used to receive HTTP POST events when actions take place on the board. - Page 28 Setup & Configuration HDE-VoIP Telephones Web Page Item Description Enable Event When this option is selected, the device will initialize the event generation engine. This mechanism Generation: can be used to send xml formatted http POST packets to an external server in response to triggers in the operation of the device.
- Page 29 Setup & Configuration HDE-VoIP Telephones Enable Relay When this option is enabled, an event will be sent to the remote server when the relay is Deactivated Events: deactivated. POST xmlparse_engine HTTP/1.1 Host: 10.0.3.79 User-Agent: CyberData/1.0.0 Content-Length: 234 Content-Type: application/x-www-form-urlencoded <?xml version="1.0" encoding="lSO-8859-1"?> <cyberdata NAME='Guardian VoIP Device' MAC='0020f70015b6'>...
-
Page 30: Table 8 - Event Configuration
Setup & Configuration HDE-VoIP Telephones Enable Remote When this option is enabled, an event will be generated when a change is seen on the one of the Relay Events: opto-isolated input lines. POST xmlparse_engine HTTP/1.1 Host: 10.0.3.79 User-Agent: CyberData/1.0.0 Content-Length: 197 Content-Type: application/x-www-form-urlencoded <?xml version="1.0"... -
Page 31: Configure The Autoprovisioning Parameters
Setup & Configuration HDE-VoIP Telephones 8.7. Configure the Autoprovisioning Parameters Every phone that needs auto-provisioning has to have its auto-provisioning file set up. The auto-provisioning of a HDE-VoIP phone is done as follows: 1. Create an auto-provision template of the phone. Go to Import/Export Settings near the bottom of the page on the Home Page. -
Page 32: Table 9 - Autoprovisioning Configuration Parameters
Setup & Configuration HDE-VoIP Telephones Web Page Item Description Autoprovisioning Disable Autoprovisioning: When this option is enabled, the device will try to fetch an autoprovisioning file from a remote server. Autoprovisioning Server: When this option is enabled, the device will fetch its autoprovisioning file from the server specified from the DHCP server. -
Page 33: Configure Update Firmware
Setup & Configuration HDE-VoIP Telephones 8.8. Configure Update Firmware Click the Update Firmware button to open the Update Firmware page (Figure 13). NOTE: IF UPDATING FROM PRE V3.9.0 REVIEW THE SUPPLIED FIRMWARE INSTALLTION DOCUMENT FIRST!!! Figure 13 - Update Firmware Page Web Page Item Description File Upload... -
Page 34: Setting Up A Tftp Server
Setup & Configuration HDE-VoIP Telephones Setting up a TFTP Server Autoprovisioning requires a TFTP server for hosting the configuration file. 9.1. In a LINUX Environment To set up a TFTP server on LINUX: 1. Create a directory dedicated to the TFTP server, and move the files to be uploaded to that directory. 2. -
Page 35: Operation
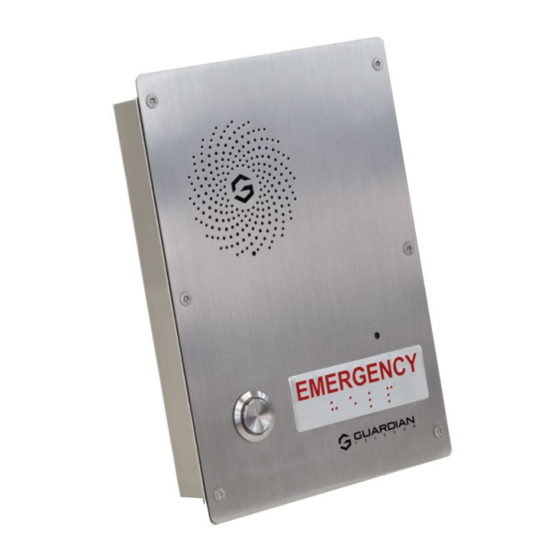
Setup & Configuration HDE-VoIP Telephones 10. Operation ( Images may vary from actual product HDE-11-VoIP & HDE-12-VoIP EMERGENCY TELEPHONES Press the EMERGENCY button. The pre-programmed telephone number automatically dials. If the unit is equipped with an external signaling device, it will also activate. -
Page 36: Frequently Asked Questions
Setup & Configuration HDE-VoIP Telephones 11. Frequently Asked Questions 1. When I set my device network mode to “Static”, after I save and reboot the unit, the count down time continuously recycles and never exits. Once the IP address is physically changed to static mode, the webscreen does not know to change addresses and will attempt to re-connect to the original IP address. - Page 37 Setup & Configuration HDE-VoIP Telephones 9. On an Asterisk-based VoIP SIP PBX system, the Guardian SIP Device status is "Busy" or "Unreachable". I have set up both the Guardian VoIP SIP device and the PBX extension information for the device. I can see the device on the network, am able to PING it, and can bring up the device web page with a browser.
-
Page 38: Product Specifications
Setup & Configuration HDE-VoIP Telephones Pantel, Cisco, or Linksys PoE endpoints all work on the Dell Powerconnect 3524P. A user tried hard coding the switch speed/duplex and tried four different Dell Powerconnect 3524P switches. --- Check to make sure the Dell Powerconnect 3524P has flow control enabled on the port for the Guardian device to power up properly. -
Page 39: Appendix A Time Zone Settings
Setup & Configuration HDE-VoIP Telephones 13. Appendix A Time Zone Settings posix time zone string tells the internal date and time utilities how to handle daylight savings time for different time zones. Shown below are some common strings. Common Time Zone Strings Time Zone Time Zone String US Pacific Time... - Page 40 Setup & Configuration HDE-VoIP Telephones Time Zone Identifier user-definable three or four-character time zone identifier (such as PST, EDT, 1ST, MUT, etc.) is needed at the beginning of the posix time zone string to properly set the time. However, the specific letters or numbers used the time...
- Page 41 Setup & Configuration HDE-VoIP Telephones Notes: Model No. Part No. Serial No. Date of Purchase Page 41...
- Page 42 THIS PAGE INTENTIONALLY LEFT BLANK...
- Page 43 THIS PAGE INTENTIONALLY LEFT BLANK...
- Page 44 Guardian Telecom, a Division of Circa Enterprises Inc. Toll-free 1-800-363-8010 Phone (403) 258-3100 Fax. (403) 255-2595 www.guardiantelecom.com E-mail: sales@guardiantelecom.com (Click to open message box) Tough. Trusted. True. © Guardian Telecom 2020...
Need help?
Do you have a question about the Guardian HDE Series and is the answer not in the manual?
Questions and answers