Table of Contents
Advertisement
Quick Links
Advertisement
Table of Contents

Subscribe to Our Youtube Channel
Summary of Contents for Futurex USB Backup HSM
- Page 1 User Guide Applicable Devices: Vectera Plus Guardian Series 3 KMES Series 3 RKMS Series 3 THIS DOCUMENT CONTAINS CONFIDENTIAL INFORMATION PROPRIETARY TO FUTUREX, LP. ANY UNAUTHORIZED USE, DISCLOSURE, OR DUPLICATION OF THIS DOCUMENT OR ANY OF ITS CONTENTS IS EXPRESSLY PROHIBITED.
-
Page 2: Table Of Contents
USER GUIDE | USB BACKUP HSM TABLE OF CONTENTS [1] DOCUMENT INFORMATION [1.1] D OCUMENT VERVIEW [1.2] A PPLICATION ESCRIPTION [1.3] C OPYRIGHT AND RADEMARK OTICES [1.4] T ERMS OF [2] HARDWARE SPECIFICATIONS [3] INITIAL SETUP AND USE [3.1] A PIN DMIN DMIN [3.2] L... -
Page 3: Document Information
This integration guide, as well as the software and/or products described in it, are furnished under agreement with Futurex and may be used only in accordance with the terms of such agreement. Except as permitted by such agreement, no part of this publication may be reproduced, stored in a retrieval system, or transmitted, in any form or by any means, electronic, mechanical, recording, or otherwise, without prior written permission of Futurex. -
Page 4: Hardware Specifications
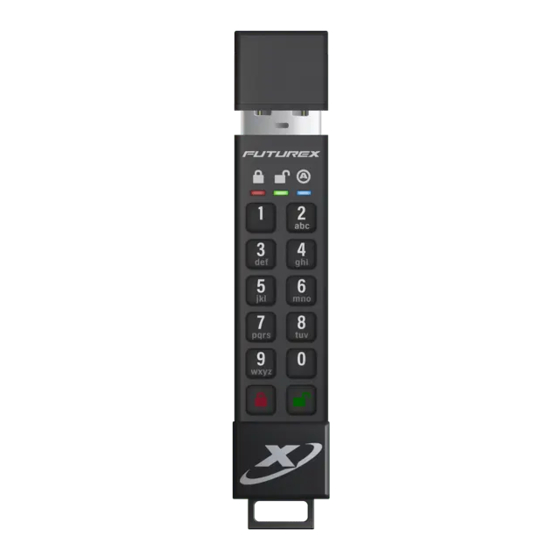
USER GUIDE | USB BACKUP HSM [2] HARDWARE SPECIFICATIONS Data transfer rate: Up to 190MB/s read & 80MB/s write Power Supply: USB port or internal battery Interface: Super Speed USB 3.1 (Backwards compatible with USB 3.0, 2.0 and 1.1) Dimensions: 81mm x 18.4mm x 9.5mm, 22 g Approvals: FIPS 140-2 Level 3, IP-67, FCC, CE, VCCI, WEE, C-TICK ECCN / HTS / Cage Code: 5A992.c / 8473.50.3000 / 3VYK8 System Requirements: Windows, Mac, Linux, Android. -
Page 5: Initial Setup And Use
LED glowing for one second. Then the blue LED will illuminate, indicating that the Admin PIN has been set and the USB Backup HSM is in Admin mode, ready to add another User PIN or for setting up features. 5. To exit the Admin mode, press... -
Page 6: [3.2] Locking The Device
If data is still being written to the device, it must be completed before the locking operation takes place. The button can also be used to exit out of the Admin mode. NOTE: The USB Backup HSM will not be recognized by any operating system in its locked state. [3.3] UNLOCKING THE DEVICE 1. -
Page 7: [3.5] Formatting The Usb Backup Hsm
Mac OS X The USB Backup HSM comes preformatted in FAT32 for complete cross-platform compatibility, and is ready for use. For a strictly Mac OS environment, the user must first reformat the device to Mac OS Extended (Journaled). -
Page 8: User Pin Setup And Management
LED illuminating. 3. Press the button to return the USB Backup HSM to its locked state. The device is now in User Forced Enrollment State, allowing a user to establish their own User PIN. User-Generated User PIN in Forced Enrollment State 1. -
Page 9: [4.4] Deleting The User Pin
USER GUIDE | USB BACKUP HSM You can change the User PIN by doing the following: 1. Unlock the USB Backup HSM with the User PIN. The green LED will blink. 2. Press the + 1 buttons together for five seconds. The LED will blink. -
Page 10: Security Settings
NOTE: The Self-Destruct PIN must be different from the Admin PIN, User PIN, and Recovery PINs. 1. By default, the Self-Destruct feature is disabled. To allow the USB Backup HSM to be set with a Self- Destruct PIN, Enter the Admin mode. (Hold + 0 for five seconds;... -
Page 11: [5.2] Brute-Force Protection
USER GUIDE | USB BACKUP HSM [5.2] BRUTE-FORCE PROTECTION A Brute-Force Attack is a means of breaching a cryptographic data defense scheme by systematically running an astronomical number of decryption possibilities. With AES 256 having never been cracked, the data stored on a USB Backup HSM is going to be more than well-protected against brute-force. - Page 12 USER GUIDE | USB BACKUP HSM In its default state, the USB Backup HSM’s Unattended Auto-Lock feature is turned off. However, the Unattended Auto-Lock can be set to activate after 5, 10, or 20 minutes of inactivity. To set the Unattended Auto-Lock, perform the following steps: 1.
-
Page 13: Special Modes
[6.1] ONE-TIME-USE RECOVERY PINS The Admin has the ability to set Recovery PINs that will allow a User to access data on the USB Backup HSM in the event of a forgotten PIN by creating a new state of User Forced Enrollment in which a new User PIN can be established without wiping any data off of the drive. -
Page 14: [6.2] Setting Read -Only Or Read /Write
USER GUIDE | USB BACKUP HSM [6.2] SETTING READ-ONLY OR READ/WRITE MODES With a large number of viruses and Trojans that attach themselves to USB devices, the Read-Only feature is especially useful if you need to access data on the device when used in a public setting. Additionally, Read- Only is an important feature for forensic applications, where data must be preserved in its original, unaltered state and can’t be overwritten or modified. -
Page 15: [6.3] Lock Override Mode
USER GUIDE | USB BACKUP HSM 1. Press the button to wake the device. The LED will glow solidly. 2. Press the R + O (7 + 6) buttons together for three seconds. The green LED will blink three times. 3. Enter the User / Admin PIN and press . -
Page 16: [6.4] Diagnostic Mode
USER GUIDE | USB BACKUP HSM 1. Enter the Admin Mode. 2. Press the 7 + 0 together until the green LED blinks three times, followed by the blue LED glowing solidly. 3. To verify, unlock the device in User mode and check that the blue LED is no longer blinking. - Page 17 USER GUIDE | USB BACKUP HSM cannot recover, it must be replaced. Page of 31...
-
Page 18: Device Reset
USER GUIDE | USB BACKUP HSM [7] DEVICE RESET There may be circumstances (forgotten PIN, redeployment, return to factory default settings) when you need to completely reset the device. The complete reset feature will perform a crypto-erase on the device, generate a new encryption key, delete all users and formatting, and will return all of the settings to factory default. -
Page 19: Using With An Hsm
USER GUIDE | USB BACKUP HSM [8] USING WITH AN HSM The USB Backup HSM can be used with Vectera Plus, Excrypt SSP Enterprise V2, and Excrypt Plus HSMs, to safely store backups of keys and configuration settings, and to allow users to restore from those backups. [8.1] BACKING UP AND RESTORING DATA HSM configuration data can be backed up to the USB Backup HSM, and restored using the Backup Config and Restore Config buttons. - Page 20 USER GUIDE | USB BACKUP HSM Restoring Configuration Data To restore configuration settings into the HSM from a file: 1. Unlock the USB Backup HSM, and connect it to a computer running Excrypt Manager. 2. In Excrypt Manager, select the Maintenance tab on the left toolbar. 3.
- Page 21 USER GUIDE | USB BACKUP HSM Restoring Keys If restoring from a file saved on the USB Backup HSM, click the Restore Keys button to load keys into the HSM from a file saved on the USB Backup HSM. 1. Unlock the USB Backup HSM, and connect it to a computer running Excrypt Manager. 2.
-
Page 22: Using With A Kmes, Rkms, Or Guardian
1. Unlock the USB Backup HSM, and insert it into one of the USB ports on the rear of the unit. NOTE: It will take approximately 20 seconds for the device to detect the USB Backup HSM. Before conducting a database backup, ensure that the USB Backup HSM has a sufficient amount of free space for the operation. - Page 23 USER GUIDE | USB BACKUP HSM NOTE: When a backup or restore operation is performed, the system will automatically perform a file integrity check. If any invalid or corrupt data is detected, the restore operation will fail and there will be a user notification of the failure. ...
-
Page 24: [9.3] Saving Exported Logs
7. Click the OK button to begin exporting the filtered logs. After saving, a window will appear with a status bar and the message Report succeeded. It is now safe to remove the USB Backup HSM. Page of 31... - Page 25 USER GUIDE | USB BACKUP HSM NOTE: The reports export to the USB Backup HSM in .txt file format unless the Comma Separated Values checkbox is enabled. Export Device Trace Logs In order to export trace logs for other devices that the server manages, verify that USB Backup HSM is unlocked and connected, and follow the steps below.
-
Page 26: Appendix A: Led States
USER GUIDE | USB BACKUP HSM APPENDIX A: LED STATES State Description Slow fading Battery charging (when plugged into USB port) No LEDs Key locked and asleep Blinking Error / incorrect key entry; mode not available; user PIN change Solid Locked / Standby state; awaiting PIN entry Blinking green Waiting for a new user or Admin PIN to be established... -
Page 27: Appendix B: Programming Key Combinations
USER GUIDE | USB BACKUP HSM APPENDIX B: PROGRAMMING KEY COMBINATIONS Standby Mode Keys Mode 7 + 6 Read-only on 7 + 9 Read-only off + 1, then hold 0 Diagnostic mode User Mode Keys Mode + 1 Enter user PIN (from forced enrollment state) + 3 Set self-destruct PIN Admin Mode Keys... - Page 28 USER GUIDE | USB BACKUP HSM Keys Mode 7 + 9 Read-only off 7 + 8 Erase user and self-destruct PINs 0 + 1 Set forced-enrollment for user 0 + 3 Turn on LED flicker when entering PIN from standby 0 + 4 Turn off LED flicker when entering PIN from standby Page of 31...
-
Page 29: Appendix C: Troubleshooting Faq
USER GUIDE | USB BACKUP HSM APPENDIX C: TROUBLESHOOTING FAQ Q: What can I do if I forget the User PIN? A: Use the Admin PIN to enter the Admin Mode and create another User PIN or (if programmed at configuration) utilize one of the data recovery PINs programmed into the device to create a state of User forced enrollment. -
Page 30: Appendix D: Xceptional Support
Extremely knowledgeable subject matter experts At Futurex, we strive to supply you with the latest data encryption innovations as well as our best-in-class support services. Our Xceptional Support Team goes above and beyond to meet your needs and provide you with exclusive services that cannot be found anywhere else in the industry. - Page 31 ENGINEERING CAMPUS 864 Old Boerne Road Bulverde, Texas, USA 78163 Phone: +1 830-980-9782 +1 830-438-8782 E-mail: info@futurex.com XCEPTIONAL SUPPORT 24x7x365 Toll-Free: 1-800-251-5112 E-mail: support@futurex.com SOLUTIONS ARCHITECT E-mail: solutions@futurex.com...
Need help?
Do you have a question about the USB Backup HSM and is the answer not in the manual?
Questions and answers