
Summary of Contents for EDER Maschinenbau ESG-A56
- Page 1 Original 310003_04 | 06.2019 Operating Instructions EDER Forestrytools Motorised handheld device for working logs and wood...
-
Page 2: Table Of Contents
Content About this guide ..............3 Validity ................3 Warranty ................3 Presentation of the warning notes ........4 Symbols used in this manual ..........5 Safety instructions ..............5 Intended use ..............6 Improper use ..............6 Qualification of the personnel ..........6 Points to observe .............. - Page 3 Filling up with fuel ............19 Starting the engine ............20 Switching off the engine ........... 24 Operation ................25 Operation at temperatures below +10 °C ......26 Changing and adjusting the knives ........26 Cleaning ................35 Maintenance ................ 36 Maintenance schedule .............
-
Page 4: About This Guide
Validity These instructions apply to the Eder attachment set for debarking and milling tree trunks and wood in the following variants: EDER Bark Stripper Set ESG-A56 EDER Flat Planer Set EPH-A56 EDER Curved Planer Set ERH-A56 EDER Contour Planer Set EKH-A56... -
Page 5: Presentation Of The Warning Notes
Guarantee The warranty period shall be 24 months from the date of delivery for exclusively private use, and 12 months for commercial or professional use or application or for rental. The statutory warranty remains unaffected. Warranty claims must always be proven by the buyer by means of the original purchase receipt. -
Page 6: Symbols Used In This Manual
The signal words have the following meaning: Warning Meaning word DANGER! Indicates a hazard that will certainly lead to death or serious injury if you do not avoid the danger. WARNING! Indicates a hazard that can lead to death or serious injury if you do not avoid the danger. -
Page 7: Intended Use
Intended use The motorised handheld device is a machine that consists of a drive motor that may be combined with various attachments. You may only use the motorised handheld device for the activities described in this manual. The motorised handheld device is approved for use in forestry and for private use. -
Page 8: Points To Observe
Points to observe General safety instructions > Always follow the instructions in this manual to avoid hazards and prevent damage. > Observe the relevant accident prevention regulations and other generally recognised safety and occupational health rules. > Only carry out repair, set-up, maintenance and cleaning work and transport the device when the drive is switched off and the tool is stationary. -
Page 9: Behaviour In An Emergency
Behaviour in an emergency If, for example, malfunctions or dangerous situations pose an immediate risk of injury to persons or damage to the device: > Switch off the device to which the attachment is mounted. > Have the malfunctions eliminated by your specialist dealer. Safety devices The device may only be used with the protective and safety equipment (e.g. -
Page 10: Design And Function
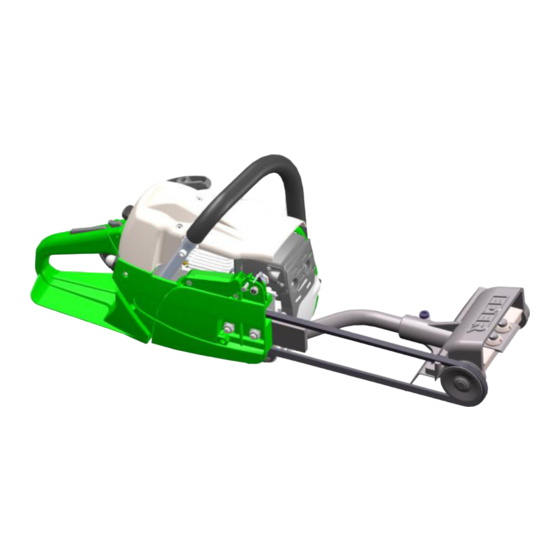
Design and function Fig. 1 : Overview of the drive motor Hand guard and V-belt brake Silencer operating lever Front handle Engine starter handle Air filter cover Fuel filler cap Primer Stop switch Position A : Cold start Position B : Operation Position C : Stop Throttle handle Throttle trigger... -
Page 11: Function
The individual attachments can be exchanged for another attachment in a few easy steps. EDER Bark Stripper Set ESG-A56 Field of application: For peeling logs of any diameter. The design of the cylinder results in high cutting performance with minimum effort. - Page 12 EDER Curved Planer Set ERH-A56 Field of application: For planing round, flat or curved wood surfaces up to 30 cm diameter. The design of the cylinder results in high cutting performance with minimum effort. The knives mounted on the rotating cylinder are continuously adjustable, allowing you to set both the cutting radius and the cutting depth according to the desired chip thickness.
- Page 13 EDER Carving Cutter Set ESF-A56 Field of application: For milling channels and grooves in wood surfaces, e.g. when building log houses, children's playgrounds, carving sculptures and in similar projects. The design of the milling head results in high cutting performance with minimum effort.
-
Page 14: Symbols On The Drive Motor
• 1 set of tools consisting of a combination wrench (spark plug wrench and slotted screwdriver), Allen key 6 mm, 5 mm and 4 mm, Phillips screwdriver • 1x setting gauge (ESG-A56, EPH-A56, ERH-A56, EKH-A56, ESF- A56) Eder Forestrytools 310003_04 | 06.2019... -
Page 15: Transport
• 1x groove nut wrench (EBF-A56) / 2x groove nut wrench (ERB- A56) • 1x operating instructions Check transport damage Visible transport damage can be recognized by packaging damage or by scratched and deformed parts on the device. > Be sure to make a note of the damage on the delivery note: both on the copy you receive and on the one that you must sign. -
Page 16: Assembly
ATTENTION Danger from leaking fuel! If the fuel tank inlet is not properly closed, fuel may leak and pollute the environment. > Before transportation, check whether the fuel tank inlet is correctly closed. > When transporting the device on vehicles, secure it against tipping over. -
Page 17: Mounting The Support And Cutter Head
The V-belt must always be tensioned properly. > Only use original spare parts. These can be ordered directly from Eder Maschinenbau GmbH or from your dealer (see back page for address). Mounting the support and cutter head Fig. - Page 18 Fig. 4: Mounting the support and the V-belt > Place the support (1) with the slot between the two threaded pins (2). > Place the V-belt between the V-belt pulley and the clutch drum. Fig. 5: Fastening the peeling head to the support >...
-
Page 19: Mounting The Attachment
Fig. 6: V-belt tightening screw Mounting the attachment > Insert the support (1 - Fig. 3) with the slot between the threaded pins (2 - Fig. 3). > The hole (3 - Fig.3) in the support must be located at the chain tensioner driver. -
Page 20: Filling Up With Fuel
> the V-belt brake is functional, > all knives and tools are correctly mounted and firmly seated (tightening torque 35 Nm) > the handles are clean and dry, > both the fuel tank and the device are located outside of flammable environments. -
Page 21: Starting The Engine
ATTENTION Damage to the engine by stored fuel! The fuel mixture is prone to ageing and therefore changes over time. > Mix the fuel in a container well and long. > Do not use mixtures that have been prepared for several weeks, as this could lead to engine damage. - Page 22 ATTENTION Clutch damage! If the engine is not immediately brought to minimum speed, damage to the clutch could occur. Always release the V-belt brake before starting work (see "Preparing to start the device"). > Place the motorised handheld device on the ground so that the device does not touch any foreign objects.
- Page 23 > Pull the front hand guard (Fig.7 no.1) to the rear to disengage (release) the V-belt brake. The release noise of the V-belt brake is clearly audible. > Push down the pressure relief valve push-button (Fig.7 no. 2). > When the engine is cold: Set the stop switch (6) to A (cold start). >...
- Page 24 V-belt brake Fig. 8: Engaging the V-belt brake Hand guard in "Disengaged Hand guard in "Engaged V- V-belt brake" position belt brake" position CAUTION Danger of injury due to defective braking device! The V-belt brake is subject to wear. > Have the V-belt brake checked regularly by qualified personnel to ensure the safety of the operator.
-
Page 25: Switching Off The Engine
During normal operation, the hand guard is in the position "disengaged V-belt brake". The V-belt brake is not actuated When you engage the V-belt brake, the V-belt is blocked. The tool stops immediately. You can actuate the V-belt brake manually or automatically. Actuating the V-belt brake manually >... -
Page 26: Operation
Operation WARNING Risk of injury due to unsafe standing position! There is a risk of injury if your standing position is not stable or if you work overhead. > Always take a safe and stable position. > Never work on icy or wet surfaces, as there is a risk of slipping. >... -
Page 27: Operation At Temperatures Below +10 °C
> Retighten the screw. The intake air is now preheated. Changing and adjusting the knives EDER Bark Stripper Set ESG-A56 Sharp knives are required for optimal work with the EDER Bark Stripper Set ESG-A56. Blunt knives can be sharpened manually using normal grinding wheels. - Page 28 Adjust the knives from case to case. The smaller the knife protrusion, the less wood is removed and the smoother the surface becomes. Fig. 9: Knife adjustment The tungsten carbide pins on the knife discs serve as depth limiters. All four knives must therefore have the same setting and the same distance to the carbide pins.
- Page 29 EDER Flat and Curved Planer Set EPH-A56/ERH-A56 Sharp knives are required for optimal work with the EDER Flat Planer Set EPH-A56 and the EDER Curved Planer Set ERH-A56. Blunt knives can be sharpened manually using normal grinding wheels. Cutting edge angle is 40°. Fig.
- Page 30 Fig. 11: Knife adjustment Proceed as follows for each knife: > Loosen the Allen screw of the knife with a 6 mm Allen key. > Replace the knife (2) if necessary. > Turn the cylinder (1) so that the knife protrudes at maximum through the guide plate (3).
- Page 31 Fig. 12: Cutting depths on the knife gauge The smaller the knife protrusion, the less wood is removed and the smoother the surface becomes. Fig. 13 Knife adjustment > Loosen the knife screw (1). > Push the knife (2) all the way back. >...
- Page 32 All 4 knives are exchanged and adjusted in the same way. Proceed as follows for each knife: Fig. 14: Changing the knives > Loosen the knife screw (1 - Fig.10) on the milling head (3 - Fig.10) with a 6 mm Allen key. >...
- Page 33 Fig. 15: Adjusting the guide block ATTENTION Damage to the knives! An incorrectly mounted guide block can damage the rotating knives. > Check the guide block for tight fit before each use. > Make sure that the guide block cannot touch the rotating knives.
- Page 34 Fig. 16: Replacing knives on the carving cutter > Loosen the knife screw (2 - Fig.12) slightly. > Place the knife gauge (4 - Fig.12) on the milling head (1 - Fig.12) and slide the knife (3 - Fig.12) against the gauge until it touches the notched area.
- Page 35 > Take the V-belt off. > Unscrew the V-belt pulley (1). Use pointed pliers and insert them in the side holes of the V-belt pulley. > Unscrew the short bearing shaft (3) and the long bearing shaft (2). > Remove the wire brush from the housing and unscrew the locking plate (4).
-
Page 36: Cleaning
Fig. 18: Replacing knives Cleaning WARNING Danger during maintenance, repair and cleaning work with the drive motor running! This may result in injury. Before carrying out maintenance, repair and cleaning work, switch off the drive motor and secure the device against being switched on again. -
Page 37: Maintenance
The V-belt must always be tensioned properly. > Only use original spare parts. These can be ordered directly from Eder Maschinenbau GmbH or from your dealer (see back page for address). The EDER attachments are operated with a V-belt and must therefore not be lubricated. -
Page 38: Maintenance Schedule
Maintenance schedule The listed work refers to normal operating conditions. The intervals can be adjusted according to the load. Shortening the intervals: In the case of difficult operating conditions such as: • with strongly resinous woods • very dusty working area •... - Page 39 Component Action V-belt brake Functional test Inspection by specialist dealer Fuel tank Clean Belt Check whether there is also wear Belt tension Air filter Clean Replace Cooling air Clean suction slots Cylinder ribs Clean Carburettor Check idle speed (Belt must not run) Adjust idle speed Spark plug Readjust electrode...
-
Page 40: Cleaning The Air Filter
Replace Clean Accessible Tighten screws (except adjusting screws) Functional test of the V-belt brake by specialist dealer according to the operating time: • Full time: quarterly • Part time: half-yearly • Occasional use: once a year Cleaning the air filter Fig. -
Page 41: Changing The Carburettor Filter
To remove the dust from the filter surface: > Gently tap one corner of the air filter against a solid surface. To remove the dirt from the inside: > Open the air filter in the middle. > Brush the air filter with a benzine soaked brush or clean it with compressed air. - Page 42 Fig. 20: Carburettor adjusting screws on the motorised handheld device Fig. 21: Adjusting the adjusting screws on the carburettor Required tools: • a single-D screwdriver • a device for measuring the rotational speed Carburettor adjustment at minimum > Start the engine and let it run for a few minutes. >...
-
Page 43: Replacing The Starter Cord
> Turn the adjusting screw T to set the engine to 4200 rpm. > Turn the adjusting screw L counter clockwise to set the engine to 3000 rpm. Carburettor adjustment at maximum > Start the engine and let it run for a few minutes. >... - Page 44 Fig. 23: Starting system > Using a screwdriver, remove the small spring (1), the washer (3) and the ratchet (4), then pull out the drum (2). > Remove the starter cord by unwinding it from the drum and undoing the knot. >...
-
Page 45: Replacing The Spring
Replacing the spring Fig. 24: Replacing the spring > Remove the drum as described in "Replacing the starter cord". > First remove the spring guard (7) and then the spring (8) from its seat in the housing (9). > Lubricate the spring and insert it in its seat with its spring guard (7) and washer (3). -
Page 46: Checking The Starting System
Checking the starting system (without removing the flywheel) If the device does not start up or splutters, you can check the starting system without removing the flywheel as follows: > Remove the spark plug. > Make contact between the removed spark plug and the engine body. -
Page 47: Faults
To prepare the cylinder for storage > Remove the spark plug and pour some 2-stroke oil into the cylinder. > Pull the starter cord with the engine starter handle slightly to turn the engine shaft a few times and distribute the oil in the cylinder. - Page 48 Fault Cause Elimination V-belt slips V-belt too loose Tighten the V-belt V-belt has been lubricated or Clean the V-belt and keep is soiled it free of grease and oil V-belt twisted/bounces V-belt too loose Tighten the V-belt Device head twisted Re-adjust the head on the support and tighten the Allen screw (see...
-
Page 49: Technical Data
Technical data ESG- EPH- ERH- EKH- ERB- EBFH- ESF- ETH- Technical data Dimensions 700 x 710 x 710 x 700 x 700 x 700 x 710 x 730 x (L x W x H) [mm] 235 x 235 x 235 x 235 x 235 x 235 x... -
Page 50: Accessories And Spare Parts
Accessories and spare parts Unsuitable accessories, consumables and spare parts can impair the function and safety and have the following consequences: • Danger to persons • Damage to the motorised handheld device • Malfunctions of the motorized handheld device • Failure of the motorised handheld device >... - Page 51 EDER Bark Stripper Set ESG-A56 Order no. Description Order no. Description 310007 Housing support 021100 Knife screw (4 x) 020200 Housing 021200 Allen wrench 020301 Cylinder 021300 Short bearing bolt 020400 V-belt pulley 021400 Long bearing bolt 020500 Protective plate...
- Page 52 EDER Flat Planer Set EPH-A56 Order no. Description Order no. Description 310007 Housing support 062000 Allen wrench 020200 Housing 021300 Short bearing bolt 020302 Cylinder 021400 Long bearing bolt 020400 V-belt pulley 021500 Deep groove ball bearing (2 x) 020500 Protective plate 021600 Sealing ring (2 x)
- Page 53 EDER Curved Planer Set ERH-A56 Order no. Description Order no. Description 310007 Housing support 062000 Allen wrench 020200 Housing 021300 Short bearing bolt 071600 Cylinder 021400 Long bearing bolt 020400 V-belt pulley 021500 Deep groove ball bearing (2 x) 020500 Protective plate 021600 Sealing ring (2 x)
- Page 54 EDER Contour Planer Set EKH-A56 Order no. Description Order no. Description 310007 Housing support 021100 Knife screw M8x25 (4 x) 020200 Housing 021200 Allen wrench 190300 Cylinder 021300 Short bearing bolt 020400 V-belt pulley 021400 Long bearing bolt 020500 Protective plate 021500 Deep groove ball bearing (2 x) 310006Z...
- Page 55 EDER Trough Cutter Set ETH-A56 Order no. Description Order no. Description 140100 Right milling head 021500 Deep groove ball bearing (2 x) 140200 Left milling head 021700 Circlip 021200 Allen wrench 031300 Support disc 370002 Base 031400 Shaft nut (6 x) 030500 Bearing shaft (3 x) 031500...
- Page 56 EDER Carving Cutter Set ESF-A56 Order no. Description Order no. Description 130100 Milling head with V-belt pulley 020800 V-belt 130200 Protective plate 021500 Deep groove ball bearing (2 x) 310006Z Clutch drum 021700 Circlip (2 x) 360001 Base 031300 Support disc (2 x) 130500 Bearing shaft 031400...
- Page 57 EDER Wire Brush Set ERB-A56 Order no. Description Order no. Description 310007 Housing support 021400 Long bearing bolt 020200 Housing 021500 Deep groove ball bearing (2 x) 150500 Wire brush 021600 Sealing ring (2 x) 020400 V-belt pulley 021700 Circlip (2 x) 020500 Protective plate 021800...
- Page 58 EDER Bark Beetle Cutter Set EBF-A56 Order no. Description Order no. Description 310007 Housing support 021300 Short bearing bolt 020200 Housing 021400 Long bearing bolt 091600 Cylinder 021500 Deep groove ball bearing (2 x) 020400 V-belt pulley 021600 Sealing ring (2 x) 020500 Protective plate 021700...
-
Page 59: Declaration Of Conformity
Herewith declares that the machine designated below complies with the relevant essential safety and health requirements of the EC Machinery Directive 2006/42/EC due to its design and construction. Main designation: EDER Forestrytools (Type ESG-A56) Alternative accessories: EDER Forestrytools (Type EPH-A56) - Page 60 Eder Maschinenbau GmbH Schweigerstraße 6 38302 Wolfenbüttel Germany www.eder-maschinenbau.de info@eder-maschinenbau.de...
Need help?
Do you have a question about the ESG-A56 and is the answer not in the manual?
Questions and answers