Table of Contents
Advertisement
Available languages
Available languages
Quick Links
Advertisement
Table of Contents

Summary of Contents for Brilum CALLER 40
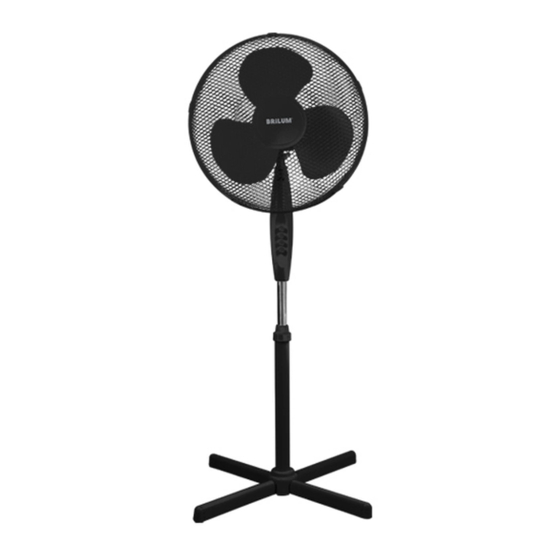
- Page 1 INSTRUKCJA MONTAŻU I EKSPLOATACJI CALLER 40 Wentylator stojący REGULACJA POBÓR MOCY KĄTA NACHYLENIA ŚREDNICA REGULACJA WENTYLATORA WYSOKOŚCI OSCYLACJA 3 OPCJE POZIOMA PRĘDKOŚCI ELUM Sp. z o.o. www.elum24.pl ul. Wilanowska 1A, 05-520 Konstancin-Jeziorna, Poland...
- Page 2 • Nie można zanurzać urządzenia ani jego części w wodzie lub w innych cieczach. • Urządzenie może być używane tylko kompletnie i prawidłowo Model CALLER 40, 45W zmontowane! W regularnych odstępach czasu należy Podczas użytkowania wentylatora, który jest urządzeniem elektrycznym, należy przestrzegać sprawdzać wszelkie połączenia śrubowe i wtykowe! Średnica wentylatora...
- Page 3 Należy je czyścić przy użyciu suchej szmatki. 4. Umieścić dolną rurę (14) na podstawie i zamocować CALLER 40 • W przypadku mocnych zabrudzeń zewnętrznych, powierzchnię za pomocą czterech dostarczonych śrub.
- Page 4 IMPORTANT SAFETY INSTRUCTIONS TECHNICAL SPECIFICATIONS Model CALLER 40, 45W Fan diameter 40 cm Basic safety precautions must be observed when using electrical devices. To avoid the danger of burns, Power 45W ± 5W electric shocks, fires and/or personal injury, please carefully read through this instruction manual before...
- Page 5 ASSEMBLY CLEANING AND MAINTENANCE Before cleaning, always switch off and unplug the 1. Take all the device components out of the packaging and device from the mains. remove all packaging material and enclosures. 2. Remove the screws from the base parts. Assemble the base •...
Need help?
Do you have a question about the CALLER 40 and is the answer not in the manual?
Questions and answers