Advertisement
HOBO® MX2300 Series Data Logger Manual
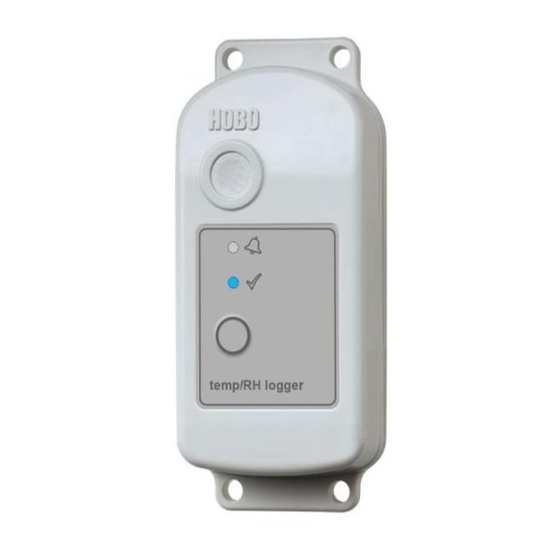
HOBO MX2300 Series
Data Logger
Models:
MX2301A, temp/RH
MX2302A, ext temp/RH
MX2303, 2 ext temp
MX2304, ext temp
MX2305, temp
Included Items:
Screws
Cable ties
Required Items:
Mobile device with
Bluetooth
HOBOmobile app for
devices with iOS
HOBOconnect app for
devices with Android™
Accessories:
Solar radiation shield
(RS3‐B for use with
MX2302A, MX2303, and
MX2304 models; RS1 or M‐
RSA for use with MX2301A
and MX2305 models)
Mounting bracket for solar
radiation shield (MX2300‐
RS‐BRACKET), for use with
MX2301A and MX2305
models
Replacement battery
(HRB‐2/3AA)
20923‐K
The HOBO MX2300 series data loggers record and transmit temperature and/or relative
humidity (RH) in outdoor or indoor environments. These Bluetooth® Low Energy‐enabled
loggers are designed for wireless communication with a mobile device. Using the HOBOmobile®
or HOBOconnect® app, you can easily configure the logger, read it out, and view data on your
phone or tablet, or export the data for further analysis. The logger can calculate minimum,
maximum, average, and standard deviation statistics and be configured to indicate alarms at
thresholds you specify. The logger also supports burst logging in which data is logged at a faster
interval when sensor readings are above or below certain limits. The Temp and Temp/RH
models have internal sensors while the External Temp/RH, External Temp, and 2x External
Temp include built‐in external sensors, offering a wide range of solutions for monitoring
temperature and RH in numerous applications.
Specifications
Temperature Sensor
Range
Accuracy
Resolution
Drift
Relative Humidity Sensor* (MX2301A, MX2302A only)
Range
Accuracy
Resolution
Drift
Response Time (typical, to 90% of change)
Temperature
MX2301A
internal sensor
MX2302A
external sensor
MX2303/MX2304
external sensors
MX2305
internal sensor
RH
MX2301A
internal sensor
MX2302A
external sensor
MX2301A and MX2305 internal sensors: ‐40 to 70°C (‐40 to 158°F)
MX2302A external temperature sensor: ‐40 to 70°C (‐40 to 158°F)
MX2303 and MX2304 external sensors: ‐40 to 100°C (‐40 to 212°F), with
tip and cable immersion in fresh water up to 50°C (122°F) for one year
±0.25°C from ‐40 to 0°C (±0.45 from ‐40 to 32°F)
±0.2°C from 0 to 70°C (±0.36 from 32 to 158°F)
±0.25°C from 70 to 100°C (±0.45 from 158 to 212°F), MX2303 and
MX2304 only
MX2301A and MX2302A: 0.02°C (0.036°F)
MX2303, MX2304, and MX2305: 0.04°C (0.072°F)
<0.01°C (0.018°F) per year
0 to 100% RH, ‐40° to 70°C (‐40° to 158°F); exposure to conditions
below ‐20°C (‐4°F) or above 95% RH may temporarily increase the
maximum RH sensor error by an additional 1%
±2.5% from 10% to 90% (typical) to a maximum of ±3.5% including
hysteresis at 25°C (77°F); below 10% RH and above 90% RH ±5% typical
0.01%
<1% per year typical
Without Solar
With RS1/M‐RSA
Radiation Shield
Solar Radiation Shield
17 minutes in air
24 minutes in air
moving 1 m/sec
moving 1 m/sec
3 minutes, 45 seconds
7 minutes, 45
in air moving 1 m/sec
seconds in air
moving 1 m/sec
3 minutes in air
7 minutes in air
moving 1 m/sec; 20
moving 1 m/sec
seconds in stirred
water
17 minutes in air
24 minutes in air
moving 1 m/sec
moving 1 m/sec
Without Solar
With RS1/M‐RSA
Radiation Shield
Solar Radiation Shield
30 seconds in air
40 seconds in air
moving 1 m/sec
moving 1 m/sec
15 seconds in air
30 seconds in air
moving 1 m/sec
moving 1 m/sec
With RS3‐B Solar
Radiation Shield
NA
6 minutes, 30
seconds in air
moving 1 m/sec
4 minutes in air
moving 1 m/sec
NA
With RS3‐B Solar
Radiation Shield
NA
30 seconds in air
moving 1 m/sec
Advertisement
Table of Contents

Summary of Contents for HH Solutions HOBO MX2300 Series
- Page 1 HOBO® MX2300 Series Data Logger Manual The HOBO MX2300 series data loggers record and transmit temperature and/or relative humidity (RH) in outdoor or indoor environments. These Bluetooth® Low Energy‐enabled loggers are designed for wireless communication with a mobile device. Using the HOBOmobile® or HOBOconnect® app, you can easily configure the logger, read it out, and view data on your phone or tablet, or export the data for further analysis. The logger can calculate minimum, maximum, average, and standard deviation statistics and be configured to indicate alarms at thresholds you specify. The logger also supports burst logging in which data is logged at a faster interval when sensor readings are above or below certain limits. The Temp and Temp/RH models have internal sensors while the External Temp/RH, External Temp, and 2x External Temp include built‐in external sensors, offering a wide range of solutions for monitoring temperature and RH in numerous applications. Specifications Temperature Sensor Range MX2301A and MX2305 internal sensors: ‐40 to 70°C (‐40 to 158°F) MX2302A external temperature sensor: ‐40 to 70°C (‐40 to 158°F) HOBO MX2300 Series MX2303 and MX2304 external sensors: ‐40 to 100°C (‐40 to 212°F), with Data Logger tip and cable immersion in fresh water up to 50°C (122°F) for one year Accuracy ±0.25°C from ‐40 to 0°C (±0.45 from ‐40 to 32°F) Models: ±0.2°C from 0 to 70°C (±0.36 from 32 to 158°F) MX2301A, temp/RH ±0.25°C from 70 to 100°C (±0.45 from 158 to 212°F), MX2303 and MX2302A, ext temp/RH MX2304 only MX2303, 2 ext temp Resolution MX2301A and MX2302A: 0.02°C (0.036°F) MX2304, ext temp MX2303, MX2304, and MX2305: 0.04°C (0.072°F) MX2305, temp Drift ...
- Page 2 HOBO MX2300 Series Data Logger Manual Specifications (continued) Logger Operating Range ‐40° to 70°C (‐40° to 158°F) Radio Power 1 mW (0 dBm) Transmission Range Approximately 30.5 m (100 ft) line‐of‐sight Wireless Data Standard Bluetooth Low Energy (Bluetooth Smart) Logging Rate 1 second to 18 hours Logging Modes Fixed interval (normal, statistics) or burst Memory Modes Wrap when full or stop when full Start Modes Immediate, push button, date & time, or next interval Stop Modes When memory full, push button, date & time, or after a set logging period Time Accuracy ±1 minute per month 0° to 50°C (32° to 122°F) Battery Type 2/3 AA 3.6 Volt lithium, user replaceable Battery Life 2 years, typical with logging interval of 1 minute and Bluetooth Always On enabled; 5 years, typical with logging interval of 1 minute and Bluetooth Always On disabled. Faster logging intervals and statistics sampling intervals, burst logging, remaining connected with the app, excessive downloads, and paging may impact battery life. Memory MX2301A and MX2302A: 128 KB (63,488 measurements, maximum) MX2303, MX2304, and MX2305: 128 KB (84,650 measurements, maximum) Full Memory Download Time Approximately 60 seconds; may take longer the further the device is from the logger ...
- Page 3 HOBO MX2300 Series Data Logger Manual 2. Open the app and enable Bluetooth in the device settings if Logger Components and Operation prompted. Mounting 3. Press the button on the logger to wake it up. Holes 4. Tap the Devices in the app. (In HOBOmobile, tap Loggers at the top of the screen.) Tap the logger in the app to connect to it. Vent If the logger does not appear or if it is having trouble connecting, follow these tips: Make sure the logger is “awake” by pressing the start button. The alarm and status LEDs will blink once when Alarm LED the logger wakes up. You can also press the button a Status LED second time to bring it to the top of the list if you are working with multiple loggers. Make sure the logger is within range of your mobile device. The range for successful wireless communication is approximately 30.5 m (100 ft) with full line‐of‐sight. Start Button If there are several loggers in the area, move the logger to a location with fewer loggers. Interference can External Sensor sometimes occur when numerous loggers are in one MX2301A model shown location. MX2303 model shown If your device can connect to the logger intermittently or loses its connection, move closer to the logger, within ...
-
Page 4: Configuring The Logger
HOBO MX2300 Series Data Logger Manual On Button Push. Logging will begin once you press the Factory Default in HOBOmobile or tap and tap Reset button on the logger for 3 seconds. in HOBOconnect.. You can also press the button on the On Date/Time. Logging will begin on a date and time you logger for 10 seconds to reset a password. specify. Select the date and time. In HOBOmobile, tap Done. Update Firmware in HOBOmobile or and then in HOBOconnect. When new logger firmware is available, Tap Done or Save. this action appears in the list. Select it and follow the 8. Tap Stop Logging and select the options for when logging instructions on the screen. A logger readout will be will end. completed automatically at the beginning of the a. Choose one of two memory options: firmware update process. If the connection is lost between the logger and the mobile device during the When Memory Fills. The logger will continue recording firmware update, a Firmware Update Pending Status data until the memory is full. displays for the logger in the Devices list. Connect to the Never (Wrap When Full). The logger will continue logger and update the firmware again (or select Restore recording data indefinitely, with newest data Logger if available in HOBOmobile). overwriting the oldest. This option is not available if the Logging Mode is set to Burst (see Burst Logging). Important: Before updating the firmware on the logger, check the remaining battery level by selecting ... -
Page 5: Setting Up Alarms
HOBO MX2300 Series Data Logger Manual available for plotting after reading out the logger. You can 8. In the configuration settings, select one of the following also set up alarms to trip when a sensor reading rises above options to determine how the alarm indications are cleared: or falls below a specified value. See Setting up Alarms for Logger Reconfigured. The alarm indication will display details on enabling sensor alarms. Note for MX2303 models until the next time the logger is reconfigured. only: The first temperature sensor listed is channel 1 and Sensor in Limits. The alarm icon indication will display the second is channel 2 (and “‐1” and “‐2” is used in the until the sensor reading returns to the normal range column headings in the data file to differentiate the two between any configured high and low alarm limits. sensors). 13. Tap Start in the upper right corner of the Configure screen 9. Tap Start in HOBOmobile or in HOBOconnect. When an alarm trips, the logger alarm LED blinks every 4 in HOBOmobile or tap in HOBOconnect. seconds (unless Show LED is disabled), an alarm icon appears in Logging will begin based on the settings you selected. Press the app, and an Alarm Tripped event is logged. The alarm state the start button on the logger if you set it up to start logging will clear when the readings return to normal if you selected with a button push. See Deploying and Mounting the Logger Sensor in Limits in step 8. Otherwise, the alarm state will for details on mounting and see Reading Out the Logger for remain in place until the logger is reconfigured. details on downloading. Notes: Alarm limits are checked at every logging interval. For Setting up Alarms ... - Page 6 HOBO MX2300 Series Data Logger Manual 4. Select Low and/or High and either type or drag the slider to logging interval. The following statistics can be logged for each set the low and/or high values. Tap Done in HOBOmobile. sensor: The maximum, or highest, sampled value, 5. Repeat step 4 for the other sensor if desired. The minimum, or lowest, sampled value, 6. Tap Done and repeat steps 4–7 for the other sensor if desired. An average of all sampled values, and 7. Set the burst logging interval, which must be faster than the The standard deviation from the average for all sampled logging interval. Keep in mind that the faster the burst values. logging rate, the greater the impact on battery life and the For example, a logger is configured with both the temperature shorter the logging duration. Because measurements are and RH sensors enabled, and the logging interval set to 5 being taken at the burst logging interval throughout the minutes. The logging mode is set to fixed logging with Normal deployment, the battery usage is similar to what it would be and all four statistics enabled and with a statistics sampling if you had selected this rate for the normal logging interval. interval of 30 seconds. Once logging begins, the logger will Tap Done in HOBOmobile. measure and record the actual temperature and RH sensor 8. Tap Done or Save. values every 5 minutes. In addition, the logger will take a temperature and RH sample every 30 seconds and temporarily 9. Tap Start in HOBOmobile or in HOBOconnect. ...
-
Page 7: Setting A Password
HOBO MX2300 Series Data Logger Manual rate for the normal logging interval. Tap Done in Logger Events HOBOmobile. The logger records the following internal events to track logger 7. Tap Done or Save. operation and status. You can view events in exported files or plot events in the app. 8. Tap Start in HOBOmobile or in HOBOconnect. To plot events in HOBOmobile, tap a mini‐graph and then tap . Select the events you want to plot and then tap Setting a Password again. You can create an encrypted password for the logger that will To plot events in HOBOconnect, tap the HOBO Files icon be required if another phone or tablet attempts to connect to it. This is recommended to ensure that a deployed logger is not and select a file to open. Tap and then tap . Select mistakenly stopped or purposely altered by others. This the events you want to plot and tap OK. password uses a proprietary encryption algorithm that changes with every connection. Internal Event Name Definition To set a password: Host Connected The logger was connected to the mobile device. 1. Tap the Devices icon (in HOBOmobile, tap Loggers at the top of the screen). Tap the logger in the app to connect to Started The logger started logging. ... -
Page 8: Battery Information
HOBO MX2300 Series Data Logger Manual side of the sensor is vertical or facing down. If the sensor impact battery life. Estimates are not guaranteed due to is being deployed in an RS3‐B solar radiation shield, uncertainties in initial battery conditions and operating mount it vertically as shown below. environment. To install or replace the battery: 1. Use a Phillips‐head screwdriver to unscrew the four screws from the back of the logger. When deploying a logger with external sensors (MX2302A, MX2303, and MX2304), mount the logger so Unscrew these four the sensor cable is not being pulled. Leave about 5 cm (2 screws to replace in.) of drip loop in the cable where it comes out of the the battery logger to prevent water from entering the logger housing. 2. Carefully separate the top and bottom of the logger enclosure. 3. Remove the old battery and insert the new battery observing polarity. It is recommended that you replace the desiccant (DESICCANT2) when replacing the battery. 4. Make sure the rubber seal is clean and free of any debris and then carefully reassemble the logger enclosure and screw in the four screws. Drip Loop WARNING: Do not cut open, incinerate, heat above 85°C (185°F), or recharge the lithium battery. The battery may explode if the logger is exposed to extreme heat or conditions ... - Page 9 HOBO MX2300 Series Data Logger Manual Federal Communication Commission Interference Statement This equipment has been tested and found to comply with the limits for a Class B digital device, pursuant to Part 15 of the FCC Rules. These limits are designed to provide reasonable protection against harmful interference in a residential installation. This equipment generates uses and can radiate radio frequency energy and, if not installed and used in accordance with the instructions, may cause harmful interference to radio communications. However, there is no guarantee that interference will not occur in a particular installation. If this equipment does cause harmful interference to radio or television reception, which can be determined by turning the equipment off and on, the user is encouraged to try to correct the interference by one of the following measures: Reorient or relocate the receiving antenna Increase the separation between the equipment and receiver Connect the equipment into an outlet on a circuit different from that to which the receiver is connected ...
Need help?
Do you have a question about the HOBO MX2300 Series and is the answer not in the manual?
Questions and answers