Table of Contents
Advertisement
Advertisement
Table of Contents

Summary of Contents for PAXSTER Hardtop
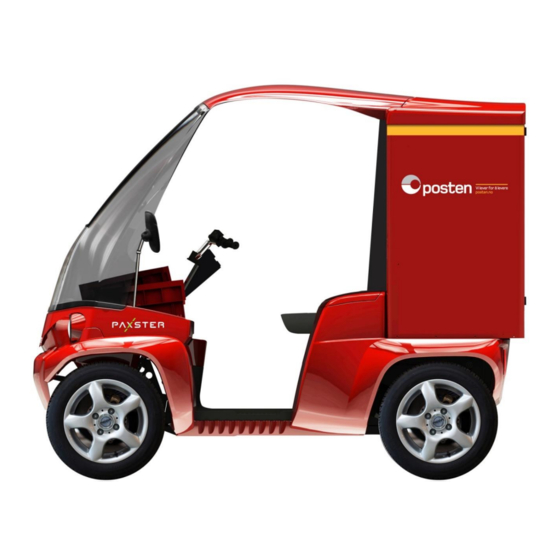
- Page 1 USER MANUAL -EN-UK- Paxster Hardtop – Generation 2.0...
-
Page 2: Table Of Contents
Table of Contents Foreword ..............................3 About this manual ........................... 3 Warranty ..............................4 Modifications ............................4 Keys ................................. 4 Vehicle Identification..........................5 Safety instructions ........................... 6 Ignition lock ............................. 6 Range and driving behavior ........................7 The batteries, the battery charger and the charging process ..............8 Instruments and switches ........................ -
Page 3: Foreword
Paxster stands out as “the ultimate electric delivery vehicle”. It is very important to us at Paxster AS that you as a delivery worker have a good and efficient work day as possible. Therefore, I hope that you will find Paxster to be a decent work tool, which will help you perform your tasks in the best way possible. -
Page 4: Warranty
Modifications Paxster is a technically advanced vehicle. If there is a need for repairs or other assessment of malfunctions, please contact your local- or national service provider printed on the back of this manual. -
Page 5: Vehicle Identification
Vehicle Identification Chassis number The vehicle’s chassis number (VIN) is engraved into the front chassis structure on the right side. The manufacturer’s data plate The manufacturer’s data plate contains the vehicle’s identification number (VIN), and type-approval. The data plate is located under the seat on the left side. Registration number The vehicle’s registration number is located below the cargo zone in the rear of the vehicle, just as on an ordinary car. -
Page 6: Safety Instructions
Safety instructions Paxster is electrically powered. This is a different technology than internal combustion engines and therefore requires a different attention. If you pay attention to the points described below, you will safeguard both yourself and the vehicle. Caution when handling charger and battery All handling of the vehicle’s battery charger shall be performed with great caution. -
Page 7: Range And Driving Behavior
By active use of the regenerative brake, you extend the vehicles range. The theoretical range of Paxster is in the interval of 40-100 km or 4-10 hours of active mail/parcel distribution. Higher speed means higher energy consumption. -
Page 8: The Batteries, The Battery Charger And The Charging Process
Tips when starting on a steep hill: • Place the vehicle in Power-mode. • Hold the rear brake (left lever) in at the same time as you turn up the throttle, then release the brake. If the vehicle is released backward before you turn up the throttle, you will use considerably more energy getting under way. - Page 9 NOTE: The charger must be plugged in to the vehicle for the battery heater to function. At temperatures above 55 degrees Celsius, the battery pack will automatically be shut off to avoid damage to the batteries and vehicle. The charger An energy-efficient, maintenance-free 230V battery charger comes with the vehicle.
- Page 10 The signals should be interpreted in the following way: 1 pulse: Pre-heating. This means that the battery is too cold, and the battery heater has been activated. The BMS system waits until the battery has reached charge temperature. 2 pulses: Pre-charge. Pre-charge is something that happens if the battery is completely discharged. In that case, you need to charge with a low current until all of the cells have reached a certain voltage.
-
Page 11: Instruments And Switches
Instruments and switches Overview of the driver’s immediate anterior environment In the figure below, you will find an overview of the main components of the driver’s environment. 1. Hand control on the left side 2. Main instrument panel 3. Control panel 4. -
Page 12: Hand Control On The Left Side
Hand control on the left side 1. Brake lever for the rear brake, also activating regenerative brake 2. Lever for temporary, hydraulic park brake. Mind using the mechanical park brake if required. 3. Container for brake fluid 4. Switch to engage reverse 5. -
Page 13: Main Instrument Panel
Main instrument panel 1. Speedometer 2. Mode selection indicator 3. Battery indicator 4. Reset button 5. Mode button 6. Warning lamps Charge indicator lamp Warning lamp, malfunction in the drive system Direction flasher indicator / warning light indicator High beam indicator NOTE: If the warning lamp for malfunctions comes on, try to turn the ignition off and on. -
Page 14: Control Panel
Control panel The WIPER switch has 3 steps: OFF/LOW SPEED/HIGH SPEED or INTERVALL/OFF/HIGH SPEED, depending on your vehicle’s equipment level. The WASHER switch activates the wind shield washer. The tank for refilling fluid is in the right side compartment next to your seat. ... -
Page 15: Parking Brakes
Parking brakes Parking brake on the handlebar WARNING: This is only to be used during short stops, where you don’t leave the vehicle. In order to engage the parking brake, press the brake handle on the left side in at the same time as the smaller lever below it is pressed away from you. -
Page 16: Driving Instructions
Driving instructions Starting Make sure that the load is adequately distributed and secured Find your correct driving position and check that your field of vision in the mirrors is correct. Activate the vehicle with the ignition key (right position - clockwise) ... -
Page 17: Cargo Zones
Cargo zones The vehicle has two loading zones, one in front of the handlebar in the driver’s cab and one in the rear in the cargo hold. The design and use of these zones varies from user to user, but it is generally advisable to load weight as low as possible in the vehicle;... -
Page 18: Do It Yourself - Maintenance
NOTE: As part of the Warranty Terms, the vehicle must undergo the mandatory semi-annual Periodic Preventive Maintenance program. It is the Buyers responsibility to book and plan such PPM with a technician authorized by Paxster AS Cleaning the vehicle Keep the vehicle clean by washing it regularly with lukewarm water and car shampoo. If there is a lot of sand and dust, rinse it off first with water so as to avoid scratches. - Page 19 Jacking points Use the indicated jacking points when the vehicle is to be jacked up. Changing direction indicator light bulbs Unscrew the small screw that sits on the rear edge of the light housing. Remove the lens To remove the old light bulb: Press the bulb in and turn to the side.
-
Page 20: Faq
In this section, information is provided about known events that have been reported to the manufacturer. Here you will find description of symptoms, and explanation of possible causes. This will make you better equipped to report any events that may occur to your servicing partner and to deal with challenges on your own. -
Page 21: Daily Check Of The Vehicle
Low main battery Symptom: Before the vehicle runs completely out of power, its performance diminishes. When the vehicle is completely out of power, you will find that it comes to a complete stop before allowing you to drive a few more metres. Thereafter the vehicle will repeatedly come to a stop before you again can drive a few metres. -
Page 22: Technical Specifications
Technical specifications Length: 2320 mm Width: 1180 mm Height: 1860 mm Loading capacity: 200 kg Range: See table on page 7 Speed: 45 km/h Category: Moped, L6e-BU Motor: 4 kW Batteries: LiFePO4 Summer tires: 145/70 R13 Winter tires: 155/70 R13... -
Page 23: Recommendation To Driver's Safety
NOTE: This rule applies in Norway at the time of writing. Paxster accepts no liability for changes in regulations. Changes to regulations may not be up-to-date in this document. Paxster also holds no liability for the translation and quotes from Norwegian to English wording of the Regulation. - Page 24 Paxster Sales & Marketing Paxster AS Bredmyra 3 N-1739 Borgenhaugen Norway Tel: +47 69 97 15 00 post@paxster.no www.paxster.no Paxster Service & Support Paxster AS Bredmyra 3 N-1739 Borgenhaugen Norway Tel: +47 47 70 11 00 support@paxster.no National / Local service provider:...
Need help?
Do you have a question about the Hardtop and is the answer not in the manual?
Questions and answers