Table of Contents
Advertisement
Quick Links
RAK8213 With Mini PCIe EVB
User Manual
Shenzhen Rakwireless Technology Co., Ltd
www.rakwireless.com
info@rakwireless.com
© 2018 Rakwireless all rights reserved .
Mentioned in this document , the actual company and product
names, trademarks are their respective owners.
After update the new version, this document without prior notice.
1
RAK8213 With Mini PCIe EVB
Copyright © Shenzhen Rakwireless Technology Co., Ltd
Advertisement
Table of Contents

Related Manuals for RAK RAK8213

Summary of Contents for RAK RAK8213
- Page 1 RAK8213 With Mini PCIe EVB RAK8213 With Mini PCIe EVB User Manual Shenzhen Rakwireless Technology Co., Ltd www.rakwireless.com info@rakwireless.com © 2018 Rakwireless all rights reserved . Mentioned in this document , the actual company and product names, trademarks are their respective owners.
-
Page 2: Table Of Contents
RAK8213 With Mini PCIe EVB Contents 1. Required materials(hardware,tools)......................... 3 2. Introduction................................4 3. Use USB Control RAK8213............................ 5 4. Use UART Control RAK8213..........................7 5. Use Hologram SIM Card to Connect Network......................9 5.1 Register Hologram............................9 5.2 Activate SIM card............................10 5.3 Send Data.............................. -
Page 3: Required Materials(Hardware,Tools)
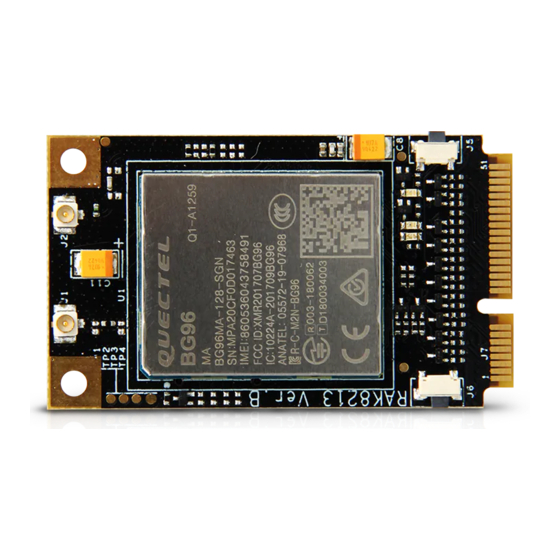
RAK8213 With Mini PCIe EVB 1. Required materials(hardware,tools) RAK8213 x1 Mini PCIe EVB x1 PC x1 Copyright © Shenzhen Rakwireless Technology Co., Ltd... -
Page 4: Introduction
RAK8213 With Mini PCIe EVB 2. Introduction This document mainly describes how to use the Mini PCIe EVB to test the RAK8213. This document may involve some information about the BG96 module. Please check the BG96 related documentation for this information. -
Page 5: Use Usb Control Rak8213
RAK8213 With Mini PCIe EVB 3. Use USB Control RAK8213 Plug the RAK8213 into the corresponding interface of the Mini PCIe EVB. Then use a Micro USB cable to connect the EVB to your computer. (Currently only supports Windows), Then, in your computer device management you can see the device shown below. - Page 6 RAK8213 With Mini PCIe EVB Send AT, the device returns OK to prove that the device is normal, detailed AT commands refer to BG96's AT manual. Copyright © Shenzhen Rakwireless Technology Co., Ltd...
-
Page 7: Use Uart Control Rak8213
RAK8213 With Mini PCIe EVB 4. Use UART Control RAK8213 Use a USB to RS232 serial cable to connect the Mini PCIe EVB to your computer.( Computer supports Windows and MAC, Linux) This device will appear in your computer's device management interface at this time.( Different... - Page 8 RAK8213 With Mini PCIe EVB Serial port settings see below ,Send AT, the device returns OK to prove that the device is normal, detailed AT commands refer to BG96's AT manual. Copyright © Shenzhen Rakwireless Technology Co., Ltd...
-
Page 9: Use Hologram Sim Card To Connect Network
RAK8213 With Mini PCIe EVB 5. Use Hologram SIM Card to Connect Network 5.1 Register Hologram Hologram is the Connectivity Platform for the Internet of Things. You can connect devices, capture data, and manage your fleet through their complete IoT platform. Here is their official website: https://hologram.io/... -
Page 10: Activate Sim Card
RAK8213 With Mini PCIe EVB 5.2 Activate SIM card After successful registration, log into your Hologram account and enter your Dashboard interface. Next you need to activate your purchased Hologram SIM card. Click on "Activate you first SIM" in the upper right. - Page 11 RAK8213 With Mini PCIe EVB After successful registration, enter the SIM card information interface. After waiting for a period of time, you will see the “Live” status. Copyright © Shenzhen Rakwireless Technology Co., Ltd...
-
Page 12: Send Data
RAK8213 With Mini PCIe EVB 5.3 Send Data Insert the card into the RAK8213's SIM card slot. Note that the default SIM card connection is the RAN8213's own card slot. Find the port number of the AT Port and use the QCOM serial port tool to connect. Then send the following AT command.( For AT command details, see the... - Page 13 RAK8213 With Mini PCIe EVB After the device is sent successfully, you can see the sent information on your interface of the Hologram Dashboard Copyright © Shenzhen Rakwireless Technology Co., Ltd...
-
Page 14: Receive Data
RAK8213 With Mini PCIe EVB 5.4 Receive Data Receiving data is similar to sending data, except that the established socket is different. The receiving data is established as a TCP server. The AT commands sent are shown below: AT+COPS=? // Find nearby network information AT+COPS=1,0,”CHINA MOBILE”,0... - Page 15 RAK8213 With Mini PCIe EVB After the Hologram Dashboard is sent, the device will receive a message of “recv, 11” indicating that the device received the data. At this time, the AT+QIRD=11,1500 command is sent to obtain the received data.
-
Page 16: Contact Information
RAK8213 With Mini PCIe EVB 6. Contact information Shenzhen Business E-Mail: ken.yu@rakwireless.com Address: Room 506, Bldg. 3, Minqi Technology Park, No.65 Taoyuan Road, Xili Block, Nanshan District, Shenzhen Shenzhen Technical E-Mail: steven.tang@rakwireless.com Tel : 0755-86108311 Address: Room 506, Bldg. 3, Minqi Technology Park, No.65 Taoyuan Road, Xili Block, Nanshan District, Shenzhen Copyright ©... -
Page 17: Change Note
RAK8213 With Mini PCIe EVB 7. Change Note Version Author Date Modify content V1.0 Chace 2018/06/25 Create Document Copyright © Shenzhen Rakwireless Technology Co., Ltd...
Need help?
Do you have a question about the RAK8213 and is the answer not in the manual?
Questions and answers