Table of Contents
Advertisement
Quick Links
Advertisement
Table of Contents

Related Manuals for Partilink GRA-H01C01


Summary of Contents for Partilink GRA-H01C01
- Page 1 HDMI2.0 to USB-C 4K Capture GRA-H01C01 User manual - English -...
-
Page 2: Table Of Contents
Introduction ......................1 Features ......................... 1 Inside the box ......................1 Specifications ......................2 System requirements .................... 3 Installation ......................3 Operating Instructions (Windows with OBS) ............3 Video Setting ....................4 Audio Setting ....................6 Operating Instructions (Mac OS with OBS) ............8 Video Setting .................... -
Page 3: Introduction
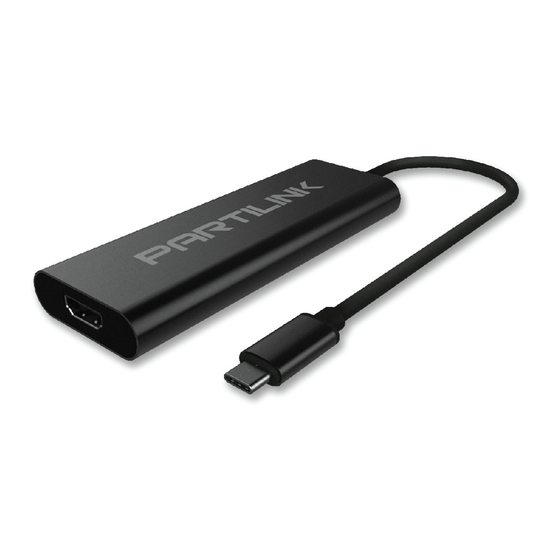
Introduction PARTILINK HDMI to USB-C 4K Capture is designed to capture 4K UHD video, allowing the user to plug-in various 4K HDMI output devices (such as PS4, XBOX, Switch, camera, etc.) and uplink 4K UHD 30Hz data to the computer through the USB terminal. -
Page 4: Specifications
Specifications MODEL NAME HDMI to USB-C 4K Grabber INPUT INTERFACE 1 x HDMI 2.0 Type A OUTPUT INTERFACE 1 x USB Type C (SuperSpeed) UVC 3840x2160p 60/50/30/25/24Hz 16:9 1920x1080p 120/60/50/30/25/24Hz 16:9 1920x1080i 60/50Hz 16:9 2560x1440p 60Hz 16:9 1280x720p 60/50Hz 16:9 720x576p 50Hz 16:9 INPUT RESOLUTION 720x576p 50Hz 4:3... -
Page 5: System Requirements
System requirements CPU: i5 Dual Core 2.8GHz or higher RAM: 4GB or higher Microsoft Windows 8.1/10 Mac OS X (10.13 and above) Installation Connect Pengo HDMI to USB-C 4K Grabber into the computer via USB 3.0 Port. Plug in your devices (ie: PS4 Pro, Xbox One X, Camcorder) with an HDMI Cable into the HDMI input port. -
Page 6: Video Setting
Download OBS Studio: https://obsproject.com/ (OBS-Studio-25.0.8-Full-Installer-x64.exe) Open OBS Studio. (version 25.0.8) 1. Video Setting 1.1 Select “Video Capture Device”... - Page 7 1.2 Select “Pengo 4K Grabber” as your device 1.3 Parameter Setting references are displayed as below *Resolution/FPS Type: Custom *Resolution: 3840x2160 *FPS: Match Output FPS (autoselect: 30) *Video Format: NV12 *Audio Device: HDMI (Pengo 4K Grabber)
-
Page 8: Audio Setting
2. Audio Setting 1.1 Click on the audio setting icon as displayed below 1.2 Select “Properties” 1.3 Under Properties: Select “HDMI (Pengo 4K Grabber)” as your device... - Page 9 1.4 Under the Audio Setting Icon: Select “Advanced Audio properties” 1.5 Under Advanced Audio Properties: Adjust your audio source to suggested preferences ( Microphone and speaker need to change the setting into Monitor and Output) 1.6 OBS Setting completed...
-
Page 10: Operating Instructions (Mac Os With Obs)
Operating Instructions (Mac OS with OBS) 1. Video Setting 1.1 Under Sources, click on the “+” icon and select “Video Capture Device” 1.2 Rename the Input Source and click OK... - Page 11 1.3 Under Properties: Select “Pengo 4K Grabber” in Device Do not click “Use Preset” and customize the configuration. *Resolution: select the best resolution possible 3840 x 2160 *FPS: Simple FPS Values 30 *Input Format: NV12...
-
Page 12: Audio Setting
2. Audio Setting 1.1 Click on the Audio Setting Icon as indicated below 1.2 Select “Properties” 1.3 Select “Pengo 4K Grabber” in Device... - Page 13 1.4 Click on the Audio Setting Icon and select “Advanced Audio Properties” 1.5 Under Advanced Audio Properties: Select “Monitor and Output” 1.6 Setting Completed Note: USB 3.0 is recommended to be connected. Different versions will have slightly different interface. ...
Need help?
Do you have a question about the GRA-H01C01 and is the answer not in the manual?
Questions and answers