Advertisement
Quick Links
Heckler AV
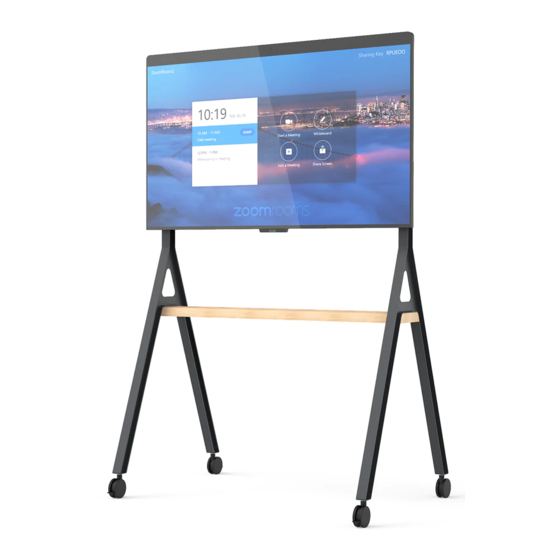
ROLLING STAND
for DTEN Board D7 55"
Assembly & Installation
Please have two people to
assemble the Rolling Stand
and to mount the display.
Compatible with
DTEN Board D7 55"
Limited Warranty
Heckler Design warrants your product hardware to be free from defects in material and
workmanship throughout the life of the product, and electronic components for a period of
one year from the original date of purchase. If you discover a defect in a product covered
by this warranty, we will repair at our option using new or refurbished components, or if
repair is not possible, replace the item. We reserve the right to request order numbers,
receipts, and other supplemental order information as proof of purchase to validate
warranty claims.
H965
Advertisement

Related Manuals for Heckler Design Heckler AV H965


Summary of Contents for Heckler Design Heckler AV H965
- Page 1 Limited Warranty DTEN Board D7 55” Heckler Design warrants your product hardware to be free from defects in material and workmanship throughout the life of the product, and electronic components for a period of one year from the original date of purchase. If you discover a defect in a product covered by this warranty, we will repair at our option using new or refurbished components, or if repair is not possible, replace the item.
- Page 2 F535 6mm Hex key F674 4mm Hex key F180 1/8” Hex Key Cable Manager Cable Tie F530...
- Page 3 F694 Flange Button Head Screws F693 Button Head Screws F534 Socket Head Screws Caster post F677 Caster...
- Page 4 F677...
- Page 5 F677 F693 F180 Please do not fully fasten screws, until after step 5...
- Page 6 F534 F535 Engage all caster brakes before installing the bracket Tightly fasten all bracket and wood shelf screws...
- Page 7 the back of the D7 Display. F694 F674 Put the D7 Display on the soft surface before installing screws Please leave some space between TV and screws keyhole and fasten screws. F674 Ensure all four screws engage the keyholes...
- Page 8 F530...
- Page 9 For any questions or issues, please contact service@hecklerdesign.com.
Need help?
Do you have a question about the Heckler AV H965 and is the answer not in the manual?
Questions and answers