Advertisement
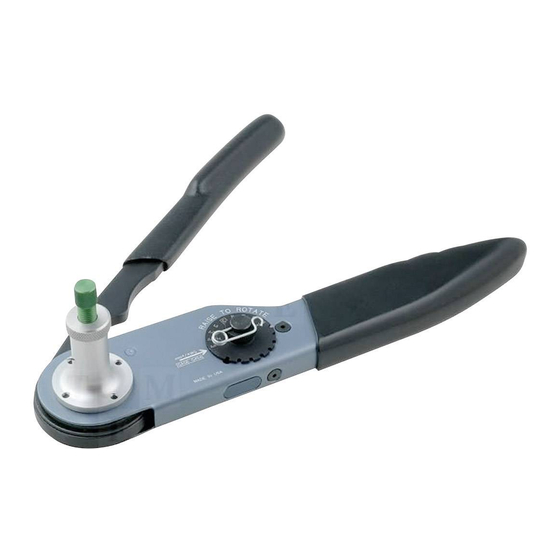
DEUTSCH Crimp Tool HDT-48-00 & DANIELS Crimp Tool AF8 M22520/1-01
Maintenance and Lubrication Guide
This guide provides the information required for basic maintenance of the DEUTSCH Crimp Tool
HDT-48-00 and & DANIELS Crimp Tool AF8 M22520/1-01 (these tools are functionally identical
for maintenance purposes) as modified by C. Davis Systems & Software, LLC's (CDSS) for use in
our GWT and LC lines of Crimping Machines.
NOTE: the DEUTSCH Crimp Tool HDT-48-00 & DANIELS Crimp Tool AF8 M22520/1-01 are hand
tools modified by CDSS for use in our our various automated Crimping Machines. Although the
tool was designed to be 'maintenance free,' the extremely high cycle counts and throughput of
automated crimping in our customer's various wire processing applications necessitate periodic
maintenance, especially cleaning and lubrication.
We recommend Krytox GPL 206 Grease for all Crimp Tool lubrication. Krytox is stable at high
temperatures, chemically inert, insoluble in most common solvents, non-flammable, and
compatible with plastics, metal, rubber and ceramics.
Advertisement
Table of Contents

Summary of Contents for DAVIS HDT-48-00
- Page 1 This guide provides the information required for basic maintenance of the DEUTSCH Crimp Tool HDT-48-00 and & DANIELS Crimp Tool AF8 M22520/1-01 (these tools are functionally identical for maintenance purposes) as modified by C. Davis Systems & Software, LLC's (CDSS) for use in our GWT and LC lines of Crimping Machines.
- Page 2 Step 1: Disassembly & Cleaning of the Deutsch HDT-48-00 To disassemble the DEUTSCH HDT-48-00 or DANIELS AF8 M22520/1-01, you will first need to remove it from the crimp head itself. Start by removing the funnel jaws: first remove the Funnel Jaw Strap (or shoulder-bolts on some models), and then lift the law assemblies off of their dowel pins.
- Page 3 Step 2: Cleaning and Lubrication of the DEUTSCH HDT-48-00 & DANIELS AF8 M22520/1-01 Carefully clean all the various components, paying special attention to the Lever Arm, Indenter Housing, Indenters and Springs ans the various shim plates, using a solvent like rubbing alcohol alcohol being sure to remove all old grease, and any debris or particulate.
- Page 4 After the Indenter Assembly is reinstalled in the lever arm, reinstall the Indenter Housing Plates on both sides of the assembly: The DEUTSCH HDT-48-00 or DANIELS AF8 M22520/1-01 Crimp Tool assembly is is now ready for lubrication. Apply fresh Krytox Grease to the Indenter cams, the Indenter springs, and the...
- Page 5 Step 3: Reassembly of the DEUTSCH HDT-48-00 or DANIELS AF8 M22520/1-01 Crimp Tool After completing cleaning and lubrication, you are ready to Reassemble the Crimp Tool. Reassembly of the tool is moderately difficult, and requires care and a steady hand.
- Page 6 Now, carefully insert Crimp Depth Arm by sliding it between the Arm/Indenter Assembly and the Tool Body on the side of the tool with the Crimp Depth Gauge. While sliding the Depth Arm into place you must hook the Depth Gauge Spring into the recess on the Crimp Depth Arm: At this point the Tool should be largely assembled, with alignment and orientation held by the Torx Bolts.
- Page 7 Now that the tool is reassembled you can reinstall the Positioner Body and Positioner After reassembly, cycle the crimp tool manually to confirm function. The tool should articulate freely, the ratchets should engage and disengage smoothly, and the the crimp depth selector should function as before.

Need help?
Do you have a question about the HDT-48-00 and is the answer not in the manual?
Questions and answers