
Related Manuals for Concierge ACMG10

Summary of Contents for Concierge ACMG10
- Page 1 User Guide: Room Booking Display Panels: - ACMG10 - ACMG22 - ACMG15 Room Booking Media Players: - ACMGMP Concierge Displays Pty Ltd | conciergedisplays.co D OC/1be7r9T6Xcw0SbgMacvjMVGsMd0TCGvsPhFCM3dvHdoA Updated October 2020 -...
-
Page 2: Table Of Contents
4.4.1. Using the QR Code Feature for Contactless Control 4.5. B OOKING INTO THE FUTURE 3 3 4.6. R EPORT FAULT 3 5 4.6.1. R eporting a fault 3 5 4.6.2. C learing a fault 3 5 Concierge Displays Pty Ltd | conciergedisplays.co... - Page 3 5.2.4. F ully unattended OTA (“over-the-air”) update (firmware and software) (since rev. 922) 3 8 5.2.5. C URL application 3 8 5.2.6. D isplay the Panel In A Browser (Remote Browsing) 3 9 Concierge Displays Pty Ltd | conciergedisplays.co...
-
Page 4: About This Guide
ABOUT THIS GUIDE Thank you for purchasing a Room Booking Display Panel or Player from Concierge Displays. The primary purpose of this guide is to provide some quick-start steps to get you up and running in the shortest time possible, however it does include some advanced configuration and ongoing general usage information. -
Page 5: Powering On
2. THE INSTALLATION SCREEN 2.1. AUTOMATIC VERSUS MANUAL NETWORK INSTALLATION During boot-up, you will briefly see a Splash Screen with some details like the Concierge IP address. You will then see the I nstallation screen (below). If your network provides automatic configuration you should see this success message:... -
Page 6: Manual Network Installation
R e-test configuration . When the network connection has been successfully tested, the screen will look like this: Concierge Displays Pty Ltd | conciergedisplays.co... -
Page 7: Update Network Settings
URL displayed. You may use your desktop, phone or any other device/tablet. If you wish to return to the Installation Screen at any time during your use of the Concierge Admin website simply press the R eset Config button under the C onfiguration tab. -
Page 8: Navigating The Admin Website
The last part of the address (the last 4 digits after the colon) is the relevant port number. NOTE : Concierge will reveal its IP address temporarily on boot-up when the Splash Screen appears. The default username/password is a dmin/admin . It’s recommended you choose your own. - Page 9 A base skin for the panel. Drop-down menu selection Your selection will typically depend on the number of resources that need to be displayed. Select between Room booking (low density, for when just a few are Concierge Displays Pty Ltd | conciergedisplays.co...
- Page 10 POST endpoint address. The G roup f ield allows enter group/network name general identification purposes. Proxy The P roxy sub-area holds Text a dvanced HTTP/HTTPS proxy-specific configuration, including Password. Concierge Displays Pty Ltd | conciergedisplays.co...
- Page 11 C ategories subsection. Categories contains up/down arrow buttons that UDP port : Concierge will allow you to change the position of T oken elements listen on a port and receive packets with data in the form in the display list, a plus %message%...
- Page 12 Remember Note that after you have that the alternating colours added 4 resources you are (blue and orange) at the side of the entries are designed Concierge Displays Pty Ltd | conciergedisplays.co...
-
Page 13: Changing The Logo Or Skin
Admin website and alter the available fields. The B ase skin and C ustom skin package o r logo URL fields are located toward the top of the Configuration menu (see below). Concierge Displays Pty Ltd | conciergedisplays.co... - Page 14 Once the logo/skin has been downloaded to the panel/player, it will remain in place until a new URL is specified. It’s best for the logo to be supplied as PNG f ormat. View the display skins library and their custom skin package URL on the Concierge Website, https://conciergedisplays.co/display-skins/ Simply copy and paste the URL into the section above.
-
Page 15: Adding Resources In The Configuration Menu
4. Enter the Connector username & C onnector p assword . T hese should be the same credentials u sed to access the mailbox or resource calendars, or to gain access to any Outlook Web portals. Concierge Displays Pty Ltd | conciergedisplays.co... -
Page 16: Google-Based Accounts
To begin adding a resource, navigate to the C onfiguration menu and scroll down to B ooking resources . Click the + i con on the far right-hand side of the submenu title. A form with input fields will appear. Concierge Displays Pty Ltd | conciergedisplays.co... -
Page 17: Accessing Your Google Calendar Id
UR OGLE LENDAR The C onnector resource address f ield in the Concierge admin website needs to be filled with your Google Calendar ID. Please access your Calendar ID using the following steps. 1. Go to h ttps://calendar.google.com... -
Page 18: Authenticating Google Apps
2. Select the relevant element under M y Calendars (eg. M eeting Room 1 ) . 3. Select S ettings and sharing . 4. Copy your Calendar ID a nd paste it into C onnector resource address i n the Concierge admin website. -
Page 19: Working With Booking Resource Defaults
Google will provide you with a sign in-code. Copy and paste it into the P aste code here f ield. If the above combination of settings has been entered properly, Concierge will display the occupancy status of the room and operate using a sensible set of parameters. - Page 20 To begin working with B ooking resource defaults in the Concierge admin website, check the Advanced c heck box next to the S ave button, at the bottom of the C onfiguration menu. Several new sections, including B ooking Resource Defaults, w ill appear in the C onfiguration menu (see below).
-
Page 21: Navigating Booking Resources (And Defaults) Within The Configuration Menu
) . For S QL include the value of the 'resource' .google.com field. Alternative calendar A calendar folder to use instead of the standard mailbox 'Calendar' folder. Enter the display name. Concierge Displays Pty Ltd | conciergedisplays.co... - Page 22 Use a single space to use a blank title. Normally Concierge will hide the booking information of privately flagged meetings. Disallow Cancel Now : Disables the C ancel Now functionality...
- Page 23 8, 10, 12, 16 & 20 person rooms. Show private fields Normally Concierge hides the booking information of privately flagged meetings. Use this setting to override that behaviour and reveal the information. Use a single space to use a blank title (otherwise '(title suppressed)' will be used).
-
Page 24: Navigating The Status Menu
The A ctivity s ection includes dynamic technical counters and other panel usage metrics. For example, there are counters providing information about the number of ungraceful shutdowns, multi-layer Booking Connector issues, Connector queries, etc. Concierge Displays Pty Ltd | conciergedisplays.co... -
Page 25: Navigating The Resources Menu (Scientia Connectors Only)
The R esources section contains one sub-area, R esource addresses, w ith a list of read-only fields. It is designed to be used in conjunction with connectors for Scientia Publishing only. Concierge Displays Pty Ltd | conciergedisplays.co... - Page 26 C onnector address e ntry for a Scientia booking in the C onfiguration menu. The N ame f ield (eg. “AL_AlfredCtr/Lv5_CompLab [14]”) will reflect what is recorded in the Description field (eg. “AL_Alfred Centre, Computer Lab, Level 5”). Concierge Displays Pty Ltd | conciergedisplays.co...
-
Page 27: Enabling The Qr Code Feature For Contactless Control
For more information please see 5 .1. Scientia Publishing (since rev. 1120) . 3.8. ENABLING THE QR CODE FEATURE FOR CONTACTLESS CONTROL Concierge Companion registration is required for QR code functionality. The device must have up to date firmware. Check h ttps://conciergedisplays.co/downloads/... -
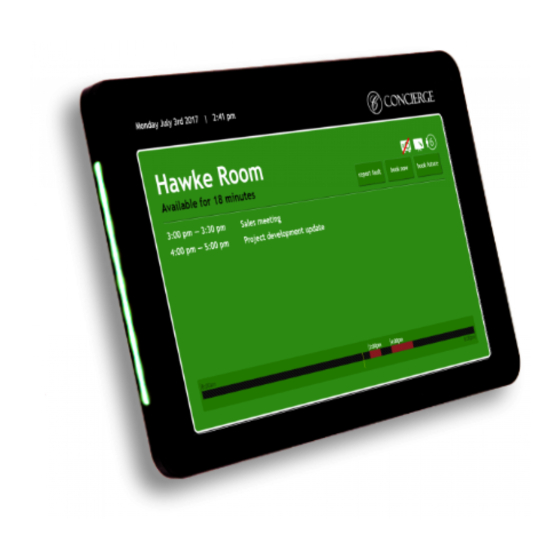
Page 28: The Panel (End-User Experience)
See Section 4.4.1 for using QR code. 4. THE PANEL (END-USER EXPERIENCE) The Concierge panel allows end users to access abundant information and valuable functionality at a click. Key displays include the R oom Status display, the R oom Features display and the ... -
Page 29: Room Features
It is shown in the top right-hand corner of the pane. The table below is an example only and not an exhaustive list of features Concierge can show in your organisation’s R oom Features display. -
Page 30: Interactive Features
A table summarising the function of panel buttons follow. All these buttons are clickable via the touch screen. Clicking B ook Now will prompt Concierge to create a new booking in the room’s calendar. Concierge will check to see if there is an overlap with future bookings and will not allow a new booking to override that. - Page 31 3.8. Enabling the QR code feature a nd S ection 4.4.1 Using the QR code for more information). All Interactive Features c an be turned on or off from the A dmin Website. Concierge Displays Pty Ltd | conciergedisplays.co...
-
Page 32: Using The Qr Code Feature For Contactless Control
. You will have a one minute window to complete the actions, there is a countdown on the top left hand corner. 3. The device will then reflect the update. Concierge Displays Pty Ltd | conciergedisplays.co... -
Page 33: B Ooking Into The Future 3
When users press B ook Future a new w indow with D ay , M onth , Y ear , T ime and M eeting Length fields will appear. Concierge makes it easy to scroll through the available timeslots and bookings lengths based on set booking parameters and pre-set subjects using the ... - Page 34 Enter a name for the booking here. This could be your name, your team’s name, a meeting agenda summary, or anything else you choose. Note that this screen also includes a T imeline showing room availability. Concierge Displays Pty Ltd | conciergedisplays.co...
-
Page 35: R Eport Fault 3
Clear faults from the S tatus p age of the Admin Website or by holding the feature icon for 10 seconds. 4.7. REBOOTING THE PANEL To reboot at any time, press the top LEFT corner of the screen and hold for 10 seconds. Concierge Displays Pty Ltd | conciergedisplays.co... - Page 36 This will instruct the connector to retrieve the list of resources. Depending on how large the list of resources is, a list will be available under the R esources t ab: Concierge Displays Pty Ltd | conciergedisplays.co...
- Page 37 Use the following command to import (push) a saved configuration: > curl http:// I P_ADDRESS : 8086/REST/config/save admin: P ASSWORD -H “Content-Type: application/json” -d @ M Y_CONFIG.JSON 5.2.3. S ( MI NATTENDED PDATE OFTWARE since rev. 420 Concierge Displays Pty Ltd | conciergedisplays.co...
- Page 38 Examples: w ill update the panel/player according to the latest firmware ota://conciergedisplays/latest and software available by Concierge Displays. w ill update the panel/player according ota://demo1companion.conciergedisplays.com.au/r922 to the revision 922 of software and firmware from a specific Companion Site (hosted internally or externally).
- Page 39 4. Enter the following address in your browser (Note: 8 085 not 8086). http:// I P_ADDRESS : 8085 5. Reboot the panel. The panel contents should now be showing in the browser connecting to the 8085 port. Concierge Displays Pty Ltd | conciergedisplays.co...
Need help?
Do you have a question about the ACMG10 and is the answer not in the manual?
Questions and answers