
Related Manuals for Meinberg ANZ14

Summary of Contents for Meinberg ANZ14
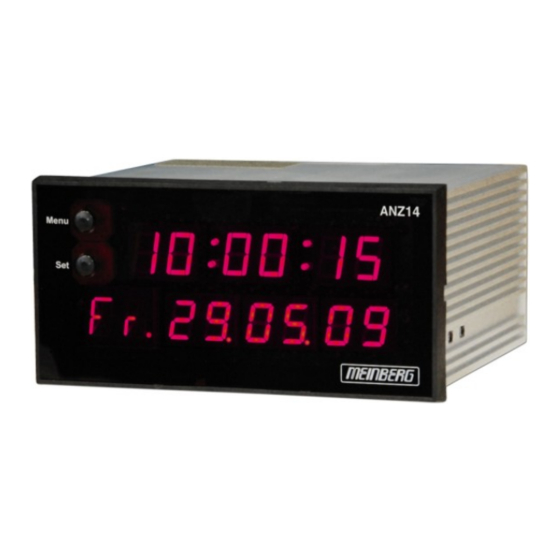
- Page 1 MANUAL ANZ14/ANZ14DCF/ANZ14NET LED Display with DCF77 or NTP Option 28th October 2019 Meinberg Funkuhren GmbH & Co. KG...
-
Page 3: Table Of Contents
2.10 Return of Electrical and Electronic Equipment ......3 Features of the ANZ14 Microprocessor System . - Page 4 ..........9.3.1 Format of the Meinberg Standard Time String ......
-
Page 5: Imprint
1 Imprint 1 Imprint Meinberg Funkuhren GmbH & Co. KG Lange Wand 9, 31812 Bad Pyrmont / Germany Phone: + 49 (0) 52 81 / 93 09 - 0 Fax: + 49 (0) 52 81 / 93 09 - 230 Internet: https://www.meinbergglobal.com... -
Page 6: Safety Hints
Meinberg Funkuhren shall not be responsible for any damage arising due to non-observance of these regulations. -
Page 7: Used Symbols
Dieses Produkt fällt unter die B2B Kategorie. Zur Entsorgung muss es an den Hersteller übergeben werden. This product is handled as a B2B category product. In order to secure a WEEE compliant waste disposal it has to be returned to the manufacturer. ANZ14/ANZ14DCF/ANZ14NET Date: 28th October 2019... - Page 8 This manual is intended exclusively for electricians or persons trained by an electrician who are familiar with the applicable national standards and safety rules. Installation, commissioning and operation of this device may only be carried out by qualified personnel. Date: 28th October 2019 ANZ14/ANZ14DCF/ANZ14NET...
-
Page 9: Security During Installation
For safety reasons, the device with the highest mass should be installed in the lowest position of the rack. Other devices must be placed from the bottom to the top. The device must be protected against mechanical stress such as vibration or shock. ANZ14/ANZ14DCF/ANZ14NET Date: 28th October 2019... - Page 10 fluids or foreign objects enter), the current flow can be interrupted. Questions about the house installation, need to be clarified with your house administration. The power supply should be connected with a short, low-inductance line. Date: 28th October 2019 ANZ14/ANZ14DCF/ANZ14NET...
- Page 11 ANZ14/ANZ14DCF/ANZ14NET Date: 28th October 2019...
-
Page 12: Protective Conductor- / Ground-Terminal
Devices that are connected via one or more uninterruptible power supplies (UPS) remain operational even when the UPS power cord is disconnected. Therefore, you must put the UPS out of operation according to the documentation of the corresponding user documentation. Date: 28th October 2019 ANZ14/ANZ14DCF/ANZ14NET... -
Page 13: Safety During Maintenance
Risk of explosion if the battery is not replaced correctly. Replace only with the same or equivalent type recommended by the manufacturer. When disposing used batteries, observe the local regulations for the disposal of hazardous waste. ANZ14/ANZ14DCF/ANZ14NET Date: 28th October 2019... -
Page 14: Cleaning And Care
Liquid can destroy the electronics of the device! Liquid penetrates into the housing of the device and can cause a short circuit of the electronics. Only clean with a soft, dry cloth. Never use solvents or cleaners. Date: 28th October 2019 ANZ14/ANZ14DCF/ANZ14NET... -
Page 15: Prevention Of Esd Damage
ESD protective covers, which are extremely wrinkled or even have holes, no longer protect against electrostatic discharge. ESD protective covers must not be low-resistance and metallically conductive if a lithium battery is installed on the assembly. ANZ14/ANZ14DCF/ANZ14NET Date: 28th October 2019... -
Page 16: Return Of Electrical And Electronic Equipment
Return and Collection Systems For returning your old equipment, please use the country-specific return and collection systems available to you or contact Meinberg. The withdrawal may be refused in the case of waste equipment which presents a risk to human health or safety due to contamination during use. -
Page 17: Features Of The Anz14
Baudrate, framing and time zone can be condigured separately by menu and two front panel buttons. It is also possible to use the ANZ14 as a display for a preconnected clock. In this case the partially equipped version without DCF77 receiver is sufficient. -
Page 18: Display
3.5 Serial Interface The ANZ14 provides two serial ports which can either be used as RS232 or RS422 interfaces. The COM0 interface provides an RS422 output, COM1 provides an RS422 input. On this way, a ANZ14 with DCF receiver can synchronize an additional ANZ14 without receiver. -
Page 19: Anz14 (Dcf Option)
4 ANZ14 (DCF Option) 4.1 General Information about DCF77 The radio remote clocks made by Meinberg receive the signal from the long wave transmitter DCF77. This long wave transmitter installed in Mainflingen near Frankfurt/Germany transmits the reference time of the Federal Republic of Germany. -
Page 20: Dcf77 Receiver
After the antenna has been well adjusted the modulation LED is blinking exactly once per second (except the 59th. second) and the free-run indication (a dot behind the second digits) will disappear after 3 minutes at least. Date: 28th October 2019 ANZ14/ANZ14DCF/ANZ14NET... -
Page 21: Anz14 (Net Option)
5.2 Time and Date Display with NTP synchronized Reference ANZ14/NET is a LED display with network (Ethernet) connection. It was designed to display the time (hours, minutes and seconds) as well as the date (day, month, year and day of the week). The free running clock is beeing synchronized cyclic via the network connection (RJ45 10/100MBit) by a NTP time server using the Network Time Protocol. -
Page 22: Error-Code
5.4 Network Configuration To identify the ANZ14 in the network it is neccessary to set the unique 32 bit TCP/IP address by the network administrator. Now configuration is possible by using a Telnet connection via ethernet. Initialization of the TCP/IP address for the first time may occur by two different ways: the network parameters are either given... -
Page 23: Dhcp
ARP table; the IP address must be a host other than the machine on which you are working. Once there is at least one additional entry in the ARP table, use the following command to ARP an IP address to the ANZ14: ARP on Windows: arp -s 191.12.3.77 00-20-4A-xx-xx-xx... -
Page 24: Extended Configuration Via Telnet
As soon as the network parameters of the ANZ14 module are correctly set, you can start configuring the unit by using a standard Telnet client. All you need to know is the IP address of the ANZ14 module and the correct access password. -
Page 25: Menu Option 0: Server Configuration
5 ANZ14 (NET Option) 5.7.1 Menu Option 0: Server configuration The setup of the network parameters can be altered here: IP Address : (172) .(016) .(003) .(202) Set Gateway IP Address (Y) Y Gateway IP Address : (172) .(016) .(003) .(002) -
Page 26: Menu Option 1: Security Configuration
Setting the Telnet configuration password prevents unauthorized access of the setup menu via a Telnet connection to port 9999. Default password is meinberg. To change this password enter this menu by pressing 1 and return. After the password is changed it has to be acknowledged by reentering it. -
Page 27: Menu Option 4: Reserved
NTP Client Stratum A NTP stratum can be assigned to the ANZ14. If the NTP server has a higher stratum during the request than the ANZ14, the time infomation is rejected. 5.7.8 Menu Option 7: Factory Defaults You can reset your configuration by choosing this option. -
Page 28: Snmp Reference
5.8 SNMP Reference The SNMP support of the ANZ14 module allows you to monitor the status of the switchcard and the involved radio clocks via SNMP and/or you can be notified when a number of events occur (e.g. when the unit restarts). -
Page 29: List Of Literature
5 ANZ14 (NET Option) 5.9 List of Literature [Mills88] Mills, D. L., "Network Time Protocol (Version 1) - specification and implementation", DARPA Networking Group Report RFC-1059, University of Delaware, July 1988 [Mills89] Mills, D. L., "Network Time Protocol (Version 2) - specification and implementation",... -
Page 30: Setup Menu
6 Setup Menu The front panel of the ANZ14 contains two push buttons (A+B). Pressing both buttons at the same time for at least one seconds enable the Setup Menu. This menu allows the configuraion of all the features provided by the ANZ14. -
Page 31: Language [Lg.]
The serial interface generates a time string either once per second (SEC), once per minute (60 S.) or on request only (on r.). Selection is made with B, exit and nex sub menu with A. ANZ14/ANZ14DCF/ANZ14NET Date: 28th October 2019... -
Page 32: Time String Out [Ts. 0] Or [Ts. 1]
CET (Central European Time or CET), EET (East European Time) or UTC (without DST). This setting is only relevant in the case of a DCF77-synchronized ANZ14. In case of a serial or NTP synchronized ANZ14, the received time is always passed. With pressing the button A you can enter the next submenu. -
Page 33: Ip Address [Ip] (Anz14Net Only)
6.15 Set Time This sub menu allows to set the time and the date of the ANZ14. This might be usefull when the ANZ14 is used as a free running clock without any synchronisation. Pressing button B toggles between YES and NO. The sub is left without any action if A is pressed while DO is displayed. -
Page 34: Factory Defaults [Fd]
All changes made in the setup menu have to be saved before coming into effect, so this sub menu has to be left with button A while YES is shown. If this menu is left with NO, all changes are dropped and the ANZ14 continues with the previous configuration. -
Page 35: Synchronisation Via Serial Interface
In addition to the synchronisation via the integrated DCF77 receiver it is possible to synchronize the ANZ14 V4 by a time sting from the serial port input. In this case the ANZ14 can be used as a display for a pre-connected master clock. -
Page 36: Firmware Updates
The charging process is independent of the contents of the program-memory, so if the process is interrupted in case of failure, it can easily be repeated. Date: 28th October 2019 ANZ14/ANZ14DCF/ANZ14NET... -
Page 37: Technical Specifications Anz14
9 Technical Specifications ANZ14 9 Technical Specifications ANZ14 DISPLAY: 14-digit, 13/14mm high numeric/alphanumeric LED display for time, date and day-of-week, variable brightness modulation and free running indicated by LEDs BUFFERING: In case of supply voltage failure the on-board RTC keeps the time based on XTAL for more than 150 hours (buffer capacitor) -
Page 38: Rear Panel Connectors
9.1.1 Pin Assignment of the D-SUB Connectors COM0 / COM1 1 n.c. 2 RS232: TxD 3 RS232: RxD 4 n.c. 5 GND 6 n.c. 7 RS422: A (COM0: T-, COM1: R-) 8 RS422: B (COM0: T+, COM1: R+) 9 n.c. Date: 28th October 2019 ANZ14/ANZ14DCF/ANZ14NET... -
Page 39: Rear Views
9 Technical Specifications ANZ14 9.2 Rear Views COM1 COM0 Antenne T0.2A/250V ANZ14/DCF with 240 VAC / 50-60Hz Power Supply COM1 COM0 Antenna T1A/250V ANZ14/DCF with DC Power Connector LTRX XPORT MAC Addr. xxxxxxxxxxxx COM1 Power 230V COM0 SB0.2A/250V ANZ14/NET - with Network Port (LAN-XPT) -
Page 40: Time Strings
9.3 Time Strings 9.3.1 Format of the Meinberg Standard Time String The Meinberg Standard Time String is a sequence of 32 ASCII characters starting with the STX (start-of-text) character and ending with the ETX (end-of-text) character. The format is: <STX>D:dd.mm.yy;T:w;U:hh.mm.ss;uvxy<ETX>... -
Page 41: Format Of The Uni Erlangen String (Ntp)
9 Technical Specifications ANZ14 9.3.2 Format of the Uni Erlangen String (NTP) The time string Uni Erlangen (NTP) of a GPS clock is a sequence of 66 ASCII characters starting with the STX (start-of-text) character and ending with the ETX (end-of-text) character. The format is: <STX>tt.mm.jj;... - Page 42 ‘E’ east of Greenwich ‘W’ west of Greenwich hhhh altitude above WGS84 ellipsoid in meters leading signs are replaced by a space character (20h) —————————————————————————————————– <ETX> End-Of-Text, ASCII Code 03h Date: 28th October 2019 ANZ14/ANZ14DCF/ANZ14NET...
-
Page 43: Format Of The Atis Standard Time String
9 Technical Specifications ANZ14 9.3.3 Format of the ATIS standard Time String The ATIS standard Time String is a sequence of 23 ASCII characters terminated by a CR (Carriage Return) character. The format is: <GID><ABS><TSQ><CC><CS><ST>yymmddhhmmsswcc<GID><CR> The letters printed in italics are replaced by ASCII numbers whereas the other characters are part of the time string. -
Page 44: Format Of The Sysplex-1 Time String
(00..23) minutes (00..59) seconds (00..59, or 60 while leap second) Quality indicator (space) Time Sync (GPS lock) (?) no Time Sync (GPS fail) <CR> Carriage-return (ASCII code 0Dh) <LF> Line-Feed (ASCII code 0Ah) Date: 28th October 2019 ANZ14/ANZ14DCF/ANZ14NET... -
Page 45: Format Of The Sat Time String
9 Technical Specifications ANZ14 9.3.5 Format of the SAT Time String The SAT Time String is a sequence of 29 ASCII characters starting with the STX (start-of-text) character and ending with the ETX (end-of-text) character. The format is: <STX>dd.mm.yy/w/hh:mm:ssxxxxuv<ETX> The letters printed in italics are replaced by ASCII numbers whereas the other characters are part of the time string. -
Page 46: Format Of The Spa Time String
(00..59) seconds (00..59, or 60 while leap second) fff milliseconds (000..999) Checksum. EXCLUSIVE-OR result of the previous characters, displayed as a HEX byte (2 ASCII characters 0..9 or A..F) <CR> Carriage Return ASCII Code 0Dh Date: 28th October 2019 ANZ14/ANZ14DCF/ANZ14NET... -
Page 47: Format Of The Computime Time String
9 Technical Specifications ANZ14 9.3.7 Format of the Computime Time String The Computime time string is a sequence of 24 ASCII characters starting with the T character and ending with the LF (line feed, ASCII Code 0Ah) character. The format is: T:yy:mm:dd:ww:hh:mm:ss<CR><LF>... -
Page 48: Format Of The Nmea 0183 String (Rmc)
(01..31) month (01..12) year of the century (00..99) magnetic variation checksum (EXOR over all characters except ‘$’ and ‘*’) <CR> Carriage Return, ASCII Code 0Dh <LF> Line Feed, ASCII Code 0Ah Date: 28th October 2019 ANZ14/ANZ14DCF/ANZ14NET... -
Page 49: Declaration Of Conformity
10 Declaration of Conformity 10 Declaration of Conformity Konformitätserklärung Doc ID: ANZ14/ANZ14DCF/ANZ14NET-2014-06-20 Hersteller Meinberg Funkuhren GmbH & Co. KG Manufacturer Lange Wand 9, D-31812 Bad Pyrmont erklärt in alleiniger Verantwortung, dass das Produkt, declares under its sole responsibility, that the product...
Need help?
Do you have a question about the ANZ14 and is the answer not in the manual?
Questions and answers