
Related Manuals for Powis Parker Foilfast 21

Summary of Contents for Powis Parker Foilfast 21
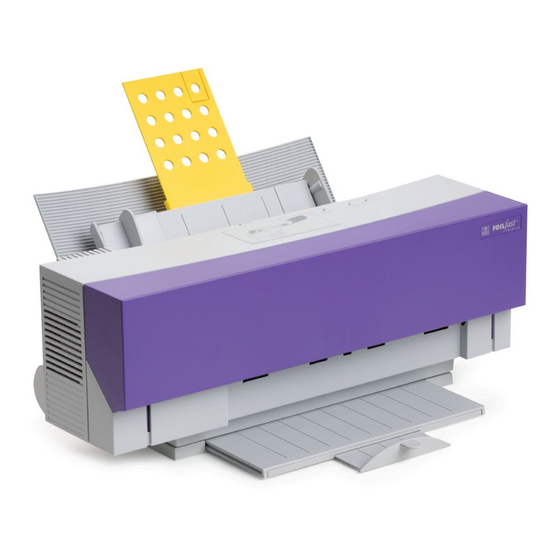
- Page 1 Powis Foilfast 21 Printer User's Manual Provided By http://www.MyBinding.com http://www.MyBindingBlog.com...
- Page 2 F O I L F A S T ® P R I N T E R M O D E L 2 1 U S E R ’ S M A N U A L...
- Page 3 SOFTWARE. You may not transmit the SOFTWARE over a network, by telephone, or electronically by any means. RIGHTS IN SOFTWARE. All rights and title in and to the SOFTWARE and any copies thereof are owned by Powis Parker or its suppliers. This Agreement is not a sale and does not transfer to you any title or ownership interest in or to the SOFTWARE or any patent, copyright, trade secret, trade name, trademark or other intellectual property right therein.
- Page 4 No change to this Agreement shall be valid unless in writing and signed by the party against whom enforcement is sought. The waiver or failure of Powis Parker or you to exercise in any respect any right or rights provided for herein shall not be deemed a waiver of any further right hereunder.
- Page 5 Declaration of Conformity Model Number: Foilfast™ Printer Trade Name: Powis Parker Inc. Responsible party: 775 Heinz Avenue Berkeley, CA 94710 USA Address: Telephone number: (800) 321-2463 This device complies with Part 15 of the FCC Rules . Operation is subject to the f o llow-...
- Page 6 IMPORTANT SAFETY INSTRUCTIONS 1. Read all of these instructions and save them for future reference. 2. Follow all warnings and instructions marked on the product. 3. Unplug this product from its power source before cleaning. Do not use liquid or aerosol cleaners.
-
Page 7: Table Of Contents
Table of Contents Service, Support and Supplies ............ 7 Product Label ................8 Chapter 1 Major Functions and Operations ........9 Getting Your Foilfast Printer Ready ..........10 Getting Your Printer Ready ................10 Removing the outside packing materials ............... 10 Opening the front cover .................. - Page 8 Contents of the Installation Disc ..............46 Installing the Printer Driver ................46 Using Balloon Help ..................47 Selecting the Powis Parker Foilfast Printer Driver .......... 47 Turning the Power On and Off ............49 Turning on the Power ..................49 Turning off the Power ..................
- Page 9 Chapter 2 Printer Driver ..............63 WINDOWS: Printer Driver Setup ........... 64 How to Open the Printer Driver Setup Dialog Box ......... 64 Print Settings ................. 65 MACINTOSH: Printer Driver Functions ........... Using the Chooser ..................68 Page Setup Dialog Box .................. 71 Print Dialog Box .....................
- Page 10 If you have any comments, please contact the Fastback dealer from whom you pur- chased the Foilfast printer. To locate your local Fastback dealer, call us at 1-800-321- BIND. We thank you very much for your purchase. And we hope you enjoy using your Foilfast printer. Sincerely, Powis Parker Inc.
-
Page 11: Service, Support And Supplies
If at any time, you would like technical assis- tance, ser vice or supplies , your Fastback® dealer is a vailable to help y ou. To locate your Fastback dealer, call Powis Parker customer ser vice at 1-800-321- BIND. -
Page 12: Product Label
Product Label The label for this product can be found in the location shown below: Location of Label... -
Page 13: Chapter 1 Major Functions And Operations
Chapter 1 Major Functions and Operations Learn the Major Functions and Operations of Your Foilfast Printer This chapter descr ibes how to set up y our printer, the name of each par t of your printer and how it functions, how to insert the cartridges and cover sheets, and how to install the pr inter driver software. -
Page 14: Getting Your Foilfast Printer Ready
Chapter 1 - Major Functions and Operations Getting Your Foilfast Printer Ready Set up your Foilfast printer by performing the following steps: • Get your printer ready. Remove the packing materials. • Connecting cables. Connect the printer to your computer with a printer cable and to a suitable AC power source with the power cord. -
Page 15: Removing The Carriage Packing Material
WINDOWS & MACINTOSH – Getting Your Printer Ready Front cover release button Front cover Make sure nothing is under the cover. Removing the carriage packing material There are three (3) items to be removed from the inside of the printer. 1.Remove the cardboard carriage packing material that is to the left of the car- riage. -
Page 16: Closing The Front Cover
Chapter 1 - Major Functions and Operations Caution Do not remove the white pad or the cleaning pad at the left end of the platen. They are there to clean the print head. Removing them can cause the printer to malfunction. The cleaning pad can be replaced when it gets dirty. -
Page 17: Using The Dust Cover
WINDOWS & MACINTOSH – Getting Your Printer Ready Using the Dust Cover Use the dust cover when the printer is idle and when using Composition Covers. How to assemble the Dust Cover Assemble the dust cover as shown below. Bend the incised part Bend the incised part inside as shown in the inside as shown in the... -
Page 18: Connecting Cables For Windows
Chapter 1 - Major Functions and Operations Connecting Cables for Windows When your printer is properly set up, connect the printer to your computer with a printer cable and to a suitable AC power source with the power cord. • Connect the printer to your computer. •... -
Page 19: Power Cord Connections
WINDOWS – Getting Your Printer Ready Power cord connections Plug the power cord into the power cord socket on the printer. Make sure the power cord is securely seated in the socket. Plug the free end of the power cord into a suitable AC power source (such as a wall socket or power strip). -
Page 20: Connecting Scsi Cables For Macintosh
Chapter 1 - Major Functions and Operations Connecting SCSI Cables for Macintosh When your printer is properly set up, connect the printer to your Macintosh with a SCSI cable, and to a suitable AC power source with the power cord. •... - Page 21 MACINTOSH – Getting Your Printer Ready How to remove the Macintosh interface module 1) Turn off the power to your printer, computer, and all SCSI de vices connected. Unplug the power cord from the power source and the printer. 2) Remove the Macintosh interface module by gently pulling the plastic handle at the bottom of the module as sho wn in the picture and lifting the module away from the printer.
-
Page 22: Power Cord Connections
Chapter 1 - Major Functions and Operations Check the SCSI device number Make sure the de vice number for the pr inter is set correctly . Each SCSI de vice connected to the computer m ust ha ve a unique SCSI de vice number. If tw o devices ha ve the same device number, they will not work properly. -
Page 23: Connecting Usb Interface Cables For Macintosh
MACINTOSH – Getting Your Printer Ready Connecting USB Interface Cables for Macintosh When your printer is properly set up, connect it to your computer with a universal serial bus (USB) interface cable, and to a suitable AC power source with the power cord. -
Page 24: Power Cord Connections
Chapter 1 - Major Functions and Operations Caution Do not plug the USB cable directly into the iMac keyboard. The USB port on the keyboard does not supply its own power, so the combined current drain of the printer and the keyboard might exceed USB specifications. -
Page 25: Name And Function Of Each Printer Part
WINDOWS & MACINTOSH – Name and Function of Each Part of the Printer Name and Function of Each Part of the Printer This section explains the name and function of each printer part. Foilfast Printer (front view) Sheet feeder Place a stack of 10 Foilfast Composition Cov- ers or 1 Foilfast ClearCover into the sheet feeder. -
Page 26: Foilfast Printer (Rear View)
Chapter 1 - Major Functions and Operations Foilfast Printer (rear view) Accessory connector This connector is for the Macintosh interface module. Make sure you remove the rectangu- lar plastic connector cover before connecting the interface module. Parallel interface connector The printer cable plugs into the parallel inter- face connector. -
Page 27: Inside The Foilfast Printer
WINDOWS & MACINTOSH – Name and Function of Each Part of the Printer Inside the Printer Marking sticker This allows you to confirm that the carriage is in the standard position. Try not to smear the face of the sticker. If it gets dirty, gently clean it with a dry cotton swab. -
Page 28: Control Panel
Chapter 1 - Major Functions and Operations Control Panel The top of the printer has two buttons and three LED indicator lights. By pushing one of these buttons and looking at the lights, you can perform various printer functions, such as ejecting a sheet. power button Use the power button to turn the printer on and off. -
Page 29: Installing Foil Cartridges
WINDOWS & MACINTOSH – Installing Ink Cartridges Installing Cartridges This section describes how to identify cartridge types and how to install and exchange cartridges. Identifying Foil Cartridge and Cover Types The cartridge type is indicated on the surface of each cartridge. The product name appears in this area. -
Page 30: Installing Cartridges
Chapter 1 - Major Functions and Operations Installing Cartridges Install cartridges by following the steps below. Note The carriage can select and pick up the necessary color car- tridge from any holder. You can put up to 7 cartridges of the same color in the holders to reduce the need to change car- tridges, or you may load different color cartridges. - Page 31 WINDOWS & MACINTOSH – Installing Ink Cartridges Insert the cartridges. • Hold the cartridge so that the side with the letter “B” faces upward, and the “B” is on the upper right of the cartridge. Hold the center of the cartridge with your thumb and index finger.
-
Page 32: Exchanging Cartridges
Chapter 1 - Major Functions and Operations Exchanging Cartridges You can change or replace empty cartridges by following the steps below. Note When a cartridge has been used up, black and silver stripes will be visible on the foil. black and silver stripes Open the front cover of the printer. -
Page 33: Loading Sheets
(.0065 – .0075 inches). Covers that fall outside the bounds of these thickness ranges may work in the Foilfast printer, but Powis Parker does not recommend using them. Covers that fall substantially beyond these thickness ranges may damage... - Page 34 Chapter 1 - Major Functions and Operations Adjust the feed guide to the proper size. Leave about 0.02” between the edge of the sheet(s) and the feed guide. The stopper will prevent the sheets from rising. Stopper Feed guide Note •...
-
Page 35: Installing The Printer Driver For Windows
WINDOWS – Installing the Printer Driver for Windows Installing the Printer Driver for Windows Before you can use your printer, you need to install the printer driver software so that your computer can work with the printer. This section describes how to install the printer driver. Purpose of the Printer Driver The printer driver software helps to control the printing process, so the printer driver you select must match the printer you ’... -
Page 36: Turning The Power On And Off
Chapter 1 - Major Functions and Operations Turning the Power On or Off Turn your printer and computer on or off by following the steps described below. Turning on the Power Turn on the power by performing the following steps. Push the power button on the printer to turn it on. -
Page 37: Printing Operations
WINDOWS – Printing Operations Printing Operations Print Mode Foilfast premium foil cartridges come in a range of colors. You may load several colors into the F oilfast pr inter at the same time , or y ou may load just a single color. -
Page 38: Single Ink Printing (One Foil Color)
Chapter 1 - Major Functions and Operations Single Foil Printing Single Ink pr inting uses just one color . This method is used when an entire image or document is going to be printed in a single color. This method of pr inting can be used e ven when the application y ou are using does not allow designation of color compositions. - Page 39 WINDOWS – Printing Operations Step 3❿ Load Cover Sheets Load up to 10 composition covers; ClearCovers must be fed one at a time. Pull up the support. Support Place the sheet(s) in the sheet feeder. Note • Using creased or curled sheets can cause the sheet to misfeed.
- Page 40 Chapter 1 - Major Functions and Operations Note • If the space is too wide, a sheet may feed diagonally. • If the space is too narrow, a sheet may not feed. Step 4❿ Set Up the Printer Driver for Printing Select Print from the File menu to open the Print dialog box, then click Properties.
- Page 41 WINDOWS – Printing Operations Select Single Ink from the Print Mode menu (for single foil color printing). Click the appropriate radio button to select the cartridge(s) you wish to use.
- Page 42 Chapter 1 - Major Functions and Operations Set the size, orientation, and number of copies as desired. When you complete the setup, click OK to close the dia- log box. Step 5❿ Print Click OK in the Print dialog box to start printing.
-
Page 43: Multiple Ink Printing (Multiple Foil Colors)
WINDOWS – Printing Operations Multiple Foil Printing Use the steps outlined belo w for pr inting with tw o or more colors . Designate each foil color with a corresponding color in y our application. You can use this method with most applications that support color. Requirements For multiple foil color printing you will need the following. - Page 44 Chapter 1 - Major Functions and Operations The colors associated with foil colors are shown in the following table. Colors used to indicate foil colors In multiple color printing, indicate foil colors by selecting colors in the ap- plication that resemble the foil colors. As much as possible, try to select colors that resemb le the foil colors to be printed.
- Page 45 WINDOWS – Printing Operations 3❿ ❿ Step Load Sheets Load up to 10 composition covers; ClearCovers must be fed one at a time. Pull up the support. Support Place the sheet(s) in the feeder. Note • Using creased or curled sheets can cause a sheet to misfeed. •...
- Page 46 Chapter 1 - Major Functions and Operations Note • If the space is too wide, a sheet may feed diagonally. • If the space is too narrow, a sheet may not feed. Step 4❿ Set Up the Printer Driver for Printing Select Print from the File menu to open the Print dialog box, then click Properties.
- Page 47 WINDOWS – Printing Operations Select Multiple Ink from the Print Mode menu. Check the check boxes under Select Cartridge(s) to indi- cate your desired colors. Note Even though you have set the color of an area to your de- sired color, the area will not be printed if the corresponding color foil cartridge has not been checked.
- Page 48 Chapter 1 - Major Functions and Operations Set the size, orientation, and number of copies as desired. When you complete the setup, click OK to close the dia- log box. Step 5❿ Print Click OK in the Print dialog box to start printing.
-
Page 49: Installing The Printer Driver For Macintosh
MACINTOSH – Installing the Printer Driver for Macintosh Installing the Printer Driver for Macintosh Before you can use y our printer, you need to install the pr inter driver software so that your computer can work with the printer. This section descr ibes how to install the printer dr iver. These directions assume that you are f a miliar with normal Macintosh operations, such as using the mouse and men u s. -
Page 50: Contents Of The Installation Disc
Chapter 1 – Major Functions and Operations Contents of the Installation Disc The files shown below are contained on the Installation Disc (CD-ROM). The installer installs the following files: • Foilfast printer driver • USB Class Driver (USB equipped system only) •... -
Page 51: Using Balloon Help
Select Hide Balloons from the Help menu. Selecting the PPI Foilfast™ Printer Driver If you want to print using the Powis Parker Foilfast Printer, you should select the Powis Parker Foilfast Printer printer driver in the Chooser bef o re you create docu- ments in your application. - Page 52 Click on the close box to close the Chooser. When the selected printer driver is changed from some other printer driver to the Powis Parker Foilfast printer driver, a dia- log box will appear to inf orm you that a diff erent printer has been selected.
-
Page 53: Turning The Power On And Off
MACINTOSH – Turning the Power On or Off Turning the Power On or Off Turn your printer and computer on or off by following the steps described below. Turning on the Power Turn on the power by performing the following steps. Push the power button on the printer to turn it on. -
Page 54: Printing Operations
Chapter 1 – Major Functions and Operations Printing Operations Print Mode Foilfast premium foil cartridges come in a range of colors. You may load several colors into the F oilfast printer at the same time , or y ou may load just a single color. -
Page 55: Single Ink Printing (One Foil Color)
MACINTOSH – Printing Operations Single Ink Printing Single Ink printing uses just one color . This method is used when an entire image or document is going to be printed in a single color. This method of pr inting can be used e ven when the application y ou are using does not allow designation of color compositions. - Page 56 Chapter 1 – Major Functions and Operations Step 3❿ Load Cover Sheets Load up to 10 composition covers; ClearCovers must be fed one at a time. Pull up the support. Support Place the sheet(s) in the feeder. Note • Using creased or curled sheets can cause the sheet to misfeed.
- Page 57 MACINTOSH – Printing Operations Note • If the space is too wide, a sheet may feed diagonally. • If the space is too narrow, a sheet may not feed. Step 4❿ Set Up the Printer Driver for Printing Select Page Setup from the File menu to open the Page Setup dialog box.
- Page 58 Chapter 1 – Major Functions and Operations Select your cover type from the Media menu. Select Single Ink from the Mode menu. In the Select Cartridge(s) area, click the radio button(s) next to the colors you wish to use.
- Page 59 MACINTOSH – Printing Operations Select Options and number of copies as desired. When you complete the setup, click Print to close the dia- log box. 5❿ ❿ Step Print Click Print in the Print dialog box.
-
Page 60: Multiple Inks Printing (Multiple Foil Colors)
Chapter 1 – Major Functions and Operations Multiple Foil Printing Use the steps outlined belo w for using tw o or more f oil car tridges. Designate each foil color with a corresponding color in y our application. You can use this method with most applications that support color. - Page 61 MACINTOSH – Printing Operations The application colors associated with f o il colors are sho wn in the f o llowing table. Colors used to indicate foil colors In multiple foil color printing, indicate colors by selecting colors in the ap- plication that resemble the foil colors.
- Page 62 Chapter 1 – Major Functions and Operations Step 3❿ Load Sheets Load up to 10 composition covers; ClearCovers must be fed one at a time. Pull up the support. Support Place the sheet(s) in the sheet feeder. Note • Using creased or curled sheets can cause a sheet to misfeed. •...
- Page 63 MACINTOSH – Printing Operations Note • If the space is too wide, a sheet may feed diagonally. • If the space is too narrow, a sheet may not feed. Step 4 Set Up the Printer Driver for Printing Select Page Setup from the File menu to open the Page Setup dialog box.
- Page 64 Chapter 1 – Major Functions and Operations Select your cover type from the Media menu. Select Multiple Inks from the Mode menu. In the Select Cartridge(s) area, click the radio buttons next to the colors you wish to use. Note Even though you have set the color of an area to your de- sired color, the area will not be printed if the corresponding cartridge has not been checked.
- Page 65 MACINTOSH – Printing Operations Click Preview in the Print dialog box to confirm that the specified foil colors are correct. The Pre view windo w sho ws the f oil colors that will actually print rather than those specified by the application. Caution The foil color that is assigned may differ from your intended foil color, so be sure to check the Preview window before printing.
- Page 66 Chapter 1 – Major Functions and Operations...
-
Page 67: Chapter 2 Printer Driver
Chapter 2 The Foilfast Printer Driver Printer Driver Functions This chapter describes each of the pr i nter driver settings required for controlling the printing operations. Read it to learn the specific setup details f or different printing modes. -
Page 68: Windows: Printer Driver Setup
• Select Page Setup from the File men u. Click Printer in the P age Setup dialog box, and then click Properties in the displayed dialog box. Note To access the Foilfast printer properties controls, you must first select the Powis Parker Foilfast Printer as the printer you wish to use. -
Page 69: Print Settings
WINDOWS – Print Settings Print Settings Media (Cover) Type Click the down arrow, and select the desired media type from the displayed settings. The available options are as follows: • Foilfast Comp Cover – HIGH • Foilfast Comp Cover – HIGH •... - Page 70 Chapter 2 - Foilfast Printer Driver Orientation This setting sets the sheet orientation. • Portrait/Landscape Click one of the radio buttons to set the orientation to either Portrait or Landscape. • Flip Horizontal Turning on this option prints an image flipped hori- zontally, the mirror image of the document as it dis- plays on your screen.
- Page 71 • Close button Click Close button to close the Show Detail dialog box. Powis Parker Foilfast Information dialog box Click the Show Status … button while holding do wn the Ctrl and Alt k eys to see the R OM version number EEPROM version number, your printer’s serial number and the n um-...
-
Page 72: Macintosh: Printer Driver Functions
Finder or from within an application. When you use the Powis Parker Foilfast for the first time, or when you switch to the Foilfast after using another printer, use the Chooser to select the ne w printer. - Page 73 Selecting the Port The SCSI or USB de vice number of the Powis Parker Foilfast printer is displayed in the upper right portion of the Chooser window, after you select (click) the PPI Foilfast driver on the left side. When more than one Foilfast printer is connected to the SCSI or USB b us, select the de vice number for the printer you want to use.
- Page 74 Chapter 2 - Foilfast Printer Driver Background Printing If you installed the Queue Kit softw are, you can enab le or disable background printing through the Chooser . In the Chooser , select the P owis Parker Foilfast printer in the Background Printing section, select the On r adio button to enable background pr inting or the Off b utton to disab le it.
-
Page 75: Page Setup Dialog Box
MACINTOSH – Printer Driver Functions Page Setup Dialog Box Select Page Setup from the File menu. The Foilfast Page Setup dialog box ap- pears. Size From the Siz e menu in the P age Setup dialog bo x, you can select one of the following page sizes: •... - Page 76 Chapter 2 - Foilfast Printer Driver To create a ne w page siz e, click “New”, enter a ne w name, height, and width, then click Add. The new page size will appear in a list in the left por tion of the window.
-
Page 77: Print Dialog Box
MACINTOSH – Printer Driver Functions Print Dialog Box Select the Print from the File menu. The Foilfast Print dialog box appears. Note When you select Print from the File menu, the Print dialog box may display not only the Foilfast settings but also additional settings specific to the application you are using. - Page 78 Chapter 2 - Foilfast Printer Driver Mode Select the desired print mode from the displayed settings. • Single Ink (one foil color) This pr int mode allo ws you to pr int a document in monochrome using one cartridge. All selectable cartridges are shown with radio buttons in the Select Cartridge(s) area in Pr int/properties.
- Page 79 MACINTOSH – Printer Driver Functions Undercoat (check box) The pr imer car tridge will be used when this chec kbox is chec ked. The pr imer cartridge is required when printing on ClearCovers, and it may improve the print quality on other print media. The default setting is Undercoat off. Double Pass Printing (check box) When using sheets with a rough te xture, you may want to chec k Double Pass Printing to increase the density of the f oil.
- Page 80 Chapter 2 - Foilfast Printer Driver To create a ne w custom co ver type, choose one of the f actory standard co ver types and select the desired settings bef ore clicking the User Defined b utton. Adjust Micro F eed and Density if necessar y. Then, enter y our cover type and click Add.
- Page 81 MACINTOSH – Printer Driver Functions Refresh button Click the Refresh button to refresh and update the latest printer status. Print Click Print to start printing according to the current print settings. Cancel Click Cancel to discard the changes and close the Print dialog box. Preview In the Print dialog box, click Preview to display an image of the page e xactly as it will print.
-
Page 82: Using Background Printing
Chapter 2 - Foilfast Printer Driver Using Background Printing This section explains how to use background printing for Macintosh operating systems 7.6.1 or ear lier. If y our Macintosh is r unning on System 7.6.1 or later , the standard desktop printer will be used for background printing. - Page 83 MACINTOSH – Using Background Printing Note • When the printer software is first installed, background print- ing is off. Once you have turned background printing on through the Chooser, it remains on until you use the Chooser to turn it off again. •...
- Page 84 Chapter 2 - Foilfast Printer Driver When the Queue Monitor windo w is displa yed, selecting Close from the File menu hides the window. Preferences settings To display the Queue Monitor Pref e rences dialog box, bring the Queue Moni- tor to the front (click on its window or choose Queue Monitor from the appli- cation menu) and then choose Pref erences from the Queue Monitor ’s File menu.
- Page 85 MACINTOSH – Using Background Printing Queue Monitor Window The Printing box displays the name of the document currently printing, while the Waiting box displays the names of waiting documents, in the order in which they will print. The current print job and any of the print jobs in the queue can be cancelled by clicking on the Cancel Pr i nting button.
-
Page 86: Error Display
Chapter 2 - Foilfast Printer Driver Error Display When the printer settings are invalid or when printing stops for some reason, an error message is displayed. If an error message appears while you are changing printer settings, correct the settings according to the error message. If an error message occurs while pr inting, refer to the “Troubleshooting”... -
Page 87: Appendix
Appendix The Appendix describes maintenance and troubleshoot- ing procedures, and the basic specifications of the pr inter. - Page 88 Appendix Cleaning the Foilfast Printer We recommend that you clean this printer periodically to ensure satisfactory long term operation. Cleaning the Printer Follow the cleaning steps described below. Unplug the printer. Make sure you unplug the printer before cleaning it. Clean the outside of the printer.
-
Page 89: Cleaning The Printer
WINDOWS & MACINTOSH – Cleaning the Printer Caution Brush very gently around electrical components, and be careful not to leave any brush hairs on or near these components. Cleaning the Print Head Follow the steps below, using isopropyl alcohol and a cotton swab. Caution •... - Page 90 Appendix Cleaning the Platen Use cellophane tape to clean the platen as described below. Caution Make sure to unplug the printer before cleaning it. Press the front cover release button and gently lower the front cover. Gently apply the tape to dirty spots on the platen, and rub your finger over the tape.
-
Page 91: Cleaning The Platen
WINDOWS & MACINTOSH – Cleaning the Printer Cleaning the Feed Roller Use isopropyl alcohol and a cotton s wab to clean the f eed roller as descr ibed below. Caution: • Do not use benzene, thinner, or other volatile materials, as they may damage the printer components. -
Page 92: Indicator Lights Summary
Appendix Indicator Lights Summary Normal Printing Mode Indicator light status = on = fast blinking = slow blinking = off Alarm status shown by indicator lights e l i The printer is out of sheets Out of sheets (detected during sheet feed) Sheet jam A sheet jam was detected The foil in the cartridge has been... -
Page 93: Troubleshooting
WINDOWS & MACINTOSH – Troubleshooting Troubleshooting What to do if a cartridge is stuck in the carriage Remove the cartridge as follows: Turn off the power. Open the front cover and remove all cartridges on the cartridge holder plates. Close the front cover, and turn on the power. The carriage will reset. -
Page 94: Ready /Insert Button Functions
Appendix The ready/insert button The ready / insert button is used f o r a variety of functions, depending on the pr i nter status. The functions during normal printing are described below. • Sheet feed and eject Sheet feed When the sheet is not fed ( error light is blinking), press the ready / insert button to feed the sheet. -
Page 95: Clearing Sheet Jams
WINDOWS & MACINTOSH – Troubleshooting Clearing Sheet Jams Follow these steps to clear a sheet jam. Press the power button to shut off the power. Press the front cover release button and gently open the front cover. Press the release lever and gently pull out the jammed paper. -
Page 96: Troubleshooting For Windows
Appendix Troubleshooting for Windows When problems occur during operation of the printer, please check the following troubleshooting tips. Power does not come on ............... Printer errors cannot be detected by the printer driver or the printer driver cannot tell which cartridge is in which holder ......Printer does not print or stops while printing ........ - Page 97 WINDOWS – Troubleshooting 3. Printer does not print or stops while printing Is the printer turned on? Before printing make sure the printer is turned on. Is the front cover closed properly? Make sure that the front cover is closed properly. Is the ready light off? Press the ready/insert button and make sure that the ready light comes on.
- Page 98 Appendix Is the foil in one of the cartridges all used up? When the foil in a cartridge has been spent, black and silver stripes will be visible on the r ibbon. Install a new cartridge. After replacing the car tridge, printing will continue from where it left off.
- Page 99 WINDOWS – Troubleshooting Are you using many applications at one time? When very little memory is available for print processing, printing may take a long time or fail. Close as many applications as possible and try again. Do you have enough memory? Handling color images requires a lot of memory for the application and for the data.
- Page 100 – .0075 inches). Covers that fall outside the bounds of these thic k ness ranges may w ork in the F oilfast printer, b ut Powis Parker does not recommend using them. Covers that f all substantially be yond these thic kness ranges may damage the printer's feeding mechanism and may void your warranty.
- Page 101 WINDOWS – Troubleshooting Has a cartridge become dislodged from a cartridge holder? Open the front cover and make sure the cartridges are correctly installed. Is there sheet caught between the platen and the print head? See the section “Clearing sheet jams” and remove the sheet. 8.
- Page 102 Appendix 10. Print Quality There may be superfluous foil on the surface of the sheet after foil printing. Gently wipe the superfluous foil with a Kleenex or soft cloth. When using sheets with a rough te xture, you may want to chec k Double Pass Printing to increase the density of the f oil.
-
Page 103: Troubleshooting For Macintosh
MACINTOSH – Troubleshooting Troubleshooting for Macintosh When problems occur during printer operation, please check the f o llowing trouble- shooting tips. Power does not come on ..............During installation a “File not found” error occurs or the installer is not found ..............The icon does not appear in the Chooser ........ - Page 104 Appendix 2. During installation a “File not found” error occurs or the installer is not found Is At Ease installed? If you are using At Ease when y ou place the Installation Disc in the CD- ROM drive, the following things may happen. (Some of the P erforma series start up in At Ease.) •...
- Page 105 MACINTOSH – Troubleshooting Is the SCSI cable loose? Make sure the SCSI cab le connectors are fir mly attached at both ends using the fastening screws or clasps. Is the SCSI device number set correctly? Make sure the SCSI device number for the printer is not the same as that used by any other SCSI device attached to the computer.
- Page 106 Appendix Is there a jam? Remove the sheet. If the sheet is caught in the rollers , open the front co ver, push down on the release lever, and gently remove the sheet. Are the settings in the application correct? Recheck the printer settings in the application.
- Page 107 MACINTOSH – Troubleshooting Is the platen dirty? Clean the platen by following the directions in this guide . If anything is stuck to the platen, remove it, being careful not to damage the platen. The platen often gets dirty at the same time as the head so it is recommended to clean the platen as well as the head.
- Page 108 – .0075 inches). Covers that fall outside the bounds of these thic k ness ranges may w ork in the F oilfast printer, b ut Powis Parker does not recommend using them. Covers that f all substantially be yond these thic kness ranges may damage the printer's feeding mechanism and may void your warranty.
- Page 109 MACINTOSH – Troubleshooting If the sheet is not f ed even by pressing the ready/insert button, the sheet feed roller may be dirty. Clean the feed rollers by following the procedures described below. (1) Turn off the printer. (2) The feed rollers are f a cing the cork pieces on the sheet f e ed tray, one on the left, and two on the right as you face the front cover.
- Page 110 Appendix Is the printer in a place where it is subject to bumps or vibrations? Bumps and vibrations can cause mechanical prob lems. Place the printer in a place free from vibrations and bumping. Is the front cover properly closed? The printer will not operate correctly if the front co ver is not closed proper ly.
- Page 111 MACINTOSH – Troubleshooting The F oilfast w orks best with F oilfast br anded co vers. Other co vers ma y work, but some may not be compatible. 13. Connection Method Can I connect multiple printers to a single computer? If different SCSI device numbers are used, m ultiple printers can be connected to a single Macintosh.
-
Page 112: Specifications
Appendix Specifications General Specifications Name Foilfast™ Printer Print head 240 dot Printing speed 20 cps equivalent (When printing 10-cpi text) Resolution 600 dpi Printing area 7.43” x 12.93” maximum Sheet feed method Friction feed Page width 3.85” minimum x 9” maximum Page length 3.85”... -
Page 113: Dip Switches
WINDOWS & MACINTOSH – Specifications DIP Switches DIP switches are used to set the SCSI ID number. 1 2 3 4 The following summarizes the settings for each SCSI device number. SCSI No. No. 0 No. 1 No. 2 No. 3 No. -
Page 114: Available Supplies
SCSI Interface for Macintosh USB Interface Kit for iMac and Windows 98 For complete document finishing, ask y our dealer about F astback document binding and the PowisPrinter . To locate the Fastback dealer nearest you, call Powis Parker at ™ 1-800-321-BIND.
Need help?
Do you have a question about the Foilfast 21 and is the answer not in the manual?
Questions and answers