Table of Contents
Advertisement
Quick Links
Advertisement
Table of Contents

Related Manuals for Galaxy Hunter Series

Summary of Contents for Galaxy Hunter Series
- Page 1 Hunter Series Network Video Recorder Quick Start Guide V1.0.1...
-
Page 2: Foreword
Foreword General This manual introduces the functions and operations of the NVR devices (hereinafter referred to be "the Device"). Safety Instructions The following categorized signal words with defined meaning might appear in the manual. Signal Words Meaning Indicates a high potential hazard which, if not avoided, will result in death or serious injury. - Page 3 updates might cause some differences between the actual product and the manual. Please contact the customer service for the latest program and supplementary documentation. There still might be deviation in technical data, functions and operations description, or errors in print. If there is any doubt or dispute, please refer to our final explanation. ...
-
Page 4: Important Safeguards And Warnings
Important Safeguards and Warnings Thank you for purchasing our Network Video Recorder (NVR). This manual will help you become familiar with our NVR in a short time. Please read the manual carefully before starting using your NVR and properly keep it for future reference. Operating Requirement ... -
Page 5: Table Of Contents
Table of Contents Foreword ..............................I Important Safeguards and Warnings ....................III 1 Quick Start ............................. 1 1.1 Checking the Components ......................1 1.2 Installing HDD ..........................2 2 The Grand Tour ............................6 3 Connection ............................. 9 4 Local Configurations .......................... 10 4.1 Booting Up ........................... -
Page 6: Quick Start
Quick Start The Device does not support wall mount. Checking the Components When you receive the Device, please check against the following checking list. If any of the items are missing or damaged, contact the local retailer or after-sales engineer immediately. Checking items Requirement Appearance... -
Page 7: Installing Hdd
Installing HDD For the first time installation, check whether the HDD has been installed or not. We recommend to use HDD of enterprise level or surveillance level. It is not recommended to use PC HDD. Shut down the NVR and unplug the power cord before opening cover to replace the HDD. ... - Page 8 Figure 1-4 Remove HDD bracket (8-HDD) Step 4 Match the four screw holes on the HDD with the four holes on the bracket and then fasten the screws. The HDD is fixed to the bracket. Figure 1-5 Fix the HDD (1) Step 5 Refer to Step 4 to install other HDDs.
- Page 9 Figure 1-7 Lock two HDD brackets Step 7 Place the bracket to the device and then fasten the screws on the sides of the bracket. Figure 1-8 Fasten HDD bracket Step 8 Connect the HDD data cable and power cable to the device. Figure 1-9 takes 4-HDD device as an example.
- Page 10 Figure 1-10 Complete installation Error! Use the Home tab to apply 标题 1,l1,H1,Title1,Normal + Font: Helvetica,Bold,Space Before 12 pt,Not Bold,Heading One,h1,Head1,Head,1,Numbered,nu,Level 1 Head,1st level,Section Head,Sec1,h11,1st level1,h12,1st level2,h13,1st level3,h14,1st level4,h15,1st leve 5...
-
Page 11: The Grand Tour
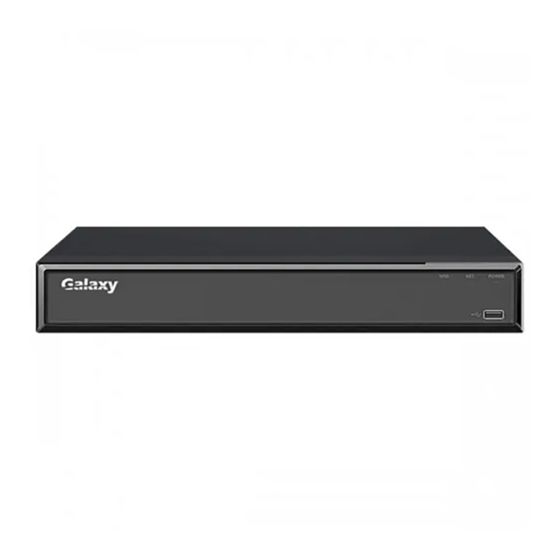
The Grand Tour The following figures are for reference only. The actual product shall prevail. See User’s Manual for detailed information. Figure 2-1 Front panel Table 2-1 Description of front panel functions Icon Name Description STATUS Status indicator After booting up the Device, the indicator glows blue. - Page 12 Icon Port Name Function Audio output port. It is to output analog audio signal to devices such as sound box. Bidirectional talk output. MIC OUT Audio output port Audio output for 1-window video monitor. Audio output for 1-window video playback. ...
- Page 13 Icon Port Name Function port. VGA video output port. It can connect to the monitor to VGA port view analog video. Ground. Error! Use the Home tab to apply 标题 1,l1,H1,Title1,Normal + Font: Helvetica,Bold,Space Before 12 pt,Not Bold,Heading One,h1,Head1,Head,1,Numbered,nu,Level 1 Head,1st level,Section Head,Sec1,h11,1st level1,h12,1st level2,h13,1st level3,h14,1st level4,h15,1st leve 8...
-
Page 14: Connection
Connection The following figure is for reference only. The actual product shall prevail. See User’s Manual for detailed information. Figure 3-1 Device connection Error! Use the Home tab to apply 标题 1,l1,H1,Title1,Normal + Font: Helvetica,Bold,Space Before 12 pt,Not Bold,Heading One,h1,Head1,Head,1,Numbered,nu,Level 1 Head,1st level,Section Head,Sec1,h11,1st level1,h12,1st level2,h13,1st level3,h14,1st level4,h15,1st leve 9... -
Page 15: Local Configurations
Local Configurations Slight difference might be found on the interfaces of different models. Following figures are for reference only. The actual product shall prevail. Booting Up Before the boot up, please make sure: The rated input voltage shall match with the device power requirement. Make sure the power wire connection is ready and then turn on the power button. - Page 16 Figure 4-1 Enter password Step 2 Configure the password information for admin. For details, see Table 4-1. Table 4-1 Password information description Parameter Description User By default, the user is admin. In the Password box, enter the password for admin. Password The new password can be set from 8 characters through 32 characters and contain at least two types from number, letter and...
- Page 17 Figure 4-2 Unlock pattern Step 4 Draw an unlock pattern. After setting unlock pattern, the password protection setting interrface is displayed. See Figure 4-3. Once you have configured the unlock pattern, the system will require the unlock pattern as the default login method. If you skip this setting, enter the password for login.
-
Page 18: Resetting Password
Step 5 Configure the protection parameters for password. For details, see Table 4-2. After configuration, if you forgot the password for admin user, you can reset the password through the reserved email address or security questions. For details about resetting the password, see User’s Manual. ... - Page 19 On the unlock pattern interface, click Forgot Unlock Pattern to switch to the password login interface, and then click If you have not input email address in device initialization, the interface is shown as in Figure 4-5. Configure an email address, click Next, and then the Device goes to Figure 4-4.
- Page 20 After clicking OK, we will collect your personal information such as cell phone number, MAC address and device serial number. The collected information is used for verifying device legality and sending security code. Read the notice carefully and confirm if you agree with the collection or not.
- Page 21 Figure 4-7 Reset password (4) Step 4 Click Next. The interface to set new password is displayed. See Figure 4-8. Figure 4-8 Reset password (5) Step 5 Enter the new password and confirm it. The password can be set from 8 characters through 32 characters and contain at least two types from number, letter and special character (excluding"'", """, ";", ":"...
-
Page 22: Startup Wizard
Startup Wizard After completing all items on the startup wizard, the startup wizard automatically hides when booting up the Device next time. After you successfully initialize the Device, the Startup Wizard is displayed. See Figure 4-9. Click Next, log in the Device, and then you can enter the startup wizard to configure the Device quickly. -
Page 23: Schedule
Click Manual Add and enter the IP address of the remote device to register it. Figure 4-10 Registration Schedule All channels are 24-hour recording continuously by factory default. You can customize the record period and record type. Step 1 Select Main Menu > STORAGE > SCHEDULE > Rec. The Rec interface is displayed. -
Page 24: Instant Playback
Step 2 Configure parameters such as channel, pre-record, ANR and record type. After setting one HDD to be redundant disk, select the Redundancy check box to realize video file backup. It is to save video files to different HDDs at the same time. Once one of the HDDs is damaged, there is still a backup file in another disk to ensure data reliability. - Page 25 Table 4-3 Control bar icon description Icon Description Instant playback Digital zoom Instant backup Manual snapshot Bidirectional talk Switch bit streams Error! Use the Home tab to apply 标题 1,l1,H1,Title1,Normal + Font: Helvetica,Bold,Space Before 12 pt,Not Bold,Heading One,h1,Head1,Head,1,Numbered,nu,Level 1 Head,1st level,Section Head,Sec1,h11,1st level1,h12,1st level2,h13,1st level3,h14,1st level4,h15,1st leve 20...
-
Page 26: Web Operations
Web Operations You can log in to the web interface of the Device by browsers such as Safari, Firefox and Chrome. Slight difference might be found on the interfaces of different models. Following figures are for reference only. The actual product shall prevail. ... - Page 27 Enter C:\Program Files\webrec\WEB30\WebPlugin, and run the uninstall tool uninst.exe. The system automatically deletes the control. Enter C:\Program Files\webrec and delete the Single folder. Error! Use the Home tab to apply 标题 1,l1,H1,Title1,Normal + Font: Helvetica,Bold,Space Before 12 pt,Not Bold,Heading One,h1,Head1,Head,1,Numbered,nu,Level 1 Head,1st level,Section Head,Sec1,h11,1st level1,h12,1st level2,h13,1st level3,h14,1st level4,h15,1st leve 22...
-
Page 28: Appendix 1 Cybersecurity Recommendations
Appendix 1 Cybersecurity Recommendations Cybersecurity is more than just a buzzword: it’s something that pertains to every device that is connected to the internet. IP video surveillance is not immune to cyber risks, but taking basic steps toward protecting and strengthening networks and networked appliances will make them less susceptible to attacks. - Page 29 Change Default HTTP and Other Service Ports We suggest you to change default HTTP and other service ports into any set of numbers between 1024~65535, reducing the risk of outsiders being able to guess which ports you are using. Enable HTTPS We suggest you to enable HTTPS, so that you visit Web service through a secure communication channel.
- Page 30 The network should be partitioned and isolated according to the actual network needs. If there are no communication requirements between two sub networks, it is suggested to use VLAN, network GAP and other technologies to partition the network, so as to achieve the network isolation effect. ...
Need help?
Do you have a question about the Hunter Series and is the answer not in the manual?
Questions and answers