Table of Contents
Advertisement
Available languages
Available languages
Quick Links
DE
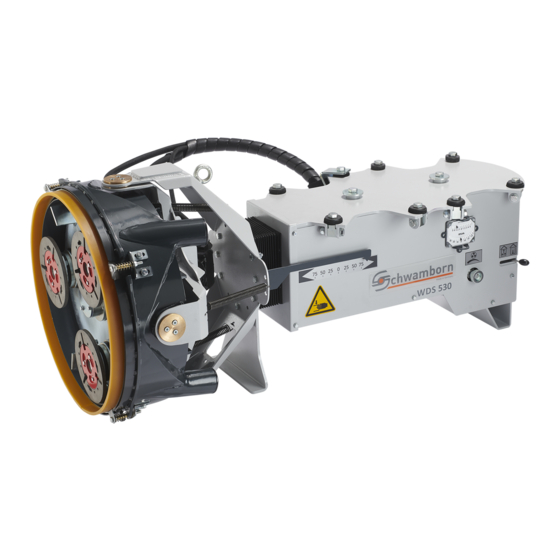
Wand‐ und Deckenschleifmaschine WDS 530 C
Originalbetriebsanleitung
EN
Wall and ceiling grinding machine WDS 530 C
Translation of the original operating manual
FR
Ponceuse pour murs et plafonds WDS 530 C
Traduction du manuel d'utilisation original
. . . . . . . . . . . . . . . . . . . . . . . . . . . . . . . . . . . . . . . . . . . . . . . . . . .
. . . . . . . . . . . . . . . . . . . . . . . . . . . . . . . . . . . . .
. . . . . . . . . . . . . . . . . . . . . . . . . . . . . . . . . . . . . . .
6
19
32
1
Advertisement
Chapters
Table of Contents

Related Manuals for Schwamborn WDS 530 C

Summary of Contents for Schwamborn WDS 530 C
- Page 1 Originalbetriebsanleitung Wall and ceiling grinding machine WDS 530 C ........
- Page 2 Fig. A Fig. D Fig. E Fig. B Fig. C 3...8 mm 26 27 Fig. F Fig. G 3...
- Page 3 Fig. H Fig. J 3... # 28 Fig. K1 Fig. K2 Fig. K3 Fig. K4 Fig. K5 Fig. K6 Fig. M Fig. N Fig. L...
- Page 4 Fig. P Fig. Q Fig. R Fig. S max. 6° max. 6° Fig. U Fig. T Fig. V Fig. X Fig. W Fig. Y Fig. Z Fig. AA Fig. AB...
- Page 5 B160 / B200: B280 / B300: ca. 0,75 m ca. 0,70 m WDS 530 C Fig. AC Fig. AD Fig. AE...
-
Page 6: Table Of Contents
DE Wand‐ und Deckenschleifmaschine WDS 530 C Wand‐ und Deckenschleifmaschine WDS 530 C Originalbetriebsanleitung Legende zu den Bildseiten Hersteller: Schwamborn Gerätebau GmbH Robert‐Bosch‐Straße 8 D‐73117 Wangen / Göppingen Fig. Benennung Staubschutzring Telefon: +49 (0)7161 2005‐0 A/T/U Federelement Telefax: +49 (0)7161 2005‐15 E‐Mail:... -
Page 7: Wichtige Hinweise
DE Wand‐ und Deckenschleifmaschine WDS 530 C 1 Wichtige Hinweise 1.1 Verwendete Symbole Legende zu den Bildseiten Fig. Benennung In dieser Dokumentation werden folgende Symbole verwendet: ETX‐Aufnahmeteller Sicherheitshinweis Schraube Mit diesem Symbol sind Warnungen, Verbote 3 x Fräswalze und Gebote gekennzeichnet, die auf Gefahren Walzenträger... -
Page 8: Begriffserklärung
Führungsmaschine Die Maschine, von der die Wand‐ und Deckenschleif Alle Gesetze und Richtlinien (z. B. die geltende Richt maschine WDS 530 C geführt wird, wird in dieser linie zur Abfallbeseitigung), Unfallverhütungsvor Betriebsanleitung als Führungsmaschine bezeichnet. schriften und die allgemein anerkannten sicherheits... -
Page 9: Bedienen
DE Wand‐ und Deckenschleifmaschine WDS 530 C 3 Bedienen 3 Bedienen Die mit der Schleifmaschine zu bearbeitenden Oberflächen müssen frei von Hindernissen und frei von losen Teilen, die beim Schleifen wegge schleudert werden können, sein! Bei starken Vibrationen oder ungewöhnlichen Geräuschen muss die Schleifmaschine sofort... -
Page 10: Betrieb
DE Wand‐ und Deckenschleifmaschine WDS 530 C 3 Bedienen 3.2 Betrieb Die zu bearbeitende Oberfläche und die Schleif werkzeuge bzw. die Bindung des Schleifmittels Die Schleifmaschine wurde in Betrieb genom müssen immer aufeinander abgestimmt sein. men (! Kapitel 3.1). Der Hersteller der Schleifmaschine gibt gern entsprechende Empfehlungen. -
Page 11: Betrieb Beenden
DE Wand‐ und Deckenschleifmaschine WDS 530 C 3 Bedienen Wenn der Hebel in Stellung „Decke“ [Fig. X] Die Werkzeugdrehung und die Anpressung mit steht, wird der Anpresszylinder mit erhöhtem der Fernsteuerung der Führungsmaschine aus Druck betrieben, um das Gewicht des Schleif... -
Page 12: Führungsarm Koppeln / Entkoppeln
DE Wand‐ und Deckenschleifmaschine WDS 530 C 4 Wartung 4.1 Führungsarm koppeln / entkoppeln Den Führungsarm [18] entriegeln und von der Aufnahmeplatte [8] trennen (! Kapitel 4.1). 4.1.1 Führungsarm koppeln Die Führungsmaschine ausschalten. In dieser Betriebsanleitung wird exemplarisch Die 4 Hydraulik‐Verbindungen [Fig. L und das Koppeln an eine Führungsmaschine des... -
Page 13: Führungsarm Entkoppeln
DE Wand‐ und Deckenschleifmaschine WDS 530 C 4 Wartung 4.1.2 Führungsarm entkoppeln Die 3 Spannelemente [21] lösen (nicht heraus schrauben) und nach unten klappen Das Entkoppeln des Führungsarms geschieht in (! Fig. C/D/E). umgekehrter Reihenfolge wie das Koppeln Die Schleifmaschine ist nur noch über die (! Kapitel 4.1.1). -
Page 14: Staubschutzring Ersetzen / Einstellen
DE Wand‐ und Deckenschleifmaschine WDS 530 C 4 Wartung Die Höhen der Diamantwerkzeuge (Abnutzungs Den Staubschutzring einstellen. grad) müssen gleich sein. Staubschutzring einstellen Die 3 Sicherungsschrauben [37, Fig. P] lösen (nicht herausschrauben), Der Staubschutzring kann nur eingestellt Den roten Sicherungsring [38, Fig. P] im Uhr... -
Page 15: Arbeiten An Hydraulischen Komponenten
DE Wand‐ und Deckenschleifmaschine WDS 530 C 4 Wartung 4.6 Arbeiten an hydraulischen Komponenten 4.9 Kundendienst und Ersatzteile Alle Arbeiten an den hydraulischen Bei Fragen zu Kundendienst, Ersatzteilen oder Repa Komponenten der Schleifmaschine dürfen aus ratur wenden Sie sich bitte an den Hersteller der schließlich von einer ausreichend informierten... -
Page 16: Fehlerbeseitigung
DE Wand‐ und Deckenschleifmaschine WDS 530 C 4 Wartung 5 Fehlerbeseitigung Die Fehlerbeseitigung an der Schleifmaschine darf ausschließlich von einer ausreichend informierten und qualifizierten Fachkraft ausgeführt werden! Störung Ursache Behebung Schleifmaschine startet nicht. Die Führungsmaschine ist nicht in Be Die Führungsmaschine in Betrieb trieb. -
Page 17: Übernahme Und Transport
DE Wand‐ und Deckenschleifmaschine WDS 530 C 6 Übernahme und Transport 6 Übernahme und Transport Die Schleifmaschine muss beim Heben und beim Transport mit einem Fahrzeug oder ent sprechenden Transportmitteln immer vor Sicherheitshinweise in Kapitel 2 beachten! schriftsmäßig gegen Verschieben und Kippen gesichert bzw. -
Page 18: Konformitätserklärung
DE Wand‐ und Deckenschleifmaschine WDS 530 C 7 Technische Daten 7 Technische Daten 8 Konformitätserklärung Schwamborn Gerätebau GmbH Benennung Wert Einheit Robert‐Bosch‐Straße 8 Hydraulik‐Betriebsdruck 70 ... 120 bar D‐73117 Wangen Deutschland Nennleistung des Schlei fantriebs (hydraulisch) 4 kW Hiermit erklären wir, dass die Schleifmaschine... - Page 19 EN Wall and ceiling grinding machine WDS 530 C Wall and ceiling grinding machine WDS 530 C Translation of the original operating manual Key to the illustrations Manufacturer: Schwamborn Gerätebau GmbH Robert‐Bosch‐Straße 8 D‐73117 Wangen / Göppingen Fig. Designation Dust cover ring Telephone: +49 (0)7161 2005‐0...
-
Page 20: Important Information
EN Wall and ceiling grinding machine WDS 530 C 1 Important information 1.1 Symbols used Key to the illustrations Fig. Designation The following symbols are used in this documentation: ETX-carrier Safety instructions Screw This symbol indicates warnings, prohibitions and 3 x Milling drum instructions regarding potential hazards. -
Page 21: Definition Of Terms
The machine from which the wall and ceiling grinding waste disposal), accident prevention guidelines and machine WDS 530 C is guided is referred to in this generally recognised safety rules must be complied operating manual as guiding machine. The guiding with when working on and with the grinding machine. -
Page 22: Operating
EN Wall and ceiling grinding machine WDS 530 C 3 Operating 3 Operating The surfaces to be ground by the grinding ma chine must be free of obstacles and free of loose objects, which could be flung out during grinding. -
Page 23: Operation
EN Wall and ceiling grinding machine WDS 530 C 3 Operating 3.2 Operation Always use suitable grinding tools or abrasive bonding for the surface to be machined. The The grinding machine was put into operation manufacturer of the grinding machine can gladly (! Chapter 3.1). -
Page 24: Ending The Operation
EN Wall and ceiling grinding machine WDS 530 C 3 Operating When the lever is set at the position for "Ceiling" Switch off the tool rotation and the contact pres [Fig. X], the pressure cylinder is operated at in sure using the remote control of the guiding ma... -
Page 25: Maintenance
EN Wall and ceiling grinding machine WDS 530 C 4 Maintenance 4.1 Coupling/Uncoupling the guide arm Unlock the guide arm [18] and disconnect from the locating plate [8] (! Chapter 4.1). 4.1.1 Coupling the guide arm Switch the guiding machine off. -
Page 26: Uncoupling The Guide Arm
EN Wall and ceiling grinding machine WDS 530 C 4 Maintenance 4.1.2 Uncoupling the guide arm Loosen (do not screw out) the 3 clamping ele ments [21] and fold down (! Fig. C/D/E). To uncouple the guide arm, proceed in the re... -
Page 27: Mounting And Dismantling Bush Hammering Rollers
EN Wall and ceiling grinding machine WDS 530 C 4 Maintenance The diamond tools need to be equal in height Adjust the dust cover ring. (degree of wear). Adjusting the dust cover ring Loosen (do not screw out) the 3 retaining screws [37, Fig. -
Page 28: Working On Hydraulic Components
EN Wall and ceiling grinding machine WDS 530 C 4 Maintenance 4.6 Working on hydraulic components 4.9 Customer service and spare parts Only suitably knowledgeable, qualified profes In case of customer service queries, replacement sional technicians may perform work on any hy... -
Page 29: Troubleshooting
EN Wall and ceiling grinding machine WDS 530 C 4 Maintenance 5 Troubleshooting Only suitably knowledgeable, qualified technicians may perform repairs on the grinding machine. Malfunction Cause Rectification Grinding machine will not The guiding machine is not in opera Put the guiding machine into opera... -
Page 30: Acceptance And Transport
EN Wall and ceiling grinding machine WDS 530 C 6 Acceptance and transport 6 Acceptance and transport Always secure the grinding machine against shifting and tipping according to regulations dur ing lifting or transport by a vehicle or suitable Observe the safety instructions in Chapter 2! devices and strap down with tension belts. -
Page 31: Technical Data
EN Wall and ceiling grinding machine WDS 530 C 7 Technical data 7 Technical data 8 Declaration of conformity Schwamborn Gerätebau GmbH Designation Value Unit Robert‐Bosch‐Straße 8 Hydraulic operating D‐73117 Wangen pressure 70 ... 120 bar Germany Nominal output of the grin... - Page 32 FR Ponceuse pour murs et plafonds WDS 530 C Ponceuse pour murs et plafonds WDS 530 C Traduction du manuel d’utilisation original Légende des illustrations Constructeur : Schwamborn Gerätebau GmbH Robert‐Bosch‐Straße 8 D‐73117 Wangen / Göppingen Fig. Dénomination Anneau pare‐poussière Téléphone :...
-
Page 33: Remarques Importantes
FR Ponceuse pour murs et plafonds WDS 530 C 1 Remarques importantes Légende des illustrations Les manuels d’utilisation de la machine de guidage à utiliser et ceux des sous‐traitants doivent être lus et Fig. Dénomination observés! 3 x vis de blocage En cas de prêt de la ponceuse à... -
Page 34: Explication Des Termes
Ponceuse personnel utilisateur. La ponceuse pour murs et plafonds WDS 530 C est dé Toutes les lois et directives (par ex. la directive en signée dans ce manuel d’utilisation comme ponceuse. vigueur concernant l’élimination des déchets), la Machine de guidage règlementation relative à... -
Page 35: Service
FR Ponceuse pour murs et plafonds WDS 530 C 3 Service Avant de mettre la machine en service, il Les travaux de nettoyage et de maintenance convient de contrôler que les dispositifs de doivent être effectués exclusivement par du sécurité soient complets et opérationnels! personnel spécialisé... -
Page 36: Mise En Service De La Ponceuse
FR Ponceuse pour murs et plafonds WDS 530 C 3 Service 3.1 Mise en service de la ponceuse Soulever la ponceuse avec le bras de guidage et déplacer la machine de guidage en position Respecter les consignes de sécurité de travail. -
Page 37: Interruption Du Fonctionnement
FR Ponceuse pour murs et plafonds WDS 530 C 3 Service Le constructeur de la ponceuse recommande La pression de contact ne peut être modifiée instamment de s’exercer suffisamment avant de qu’avec le variateur [48/49, Fig. AA]! procéder au ponçage des murs et des plafonds. -
Page 38: Maintenance
FR Ponceuse pour murs et plafonds WDS 530 C 4 Maintenance La pression de contact est retirée. de poursuivre le travail, attendre que le système La tête de la ponceuse est déplacée en position hydraulique soit hors pression de démarrage [25, Fig. G]. -
Page 39: Désaccouplage Du Bras De Guidage
FR Ponceuse pour murs et plafonds WDS 530 C 4 Maintenance Mettre la machine de guidage à l’arrêt. Mettre la machine de guidage à l’arrêt. La machine de guidage ne doit en aucun cas ! Fig. K: être utilisée! Insérer l’élément de sécurisation A [28] (! Fig. -
Page 40: Montage Et Démontage Des Outils Diamantés Etx
FR Ponceuse pour murs et plafonds WDS 530 C 4 Maintenance 4.3.1 Montage et démontage des outils diamantés ETX Remplacement de l’anneau pare‐poussière Tous les outils diamantés ETX autorisés pour Si le travail est réalisé avec les rouleaux de cette ponceuse sont mis en place et retirés de bouchardage, l’anneau pare‐poussière... -
Page 41: Travaux Sur Les Composants Hydrauliques
FR Ponceuse pour murs et plafonds WDS 530 C 4 Maintenance Tourner la poignée en étoile avec la clé d’½ sec Fixer les conduites hydrauliques correcte teur d’étoile dans le sens horaire et la maintenir ment sur la ponceuse. dans cette position (! Fig. AE). -
Page 42: Élimination Des Erreurs
FR Ponceuse pour murs et plafonds WDS 530 C 4 Maintenance 5 Élimination des erreurs Seul un spécialiste dûment informé et qualifié est autorisé à procéder à l’élimination des erreurs! Défaillance Cause Remède La ponceuse ne démarre pas. La machine de guidage n’est pas en Mettre la machine de guidage en ser... -
Page 43: Réception Et Transport
FR Ponceuse pour murs et plafonds WDS 530 C 6 Réception et transport 6 Réception et transport Pour lever et transporter la ponceuse avec un véhicule ou un moyen de transport approprié, tou jours fixer la machine pour l’empêcher de se dé... -
Page 44: Caractéristiques Techniques
FR Ponceuse pour murs et plafonds WDS 530 C 7 Caractéristiques techniques 7 Caractéristiques techniques 8 Déclaration de conformité Schwamborn Gerätebau GmbH Dénomination Valeur Unité Robert‐Bosch‐Straße 8 Pression hydraulique de 70 ... 120 bar D‐73117 Wangen service Allemagne Puissance nominale de Par la présente déclaration, nous attestons que la...
Need help?
Do you have a question about the WDS 530 C and is the answer not in the manual?
Questions and answers