Table of Contents
Advertisement
Quick Links
Advertisement
Table of Contents

Related Manuals for ACRONIS SDI-5060

Summary of Contents for ACRONIS SDI-5060
- Page 1 Acronis Cyber Infrastructure 3.0 Appliance Quick Start Guide November 20, 2019...
- Page 2 Copyright ©Acronis International GmbH, 2002-2019. All rights reserved. ”Acronis” and ”Acronis Secure Zone” are registered trademarks of Acronis International GmbH. ”Acronis Compute with Confidence”, ”Acronis Startup Recovery Manager”, ”Acronis Instant Restore”, and the Acronis logo are trademarks of Acronis International GmbH.
-
Page 3: Table Of Contents
Contents 1. About the Appliance ..........Appliance Exterior . -
Page 4: About The Appliance
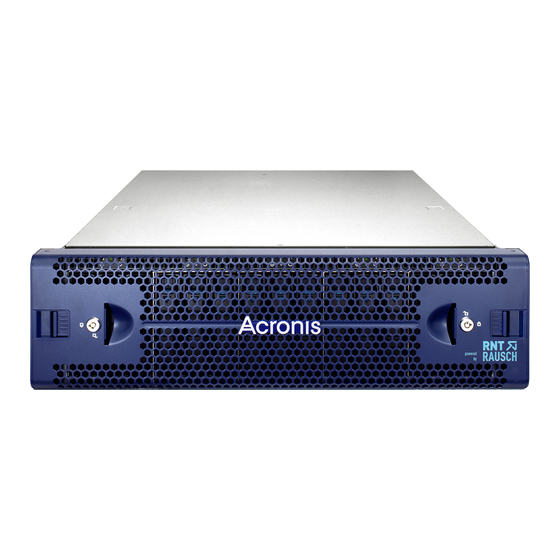
The appliance comes in several models that vary by storage capacity: Model Raw storage, TB Usable storage*, TB Capacity Performance SDI-5060 SDI-5120 SDI-5150 SDI-5180 * With the recommended redundancy scheme. Erasure coding 3+2 is recommended for capacity; replication=3 is recommended for performance. - Page 5 The default IPMI password to access the management node via SSH is Acronis!Infra%30 (it changes to a user-specified password during deployment). The USB and VGA ports allow you to connect a keyboard and a monitor to a node if the network is unavailable.
-
Page 6: Safety Instructions
CHAPTER 2 Safety Instructions Warning: The appliance may only be repaired by a certified service technician. You may only perform troubleshooting as authorized by the support team. Damage due to unauthorized repairs is not covered by the warranty. -
Page 7: Installing The Appliance
CHAPTER 3 Installing the Appliance Before installing the appliance, make sure you have the following: • 3U of server rack space in a standard 19-inch cabinet • at least five free 1/10 GbE ports in a network switch (10 GbE recommended) •... -
Page 8: Unpacking The Appliance
Chapter 3. Installing the Appliance to the Administrator’s Guide. 3.1 Unpacking the Appliance Inspect the packaging contents for damage before mounting the appliance and connecting power. Before continuing, make sure the following items are present in the packaging: the appliance chassis, mounting rails, two power cables, this quick start guide. - Page 9 Chapter 3. Installing the Appliance the inner rail with a screw from the standard screw kit after all the bayonets go through the cutouts and properly engage. H-315 3. Install the outer rail into the rack. When selecting the location, note that the rails are in the middle of the appliance. Make sure that you install the outer rails with 1U clearance above and below.
- Page 10 Chapter 3. Installing the Appliance Uninstall the bracket 4. Mount the chassis into the cabinet. Important: Two people are required to perform this step. Insert the inner rail into the outer rail as shown on the figure. Important: Make sure that the ball retainer is fully open before installing the chassis. Otherwise, you risk damaging the chassis! Retainer...
-
Page 11: Connecting Cables To The Appliance
Chapter 3. Installing the Appliance 3.3 Connecting Cables to the Appliance Note: For more details on configuring the network infrastructure, see the Acronis Cyber Infrastructure 3.0 Administrator’s Guide. To prepare the appliance for configuration, do the following: 1. Connect the appliance to the electrical outlets using the supplied power cables. - Page 12 Chapter 3. Installing the Appliance IPMI 10 GbE SFP+ 1/10 GbE IPMI 1/10 GbE 10 GbE SFP+ IPMI 1/10 GbE 10 GbE SFP+ IPMI 1/10 GbE 10 GbE SFP+ IPMI 1/10 GbE 10 GbE SFP+ 3. (Optional) Connect the out-of-band management network interfaces of each node and the chassis (1 on the diagram) to a switch with access to the IPMI subnet for your appliance (2 on the diagram).
-
Page 13: Configuring The Appliance
Chapter 3. Installing the Appliance 3.4 Configuring the Appliance Perform the following steps to configure the appliance: 1. Turn on the power: (a) press and hold down the main switch for five seconds, (b) press the power buttons of each node. 2. - Page 14 Chapter 3. Installing the Appliance 6. On the next step, enter the following: • New host names for all nodes (or leave the default names). You can rename the nodes to fit your organization’s naming policies or make them relevant to your organization. •...
- Page 15 Chapter 3. Installing the Appliance Important: Entered values cannot be changed later. If one or more nodes are not reachable from the primary node, they will be marked as offline. In this case, make sure the nodes are powered on and connected to the correct network. Deployment will be blocked until all nodes are green (accessible and configurable by the primary node).
- Page 16 Chapter 3. Installing the Appliance Click Submit. Configuration will begin, as indicated on the progress bar. 8. Wait until the progress bar reaches the end and change the IP address of the admin laptop to a free one from which you can access the appliance. 9.
- Page 17 2 and SFP slots and follow the instructions in the Acronis Cyber Infrastructure 3.0 Administrator’s Guide. After deployment, update the product to the latest version (see Managing Updates (page 15)). Finally, configure the cluster for the desired workload as described in the Acronis Cyber Infrastructure 3.0 Administrator’s Guide.
-
Page 18: Managing Updates
Internet connections. This means, in particular, that cluster DNS must be configured and point to a DNS able to resolve external host names. For more details, see the Acronis Cyber Infrastructure 3.0 Administrator’s Guide. - Page 19 Chapter 4. Managing Updates 2. To apply all available updates, click UPDATE NOW. To update the kernel with ReadyKernel, consult the Acronis Cyber Infrastructure 3.0 Administrator’s Command Line Guide.
-
Page 20: Managing Licenses
If no reports have been received for two weeks, the license expires. For reports to reach destination, the cluster must be able to access the Acronis datacenter that has been used to enable SPLA. Make sure that TCP port 443 is open. -
Page 21: Installing License Keys
ABGW to these products, you will need to use license keys. Furthermore, Acronis Backup Gateway usage is not counted in SPLA in Acronis Cyber Infrastructure. SPLA only counts universal usage that is not related to backup. Backup usage is shown in the Acronis Backup Cloud section of Acronis Cyber Cloud. - Page 22 Chapter 5. Managing Licenses 3. In the Register license key window, paste the license key and click REGISTER. 4. Back on the Licenses screen, click Activate if you are activating from a trial or choose one of the following: • Upgrade, to add storage capacity to the active license. •...
-
Page 23: Installing Spla Licenses
4. In the Register cluster window, accept the license agreement. 5. In the registration confirmation window, click Done. The registered cluster will show up in Acronis Cyber Cloud. You will be able to monitor its resource usage and download reports. -
Page 24: Getting Technical Support
Appliance, https://kb.acronis.com/acronis-appliance • Acronis Cyber Infrastructure, https://kb.acronis.com/acronis-cyber-infrastructure • Acronis Backup Cloud, https://kb.acronis.com/acronis-backup-cloud • Acronis Backup 12.5, https://kb.acronis.com/acronis-backup-12-5 • • User documentation, guides describing how to use this appliance as well as Acronis software, https://www.acronis.com/support/documentation. - Page 25 Chapter 6. Getting Technical Support For information on appliance warranty, see the Support section at https://www.acronis.com/en-us/support/hwappliancesupport.
-
Page 26: Appendix: Specifications
(also see table below) IO ports Rear: 2x USB 2.0, 1x VGA, 2x 1/10GbE RJ45, 2x 10GbE SFP+, 1x GbE RJ45 management Software Acronis Cyber Infrastructure 3.0 Data protection Replication and erasure coding via storage policies Continued on next page... -
Page 27: Power Supply Specifications
Chapter 7. Appendix: Specifications Table 7.1.1 – continued from previous page Redundancy Hot-swappable data disk drives 2x hot-swappable power supplies No single point of failure Non-disruptive online software upgrades Monitoring, management CLI, GUI, API, IPMI 7.1.1 Power Supply Specifications The following table lists appliance power supply specifications. Voltage, frequency 100-240 V, 50/60 Hz Power consumption, W... -
Page 28: Air Quality Requirements
Chapter 7. Appendix: Specifications Table 7.2.1 – continued from previous page Relative humidity percentage range for storage 10% ~ 95% (non-condensing) Relative humidity percentage range for operating 10% ~ 85% (non-condensing) Vibration for storage 1.87 Grms (10-500 Hz) Vibration for operating 0.26 Grms (5-350 Hz) Shock for storage 65G for 2ms...
Need help?
Do you have a question about the SDI-5060 and is the answer not in the manual?
Questions and answers