Table of Contents
Advertisement
Quick Links
Advertisement
Table of Contents

Related Manuals for HARTING MICA

Summary of Contents for HARTING MICA
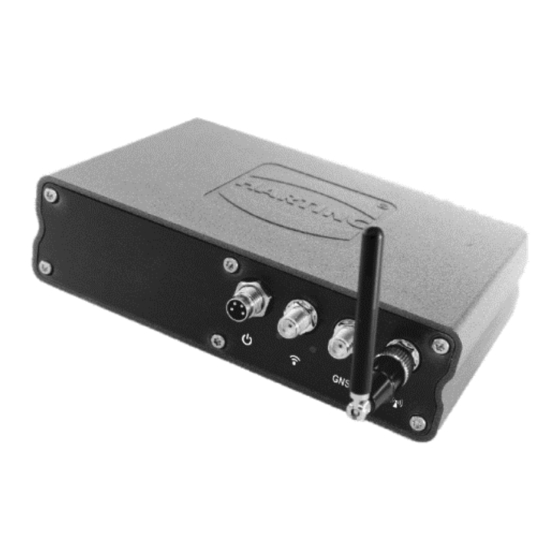
- Page 1 User Guide MICA Getting Started...
- Page 2 No part of this manual may be reproduced in any form (print, photocopy, microfilm or any other process), processed, duplicated or distributed by means of electronic systems without the written permission of HARTING IT Software Development GmbH & Co. KG, Espelkamp. Version 8.0. Subject to alterations without notice.
-
Page 3: Table Of Contents
Logging In ......................6 Using Name Resolution ................6 Using the 10.10.10.10 Fall Back Address ..........6 Connecting to a MICA Wireless for the First Time ........ 6 First Login ....................6 Working with Containers ..................8 Starting Containers ................... 8 Opening the UI of a Container .............. - Page 4 MICA Getting Started 15 MICA Software Architecture ................31 15.1 Container Architecture ................31 15.2 MICA Network Topology ................ 31 16 MICA Variants with Additional Connections ............ 33 16.1 Ethernet and USB..................33 16.2 USB Connections ................... 33 17 Troubleshooting ....................34...
-
Page 5: Connecting Your Mica To Power
IRELESS OWER UPPLY Depending on the MICA variant your MICA can be powered using Power over Ethernet (PoE) or 24V DC. The documentation included with your MICA explains how to connect your MICA to power and to your com- puter. -
Page 6: Logging In
255.255.255.240. If you have not set the MICA base system to a static IPv4 address, you can also use 10.10.10.10 to log into a MICA that no longer shows up in a network due to some fault or misconfiguration. To engage this fallback mode, disconnect the MICA from power, connect it directly to a PC that is not connected to an IPv4 network, and power the MICA back on. - Page 7 MICA Getting Started Warning: Make sure to store your password in a safe place. HARTING is not able to recover lost passwords. If you have lost your password, contact your HARTING service provider or MICASupport@HARTING.com for instructions how to return your MICA for a factory reset.
-
Page 8: Working With Containers
MICA Getting Started Working with Containers All MICA applications consist of one or more LXC containers, which are small independent virtual machines. The MICA web interface lists all installed containers and three general tools called Install, Settings, and Infor- mation. Active Container Stopped Container 3.1 Starting Containers... -
Page 9: Stopping A Container
MICA Getting Started 3.3 Stopping a Container To stop a container, choose Stop App from its context menu. You can open the context menu by right-click- ing a container icon or by long pressing it on a touch screen. Once the container is stopped, the icon... -
Page 10: Mica Network Configuration
4.1.1 General Settings The MICA host name and MDNS name are set in the factory and cannot be changed in the UI. GW&NS lets you choose which interface will be used to connect to the default gateway and nameserver. If your MICA only has one network interface, this setting is disabled. - Page 11 In this section, you can activate, deactivate and configure all built in network interfaces. If you are using Ethernet to USB dongles on a MICA USB, you can in most cases also configure these as well, but HARTING cannot guarantee that any and all USB dongles work.
- Page 12 4.1.4 IPv6 Configuration By default, the MICA base system has an IPv6 link local address as well as an unique local address. The link local address can be derived by combining the HARTING IPv6 prefix and the last 9 digits of the MAC address listed on the type shield of the MICA.
-
Page 13: Advanced Network Configuration
If your MICA has multiple built in network interfaces, you can use the GW & NS drop down to specify which network interface the MICA will use to connect to a gateway and name server. Click Apply to activate the new setting. - Page 14 To delete a forwarding route press ⊖. If you unselect, Disable Container MAC or Disable Container IP and MAC, the MICA Base System will hide the Port Forwarding section, but remember the settings when you reenable the advanced network modes.
-
Page 15: Wlan Configuration
The MICA Wireless variants are initially configured to start in Access Point mode. When you switch the MICA to Client Mode, it will restart and try to connect to the specified wireless access point. If the MICA is unable to connect to an access point within 1 minute, it will restart in Access Point mode to make sure it stays available for configuration. -
Page 16: Client Mode Configuration
When you switch the MICA to client mode, it will restart and try to connect to the specified wireless access point. If the MICA is unable to connect to an access point within one minute, it will restart as access point to make sure it stays available for configuration. - Page 17 Advanced Roaming On The MICA checks for new access points every 5 seconds and switches the to a new access point if the sig- nal strength drops below -40dBm. Advanced roaming can be activated in the network settings. While advanced roaming is active, it is recom-...
-
Page 18: Mobile Network Configuration
Mobile Network Configuration 6.1 Activating the eSIM MICA Wireless ships with an Emnify eSIM. To commission the eSIM and set up your account, check with your system administrator, or follow the instructions in the EMnify Set-Up Guide available at http://www.em- nify.com... -
Page 19: Mobile Connection Configuration
It is necessary to have GNSS enabled before getting GNSS position information. When GNSS is enabled for the first time, it can take up to 20 minutes for the MICA to lock on to a sufficient number of satellites to calcu- late its position. - Page 20 "result" : { "rssi" : rssi, "gnss_position" : [ latitude, longitude ] The ID and JSON information is being left out for readability. Please see the MICA Programming Guide for an overview of the MICA JSON RPC API. HARTING IT Software Development...
-
Page 21: Container Network Settings
The SSO Mode reflects the permission level the container has when communicating with other containers or the MICA Base. It has three user privilege levels—user, containeradmin, and admin—to provide protection against accidental or deliberate misconfiguration or deletion/installation of containers. Typically, containers should only be given access at the lowest privilege level they need to fulfill their jobs. -
Page 22: Container Network Settings
MICA base system (see section 4.1). 7.3 Note: Legacy Additional Network Interfaces MICA Base System 5 – 7 let you specify additional network interfaces on a HARTING MICA and configure various container types as gateway containers to let applications use these additional network interfaces as default gateways. -
Page 23: Bluetooth Configuration
To enable BLE, choose LE from the Operation Mode dropdown in the Interface-specific configuration of the MICA PPP interface. BLE devices can only be accessed through MICA containers. For an example, see the BLE Gateway Con- tainer on http://mica-container.com/. -
Page 24: Time And Date
Time and Date You can adjust the time and date under Settings → Time & Date. The MICA real time clock is buffered for 72 hours. If the MICA is disconnected from power for more than 72 hours, the time and date will be reset to the production date. -
Page 25: Changing Passwords
To change a password, go to Settings → Accounts, choose the user, enter a new password and con- firm the password. Up to and including MICA base system version 3, passwords must only contain ASCII characters, version 4 and higher support UTF-8 user names and passwords. -
Page 26: Firmware Reset
11 Firmware Reset To reset the MICA to default settings, go to Settings → Firmware → Reset and click OK in the confirmation dialog. The MICA will reboot with factory defaults. After a firmware rest all containers are stopped and have to be restarted. -
Page 27: Firmware Upgrade
Once you have downloaded the archive to your local PC or network, click Install to start the up- grade process. Then select the appropriate archive and click Execute. After displaying a confirmation dialog, the MICA installs the new firmware and reboots. Container and user data are not affected by a firmware up- date. -
Page 28: Generating A System Report
MICA Getting Started 13 Generating a System Report To get a comprehensive overview of your MICA and all installed containers, you can generate a system re- port from the Information panel by clicking Device Summary under MICA Resources and saving the gener- ated JSON file. -
Page 29: Container Configuration And Maintenance
You can also access a container directly by entering the URL https://micaname/#1_containername in your browser. If the container has been designed according to the HARTING development guidelines, https:// micaname /#1_containername/api will open a page describing the functionality and application programming interface of the container and https://micaname.local/#1_containername/readme will display... -
Page 30: Container Reset
The main use of Duplicate is creating a snapshot of a container. You can use this snapshot to quickly try out a new configuration, or to have a backup of the container on the MICA itself, for example before performing a container update. -
Page 31: Mica Software Architecture
OPC-UA. 15.1 Container Architecture Each MICA container has a two-tiered file system: the root file system and the overlay. The root file system stores all the application code and the default container configuration. During installation, the MICA creates an additional overlay file system that stores user data and changes to the default configuration. This archi- tecture allows swapping out the root file system—for example when performing an update—without affecting... - Page 32 (or https://mica-test.local/gpio on Linux and Mac OS) will bring up the default web page of the container named gpio running on mica-test. Adding #1_ to the URL will bring up the default website of the container as an iFrame in the MICA Base web GUI.
-
Page 33: Mica Variants With Additional Connections
While the USB connector accepts most USB A plugs, we recommend using a HARTING IP67 push-pull ca- ble for water and dust protection. USB devices connected to the USB port will show up in the Devices list in the MICA Base system and can be added to containers using the Devices screen in the Web UI. -
Page 34: Troubleshooting
While the USB connector accepts most USB A plugs, we recommend using a HARTING IP67 push-pull ca- ble for water and dust protection. USB devices connected to the USB port will show up in the Devices list in the MICA Base system and can be added to containers using the Devices screen in the Web UI. - Page 35 MICA Getting Started Clearing the DNS cache with ipconfig /flushdns resolves this problem. Lost password For security reasons, the MICA is designed in a way that HARTING cannot recover passwords. Contact you HARTING service provider or MICASup- port@HARTING.com for instructions how to return your MICA to HARTING for a factory reset.
Need help?
Do you have a question about the MICA and is the answer not in the manual?
Questions and answers