Table of Contents
Advertisement
Available languages
Available languages
Quick Links
Burgess
®
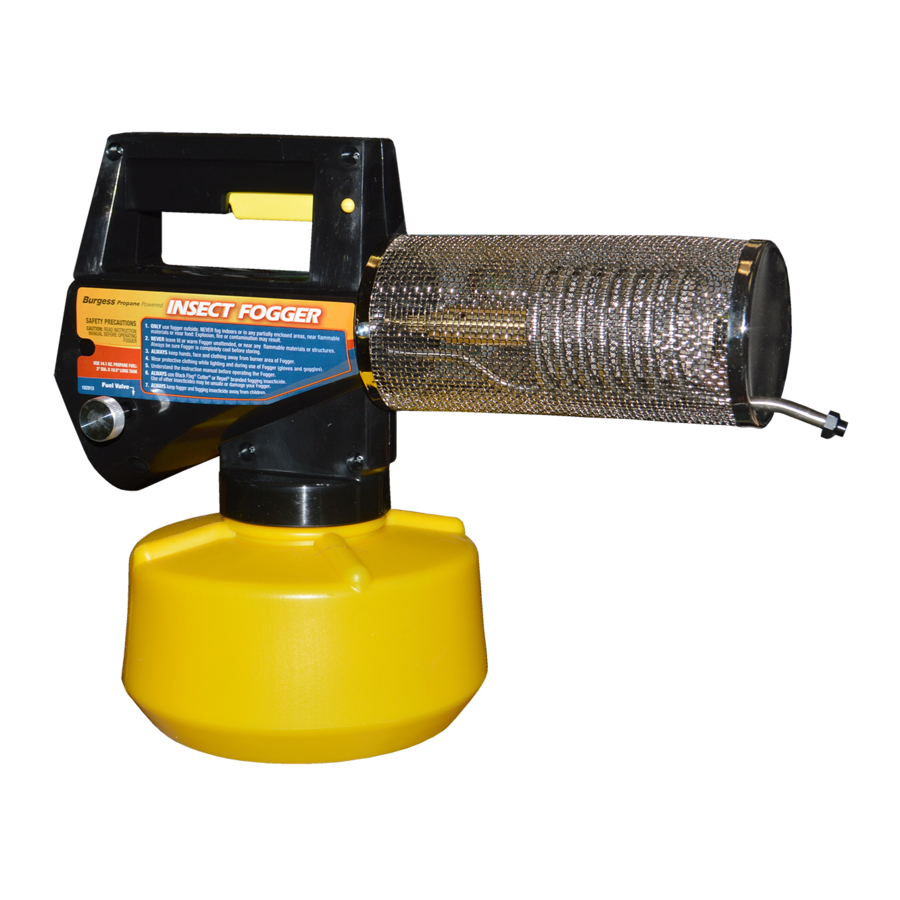
Portable Propane
Insect Fogger
Use and Care Manual
CAUTION: Read and follow all instructions
Do Not Return This Fogger To The Store
For Help, Information or Parts, Call : 1-800-311-9903
The Fountainhead Group, Inc.
23 Garden St., New York Mills, NY 13417
1-800-311-9903
www.TheFountainheadGroup.com
Manual No. 161856
Rev C. 01/08/2013
ECN13-006
5 1/2" x 8 1/2" Booklet
Advertisement
Table of Contents

Subscribe to Our Youtube Channel
Summary of Contents for The Fountainhead Group Burgess Portable Propane Insect Fogger
- Page 1 Use and Care Manual CAUTION: Read and follow all instructions Do Not Return This Fogger To The Store For Help, Information or Parts, Call : 1-800-311-9903 The Fountainhead Group, Inc. 23 Garden St., New York Mills, NY 13417 1-800-311-9903 www.TheFountainheadGroup.com Manual No.
-
Page 2: Before You Begin
BEFORE YOU BEGIN Principle of Fogging (Before Using, be sure to read and follow all instructions, including the instructions on the chemical to be used.) Fogging is one of the most eff ective and economical means of applying insecticide. The Burgess®... - Page 3 BEFORE YOU BEGIN CONTINUED To obtain warranty service, call us at The Fountainhead Group, Inc. - Customer Service Center- Monday - Friday 8 A.M. - 5 P.M., EST Toll Free: 1-800-311-9903 or e-mail: Info@TheFGI.com or Access online at: www.TheFountainheadGroup.com. Merchandise may not be returned without prior permission and must be returned to us with freight prepaid.
-
Page 4: Safety Precautions
BEFORE YOU BEGIN CONTINUED Dry and wet fog Dryness or wetness of the fog is controlled by the rate of pumping. Pumping at the recommended rate of once every 3 to 4 seconds will produce the most eff ective fog. The dryness of the fog can be determined by passing a piece of dry cardboard through the fog about 18 inches from the end of the nozzle. - Page 5 BEFORE YOU BEGIN CONTINUED 6. Never leave the fogger unattended while the burner is lit. 7. Always pre-heat your fogger for at least 2 minutes while keeping the fogger level to the ground. Failure to pre-heat may clog the burner orifi ce causing damage to the unit. 8.
- Page 6 PREPARING FOGGER FOR OPERATION 1. Make sure that the trigger is locked by pushing locking button in front of trigger to the right (See Fig 2). This will prevent the accidental pumping of insecticide into the coil. To lock trigger Fig 2 2.
- Page 7 OPERATING INSTRUCTIONS 1. Make sure that the trigger is locked. 2. Place fogger on a level surface when lighting and preheating. 3. Strike match and place under coil visible through shroud. (Fig. 3) 4. Open fuel valve a maximum of 1/4 turn. Ignition will take place immediately. 5.
- Page 8 OPERATING INSTRUCTIONS CONTINUED Fuel Cylinders for the Fogger 1. The fogger is fueled by any standard propane gas cylinder. Each cylinder will provide approximately 2½ hours of continuous fogging. 2. You can purchase additional propane cylinders at most hardware, discount and sporting goods stores.
-
Page 9: Care And Maintenance
MAINTENANCE Storage 1. Remove the propane cylinder from the fogger and store in a cool, well ventilated area, out of reach of children. 2. Do not store insecticide in fogger container. 3. When storing the units for a long period of time, fl ush out the insecticide container and the fogger by pumping kerosene through the system. - Page 10 KITS AND PARTS ATTN: Allow fogger to cool before servicing. 1. Nozzle KEY# PART# DESCRIPTION 161015 VAPOR COIL NOZZLE 2. Gasket Parts Kit 161435 KEY# PART# DESCRIPTION 161007 JAR GASKET 161013 CYLINDER ROD GASKET 3. Pump Parts Kit 161436 KEY# PART# DESCRIPTION 161006 PUMP PISTON CYLINDER 161007 JAR GASKET 161008 PUMP PISTON BALL...
-
Page 11: Servicing Instructions
SERVICING INSTRUCTIONS 1. Unthread jar from fogger. 2. Unhook pump piston 3. Remove and discard pump cylinder. piston cylinder and associated parts. 5. Remove and discard piston 6. Remove and discard 4. Unthread piston assembly. and internal parts. gasket from fogger. 7. -
Page 12: Troubleshooting
TROUBLESHOOTING Trouble Look For Remedy (Symptom) (Probable Cause) (Corrective Action) No fog while unit heats 1.) Nozzle and/or end of coil 1.1.) Remove and clean nozzle orifi ce up - Burner operating obstructed or clogged. (See Figure 1 & 2). properly. - Page 13 TROUBLESHOOTING CONTINUED ATTN: Allow fogger to cool before servicing. Figure 1 Figure 2 Enlarge view of nozzle orifi ce. Figure 3 Figure 4 NOTE: Remove plastic barrel fi rst. Figure5 Propane cylinder Trigger for pump. Figure 6 Figure 7 Page 12...
- Page 14 ATENCIÓN: Lea y siga todas las instrucciones No devuelva este generador a la tienda Para obtener ayuda, información o piezas, llame : 1-800-311-9903 The Fountainhead Group, Inc. 23 Garden St., New York Mills, NY 13417 1-800-311-9903 www.TheFountainheadGroup.com Manual No. 161856 Rev C.
-
Page 15: Antes De Comenzar
A fi n de obtener el servicio de garantfa, escrlbanos a The Fountainhead Group, Inc. - Centro deservicio al cliente De lunes a viernes de 8 a.m. a 5 p.m., EST Llame sin costo al: 1-800-311-9903 o Correo electrónico: Info@TheFGI.com o Ingrese en línea a: www.TheFountainheadGroup.com... - Page 16 ANTES DE COMENZAR (CONTINUACIÓN) No se debe devolver la mercaderia sin nuestra . autorizadón previa y usted debe pagar el envio. Este servicio de garantia es una solución exclusiva y no nos hacemos responsables por cualquier dañio consecuente o incidental o lastimaduras de la persona o dañios a la propiedad, Esta garantia no se aplicará...
-
Page 17: Precauciones De Seguridad
ANTES DE COMENZAR (CONTINUACIÓN) Niebla seca y humeda La sequedad 0 humedad de la niebla se control a con el ritmo de bombeo. AI bombear usando el ritmo recomendado de una vez cada 3 6 4 segundos, la niebla será más efi caz. - Page 18 ANTES DE COMENZAR (CONTINUACIÓN) 5. Opere el nebulizador en exteriores solamente. NO LO USE EN INTERIORES o dentro de una estructura cerrada. Siempre mantenga el nebulizador alejado de material infl amable. No fume mientras llena y/o opera la unidad. Cubra o retire los alimentos expuestos y el agua potable antes de aplicarlo. Puede ocurrir una contaminación, incendio o explosión.
- Page 19 PREPARAR EL GENERADOR PARA SU USO Cómo preparar el insecticida para su operación 1. Asegúrese de que el disparador esté bloqueado presionando el botón de bloqueo que se encuentra frente al disparador al lado derecho ( Ver Fig 2 ) Esto impedirá el bombeo accidental de insecticida en el serpentín.
-
Page 20: Modo De Empleo
MODO DE EMPLEO 1. Asegúrese de que el gatifl o esté trabado. 2. Coloque el fumigador en una superfi cie nivelada cuando lo encienda y lo precaliente. 3. Encienda el fósforo y colóquelo bajo el carreta que se ve a través del recubrimienio. (Figura 3) 4. - Page 21 INDICACIONES DE EMPLEO (CONTINUACIÓN) Procedimientos de funcionamiento del nebulizador 1. Para lograr una pulverización seca y correcta, bombee el disparador en intervalos de 3 a 4 segundos. Un bombeo demasiado frecuente puede resultar en una pulverización húmeda. 2. Si aparece una llama en el extremo de la boquilla, deje de bombear inmediatamente. Apague la válvula de propano.
-
Page 22: Cuidado Y Mantenimiento
MANTENIMIENTO Almacenaje 1. Quite el cilindro de propano del fumigador y almacénelo en un area tria y bien ventilada, fuera del alcance de los niños. 2. No almacene el insecticida en la jarra de la unidad. 3. Cuando se almacena la unidad por un largo tiempo, enjuague el recipiente de insecticida y el fumigador usando kerosene en todo el sistema. - Page 23 KITS Y PIEZAS ATENCIÓN: Deje que el generador se enfríe antes de darle mantenimiento. 1. Boquilla N° DE LLAVE N° DE PIEZA DESCRIPCIÓN 161015 BOQUILLA DEL SERPENTÍN DE VAPOR 2. Kit de piezas de junta 161435 N° DE LLAVE N° DE PIEZA DESCRIPCIÓN 161007 JUNTA DEL CONTENEDOR 161013...
- Page 24 INSTRUCCIONES PARA DAR MANTENIMIENTO 1. Desenrosque el 2. Desenganche el cilindro 3. Retire y deseche el cilindro contenedor del generador. del pistón de la bomba. del pistón de la bomba y las piezas asociadas. 4. Desenrosque el 5. Retire y deseche el pistón 6.
-
Page 25: Resolución De Problemas
RESOLUCIÓN DE PROBLEMAS Problema Causa Solución (Síntoma) (Causa probable) (Acción correctiva) No pulveriza 1.) Boquilla (3) y/o extremo del serpentín (3) 1.1.) Retire y limpie el orifi cio de la mientras que la obstruidos o atascados. boquilla. Vea la Figura 1. unidad está... - Page 26 RESOLUCIÓN DE PROBLEMAS CONTINUACIÓN ATENCIÓN: Deje que el generador se enfríe antes de darle mantenimiento. Imagen 1 Imagen 2 Agrandar la vista del orifi cio de la boquilla Imagen 3 Imagen 4 NOTA: primero retire el barril de plástico. Imagen 5 Cilindro de gas propano Disparador para la bomba.
- Page 27 ATTENTION : Lisez et suivez toutes les instructions Ne retournez pas ce brumisateur au magasin Pour obtenir de l’aide, de l’information ou des pièces, appelez : 1-800-311-9903 The Fountainhead Group, Inc. 23 Garden St., New York Mills, NY 13417 1-800-311-9903 www.TheFountainheadGroup.com Manual No.
-
Page 28: Avant De Commencer
AVANT DE COMMENCER Principe de vaporisation La vaporisation par brumisateur est I'une des méthodes les plus effi caces et économiques d'application d'un insecticide. Le Brumisateur Burgess® présente en plus I’avantage d’e’tre entiérement portable, pratique donc pour Ie mode de vie plus mobile et tourné vers I’extérieur qui est Ie notre. - Page 29 Pour faire jouer votre garantie, écrivez-nous á The Fountainhead Group, Inc. - Centre de Service à la Clientèle Lundi au vendredi, 8 h à 17 h, HNE Sans frais : 1-800-311-9903 ou courriel : Info@TheFGI.com ou Accès en ligne à...
-
Page 30: Précautions De Sécurité
AVANT DE COMMENCER SUITE Brouillard sec et humide Le degré d'humidité du brouillard est commandé par la fréquence de pompage. Un pompage à la fréquence recommandée, à savoir toutes les 3 ou 4 secondes, produit Ie brouillard Ie plus effi cace. Le degré d'humidité du brouillard peut étre déterminé en faisant passer un marceau de carton sec à... - Page 31 AVANT DE COMMENCER SUITE 6. Ne laissez jamais le brumisateur sans supervision tandis que le brûleur est allumé. 7. Préchauff ez toujours votre brumisateur pendant au moins 2 minutes tout en le gardant à niveau par rapport au sol. Si vous ne le préchauff ez pas, cela pourrait bloquer l’orifi ce du brûleur et endommager votre brumisateur.
- Page 32 PRÉPARATION DU BRUMISATEUR POUR SON UTILISATION Préparation du brumisateur pour son utilisation 1. Assurez-vous que la gâchette est verrouillée en poussant le bouton de verrouillage à l'avant de la gâchette vers la droite (voir fi g. 2). Ceci évitera le pompage accidentel d'insecticide dans la bobine.
- Page 33 MODE D’EMPLOI 1. S'assurer que la détente est bloquee. 2. Placer Ie Brumisateur sur une surface plane pour I'allumer et faire chauff er. 3. Gratier une allumette et la placer sous la spire visible àtravers I'enveloppe de protection (Fig. (3). 4.
- Page 34 MODE D’EMPLOI SUITE Procédure d'utilisation de brumisation 1. Pour une brume sèche appropriée, pompez la gâchette à des intervalles de 3 à 4 secondes. Un pompage trop fréquent mènera à une brume humide. 2. Si une fl amme apparaît au bout de la buse, cessez immédiatement le pompage. Fermez la soupape de propane.
-
Page 35: Entretien
ENTRETIEN Stockage 1. Retirer la bouteille de propane du Brumisateur et entre poser dans un endroit frais et bien aèrè, hors de portèe des enfants. 2. Ne pas entreposer d'insecticide dans Ie rèservoir de I'appareil. 3. En cas de stockage de longue durèe, rincer Ie rèservoir d'insecticide et Ie Brumisateur en vaporisant du kèrosène a travers Ie système. - Page 36 TROUSSES ET PIÈCES ATTENTION : Laissez refroidir le brumisateur avant son entretien. 1. Buse N° DE CLÉ N° DE PIÈCE DESCRIPTION 161015 BUSE DE SERPENTIN DE VAPEUR 2. Trousse de pièces de joint d’étanchéité 161435 N° DE CLÉ N° DE PIÈCE DESCRIPTION 161007 JOINT D’ÉTANCHÉITÉ...
-
Page 37: Instructions D'entretien
INSTRUCTIONS D’ENTRETIEN 1. Dévissez le vase du 2. Décrochez le cylindre du 3. Retirez et jetez le brumisateur. piston de pompe. cylindre du piston de pompe et les pièces associées. 5. Retirez et jetez le piston 6. Retirez et jetez 4. -
Page 38: Dépannage
DÉPANNAGE Solution Problème Chercher (Mesure corrective) (Symptôme) (Cause probable) Aucune brume 1.) La buse (3) et/ou l'extrémité de la 1.1.) Retirez et nettoyez l'orifi ce de la buse. lorsque l'appareil est bobine (3) est obstruée ou bloquée. Voir la Figure 1. en marche - Brûleur fonctionne. - Page 39 DÉPANNAGE SUITE ATTENTION : Laissez refroidir le brumisateur avant son entretien. Figure 1 Figure 2 Vue élargie de l’orifi ce de la buse Figure 3 Figure 4 NOTE : Retirez d’abord le corps de plastique. Figure 5 Bouteille de propane Gâchette pour la pompe.
- Page 40 SERVICE KITS, PARTS & ACCESSORIES ARE AVAILABLE BY CONTACTING The Fountainhead Group, Inc. - Customer Service Center Monday - Friday 8 A.M. - 5 P.M., EST Toll Free: 1-800-311-9903 e-mail: Info@TheFGI.com Access online at: www.TheFountainheadGroup.com...
Need help?
Do you have a question about the Burgess Portable Propane Insect Fogger and is the answer not in the manual?
Questions and answers