
Summary of Contents for Belifu SU-804A
- Page 1 FOOD FRESH VACUUM SEALER Electric Air Sealing Preserver System OPERATION MANUAL Model: SU-804A...
-
Page 2: Customer Service
Register within 2 weeks after receiving your vacuum sealer machine, extend the warranty to 36 month. Make sure you do this NOW to ensure your purchase is 100% covered. PLEASE VISIT NOW → https://belifu.com/warranty CUSTOMER SERVICE support@belifu.com @Belifu +86 19986945097 Please download the user manual on below link: https://belifu.com/downloads ... -
Page 3: Safeguards & Tips
11. Close supervision is required when children use the appliance. Do not play with the appliance as a toy. 12. Allow the machine to rest for up to 40 seconds between each use to prevent damage to the unit. 13. Do not use continuous dry burning, which will damage the heating wire and Teflon tape. IMPORTANT TIPS 1. Vacuum packaging isolates microorganisms from the air, but it cannot destroy microorganisms on the food. Perishable foods, such as raw and cooked meat, still need to be refrigerated or frozen after vacuum packaging. Low temperature can inhibit the growth of microorganisms. 2. For better sealing, please use the vacuum packaging bag with textured surface, you can contact Belifu to buy. 3. During the vacuuming process, if liquid, debris, or food particles are drawn into the vacuum chamber, please clean the vacuum chamber after use. 4. Fill food less than 3/4 of the bag. Or the overfilled bag will slide out of the vacuum chamber while sealing. 5. Two sides of the original vacuum bag are made by a special process. It is recommended not to cut the side of the original vacuum bag. The self‐made side lines do not meet the vacuum requirements. 6. Keep the bag stretch flat before vacuuming. ... -
Page 4: Structure And Functions
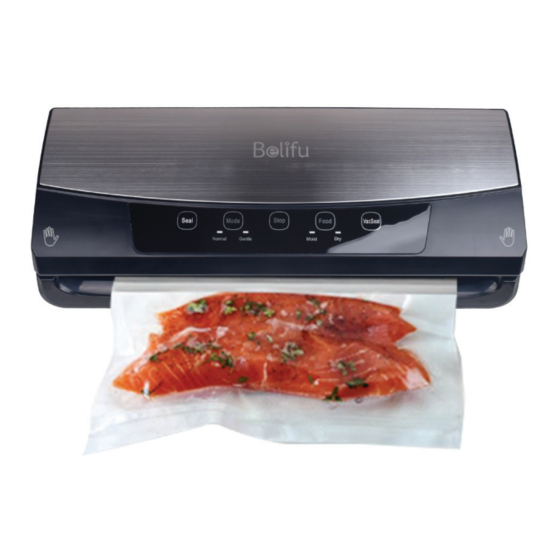
G. Vacuum Chamber: The bag must be placed within the vacuum chamber for the vacuum to work properly. H. Rubber Lip: Helps to flatten opening for better seal. I. Vacuum Nozzle: When pumping external vacuum canister, wine stopper or other accessories, insert the hose into the nozzle gently. Do not block the nozzle when using or it will cause damage to the unit. J. Canister Button: Press this button to activate the vacuum packaging to an external canister. Silicone Sealing Strip: This helps create an Air Proof seal for the vacuum, to prevent leaking. The user-friendly, intuitive control panel makes it easy for you to get the most out of your Belifu System:... -
Page 5: Specifications
1. "Mode" button: 2 settings (Normal and Gentle). The default mode is Normal. When the food is crumbly, press the button to change the mode to Gentle. You can manually control the degree of vacuum by pressing “Seal” button at any time, the food will be sealed automatically. Gentle mode is use for cookies, marshmallows, and other fragile items. (Note: if the power is interrupted, this setting will return to a preset standard mode). 2. "Food" button: 2 settings (Dry and Moist). The default mode is Dry. Press the button, changes to Moist mode. You can choose the mode according to the food type. (Approximate recommended intervals are 40 sec). ... - Page 6 2. Roll bags: Depend on your food or items. Cut the required bag size by inner cutter and sealing one side of the bag by vacuum sealer. VACUUMING & SEALING 1. Put and flatten the opening of the bag in the vacuum chamber, ensure the bag does not cover the vacuum nozzle (If using a roll, you need to cut the size of the bag you need, and seal one side first before continuing). NOTE: Place bag in the vacuum chamber accurately, or it will not be able to vac seal. Canister Button The position of Vacuum Chamber Silicone lip: the position to seal 2. Press the cover down until you hear a “click” sound, which indicates the locking hooks locked correctly, then choose vacuum or seal. NOTE: The "click" sound is loud and your hands can feel the buckles are locked. ...
-
Page 7: Preservation With Vacuum Bag
“Seal” button, if you do not need vacuum and “Vac Seal” button just want to seal, you can directly click here. 4. After the sealing done, press the “Release Buttons” to unlock and open the lid, then take out the sealed food. NOTE: When the unit is not in use, please do not lock the buckle. If the buckle is locked for a long time, the sponge strip will be deformed and affect the vacuuming effect. Do not close the lid when the unit is not in use. ... - Page 8 7. Press the release buttons at two sides, then take out the sealed items. Note: If the food is wet, please choose Moist mode. But it is better not to vac/seal the moist food. PRESERVATION WITH VACUUM CANISTER 1. Connect the connector accessory on the vacuum outlet and outer storage (storage bags or containers) 2. Keep pressing the vacuum outlet power button, until you feel the vacuum status were complete. Then remove your finger on the button. 3. When vacuum finishes, remove the connector on the machine and outer storage. Note: Please do not lock the lid when you are not using the machine as it will cause the gasket deformation. How to use vacuum canister and stopper 1. Place the food in a vacuum canister. 2. Plug in the power supply first, and then press the locks by hands, the indicator lights up (the default is Dry). 3. Put the items inside the canister and cover it with the lid, insert one end of the hose into the Suck Air Hole on the appliance, then insert the other end into the hole on the top of the canister lid. 4. Press the "Canister" button or "VacSeal" button, it begins to draw the air from the canister and creates a ...
-
Page 9: General Safety Instructions
TIPS ON USING CANISTER: Please remove the lid before you put the canister in microwave oven. Place the canister in refrigerator for better preservation. GENERAL SAFETY INSTRUCTIONS 1. Do not operate or store the appliance in humid or wet areas or outdoors. This appliance is NOT intended for use in boats or moving vehicles. Do not use any accessories, attachments, consumables, and spare parts (e.g. foils, bags, vacuum containers), which are not recommended by the manufacturer. Do not operate the appliance, when the appliance or any part of it is likely to be damaged. Damaged or unsuited parts could cause injuries and damage due to overheating, implosion, and electric shock. 2. Before each operation, ensure that the vacuum chamber is completely empty. Always ensure that the vacuum pump will not be sunk in any liquids. Immediately cancel the running process by pressing the STOP button if liquids are sucked in. 3. Operate the appliance on a well accessible, stable, level, dry and suitable large table, or counter. During operation, please keep the appliance in an appropriate distance of at least 10cm on each side. Keep at least 50cm of free space in front and above the appliance for free access. 4. Do not place any clothes or tissue or other objects under or on the appliance during operation, to avoid risk of fire, electric shock, and overheating. Do not place the appliance or any part of it on or near hot surfaces (e.g. burner, heater, range, or oven). 5. Keep in mind that the heating bar and sealing bar will get hot during operation. Do not touch the heating bar and sealing bar with your hands or any delicate objects shortly after operation. 6. The vacuum sealer is intended for vacuuming and sealing the designated bags, and vacuum containers only. Insufficient or damaged vacuum containers may burst (implode) when vacuumed, leading to a high risk of injuries and damage according to splinters and splashes flying around. Before vacuuming, vacuum containers ... -
Page 10: Helpful Hints
Correct Disposal of this product This marking indicates that this product should not be disposed with other household wastes throughout the EU. To prevent possible harm to the environment or human health from uncontrolled waste disposal, recycle it responsibly to promote the sustainable reuse of material resource. To return your used device, please use the return and collection systems or contact the retailer where the product was purchased. -
Page 11: Troubleshooting
2. AIR IS STILL IN THE BAG AFTER VACUUM: Examine the bag whether it leaks. Fill bag with air, then immerse it in water and apply pressure. Please use a new bag if bubbles appear, which shows a leak. 3. Please check the seal of bag. A wrinkle in the bag along the seal may cause leakage and allow air to re‐enter, just cut bag, and reseal. 4. The Belifu bags are manufactured with special side seams. Do not attempt to make the side seams for Bag by yourself, because it may cause leakage and allow air to re‐enter. Note: The smooth bag can only be sealed and cannot be vacuumed. ... - Page 12 2. Sometimes moisture or food material (such as juices, grease, crumbs, powders, etc.) along seal prevents bag from sealing properly. Cut bag, wipe top inside of and reseal. 3. If you vacuum package sharp food items, bag may have been punctured, use a new bag if there is a hole. Cover sharp food items with a soft cushioning material, such as a tissue paper, and reseal. 4. If there’s air still in the bag, fermentation, or the release of natural gases from inside the foods may have occurred, when this happens, food may have begun to spoil and should be discarded. 5. Vegetables and fruits that are too fresh belong to green plants, which emit photosynthesis by themselves. Fermented products also emit gas by themselves. These two types of food are not suitable for vacuum sealing and will swell internally. 6. Try not to vacuum seal the freshly heated ingredients, because the temperature is too high. The heated food itself is large when vacuum sealing. After temperature is cooled, caused the volume to become smaller, which causes the original tightening. The ingredients have become loose, like a leak. 7. The bag is filled too much during vacuum sealing, and the bag mouth is not flattened, resulting in a gap after the bag is squeezed and squeezed. ...
- Page 13 If the bag melts, rubber lip may have become too hot, always wait at least 5 minutes for appliance to cool down before you vacuum package another item. CANNOT SEAL 1. The food influence: If the food is too wet to seal, or the bag is thick, then please select "Moist" mode, and after the vacuum sealing, press the sealing button once more. 2. The ordinary food cannot be sealed. Touch the position of the heating wire after the sealing, if there is no temperature, the heating wire has been burned out. Do not operate continuously. Allow the appliance to cool for 40 seconds before using it again. If the heating wire of the machine is burnt out, please contact our ...
- Page 14 Always thaw foods in either refrigerator or microwave ‐ do not thaw perishable foods at room temperature. To reheat foods in a microwave in a Belifu Bag, always cut corner of the bag before placing it on a microwave‐safe dish. However, to avoid hot spots, do not reheat bone‐in meat or greasy foods in microwave ...
- Page 15 Blanching times range from 1 to 2 minutes for leafy greens and peas; 3 to 4 minutes for snap peas, sliced zucchini, or broccoli; 5 minutes for carrots; and 7 to 11 minutes for corn on the cob. After blanching, immerse vegetables in cold water to stop the cooking process. Finally, dry vegetables on a towel before vacuum sealing. Note: All vegetables (including broccoli, brussels sprouts, cabbage, cauliflower, kale, turnips) naturally emit gases during storage. Therefore, after blanching, they must be stored in freezer only When freezing vegetables, it is best to pre‐freeze them for 1‐2 hours or until solidly frozen. To freeze ...
- Page 16 Preparation Guidelines for Snack Foods: Your snack foods will maintain their freshness longer when you vacuum seal them. For best results, use a Canister for crushable items like crackers. STORAGE GUIDE In Freezer (-18 ± 2 ° C) No Vacuum Seal Belifu VPS Meat 6months 1‐2years Fish and Seafood 6months ...
- Page 17 Problem Solution Seal LED Flashing • Unit is overheated. Always allow 20 seconds between seals. Under heavy usage, appliance will shut off automatically and Red Light will flash. Wait for 20 min. for unit to cool off. • Always wait 40 seconds between seals.
- Page 18 Sealing Strip may have become too hot. Always wait at least 20 seconds for appliance to cool down before you vacuum seal another item. • Use Belifu brand bags. Our Bags and Rolls are specially designed for units. FEATURES: Automatic Vacuum Air Sealing Made Easy ...
- Page 19 Selectable Sealing Modes: Seals ‘Dry’ and ‘Moist’ Food Creates Strong, Air‐Tight Bags via Heat‐Sealing Re‐Usable & Waterproof Air‐Sealing Bags High‐Power Suction Element Soft Touch Digital Button Controls Stain‐Resistant & Easy‐to‐Clean Housing Safe Placement on Any Kitchen Table/Countertop LED Indicator Lights *Can Also Be Used for Preserving/Waterproofing Non‐Food Items 2-Year Limited Warranty This product is warranted to be free from defects in material and workmanship under normal use and service for 2 years from the date of original purchase with receipt.
Need help?
Do you have a question about the SU-804A and is the answer not in the manual?
Questions and answers