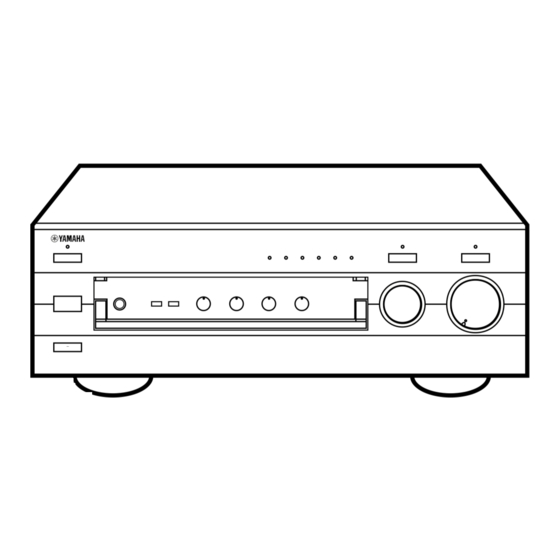
Summary of Contents for Yamaha 396
- Page 1 AX-496/396 STEREO AMPLIFIER AMPLIFICATEUR STEREO OWNER’S MANUAL MODE D’EMPLOI BEDIENUNGSANLEITUNG BRUKSANVISNING MANUALE DI ISTRUZIONI MANUAL DE INSTRUCCIONES GEBRUIKSAANWIJZING...
- Page 2 UNPACKING DEBALLAGE AUSPACKEN UPPACKNING DISIMBALLAGGIO DESEMBALAJE UITPAKKEN Remote control Télécommande Fernbedienung Fjärrkontroll Telecomando Control remoto Afstandbediening Opening and closing the front cover Close the front cover whenever the controls inside the panel are not used. Ouverture et fermeture du couvercle avant Fermer le couvercle avant lorsque les commandes placées à...
-
Page 3: Table Of Contents
Thank you for selecting this YAMAHA stereo amplifier. FEATURES AX-496 85W + 85W (8 ) RMS Output Power, 0.019% THD, 20–20,000 Hz AX-396 60W + 60W (8 ) RMS Output Power, 0.019% THD, 20–20,000 Hz Highly Dynamic Power, Low Impedance Drive Capability... -
Page 4: Caution
Using this unit with a higher voltage than specified is dangerous and may result in fire or other accidents. YAMAHA will not be held responsible for any damage resulting from use of this unit with a voltage other than specified. -
Page 5: Notes About The Remote Control
NOTES ABOUT THE REMOTE CONTROL Battery installation Since the remote control will be used for many of this unit’s control operations, you should begin by installing the supplied batteries. 1. Turn the remote control over and remove the battery compartment cover by sliding it in the direction of the arrow. -
Page 6: Connections
● Use RCA type pin plug cables for audio/video units except speakers. ● The output (or input) terminals of YAMAHA audio/video units numbered 1, 2, 3, 4, etc. on the rear panel must be connected to the same-numbered terminals of this unit. -
Page 7: Connecting Speakers
Connecting speakers Connect the SPEAKERS terminals to your speakers with the wire with the proper gauge (keep it as short as possible). If the connections are faulty, no sound will be heard from the speakers. Make sure that the + and – polarity markings of the speaker wires are observed and set correctly. -
Page 8: Controls And Their Functions
CONTROLS AND THEIR FUNCTIONS FRONT PANEL AX-496 NATURAL SOUND STEREO AMPLIFIER STANDBY POWER PHONES STANDBY/ON AX-396 NATURAL SOUND STEREO AMPLIFIER STANDBY POWER PHONES STANDBY/ON AX–496 TAPE SPEAKERS BASS TREBLE BALANCE LOUDNESS FLAT AX–396 TAPE SPEAKERS BASS TREBLE BALANCE LOUDNESS FLAT... - Page 9 LOUDNESS AX-396 only Used to compensate for the human ears’ loss of sensitivity to high and low-frequency ranges at low volume. (Refer to page 12 for details.)
-
Page 10: Remote Control
REMOTE CONTROL The remote control is designed to control the most commonly used functions of the main unit. If you have a YAMAHA CD player, tuner, tape deck, etc. with remote control compatibility, this remote control will also control their various functions. -
Page 11: Operation
Adjust the tonal quality by using the BASS, TREBLE, BALANCE, LOUDNESS controls or the CD/DVD DIRECT AMP switch (or PURE DIRECT switch for AX-496 only). (Refer to page 12). AX-396 only If the TAPE MONITOR indicator is illuminated when you TAPE CD/DVD... - Page 12 Recording a source to tape (or MD) AX-496 Select the source you want to record. REC OUT CD/DVD TAPE TUNER PHONO Play the source. Select the source with the INPUT selector and adjust VOLUME to check the sound output. – –dB STANDBY TAPE...
- Page 13 AX-396 STANDBY POWER STANDBY/ON Select the source you want to record. – TAPE CD/DVD Play the source and then turn VOLUME up to check the sound output. – –dB Notes on recording ● The VOLUME, BASS, TREBLE, BALANCE, LOUDNESS controls and CD/DVD DIRECT AMP switch (and PURE DIRECT switch for AX-496 only) have no effect on the material being recorded.
-
Page 14: Loudness Control
CD/DVD bypassing the INPUT selector, the BASS, TREBLE, BALANCE and LOUDNESS controls (and the TAPE MONITOR switch for AX-396 only), and then sent to the power amplifier. This signal routing reproduces the purest sound eliminating any alterations to the CD or DVD signals. -
Page 15: Troubleshooting
Refer to the chart below when this unit does not function properly. If the problem you are experiencing is not listed below or if the instructions given below do not help, disconnect the power cord and contact your authorized YAMAHA dealer or service center. -
Page 16: Specifications
SPECIFICATIONS Power Section Minimum RMS Output Power 8 , 20 Hz to 20 kHz, 0.019% THD < > AX-496 ... 85W+85W < > AX-396 ... 60W+60W Maximum Output Power (EIAJ) (1 kHz, 10% THD) < > AX-496 < > AX-396... - Page 17 YAMAHA ELECTRONICS (UK) LTD. YAMAHA HOUSE, 200 RICKMANSWORTH ROAD WATFORD, HERTS WD1 7JS, ENGLAND YAMAHA SCANDINAVIA A.B. J A WETTERGRENS GATA 1, BOX 30053, 400 43 VASTRA FRÖLUNDA, SWEDEN YAMAHA MUSIC AUSTRALIA PTY, LTD. 17-33 MARKET ST., SOUTH MELBOURNE, 3205 VIC., AUSTRALIA...


Need help?
Do you have a question about the 396 and is the answer not in the manual?
Questions and answers
My volume knobs are behaving scratchy. How can I solve this problem.
To fix scratchy volume knobs on a Yamaha device with part number 396, follow these steps:
1. Turn off and unplug the device.
2. Remove the knob by gently pulling it off the shaft.
3. Use electronic contact cleaner (safe for plastics) and spray a small amount into the potentiometer (volume control) through any small opening.
4. Rotate the knob back and forth fully several times to distribute the cleaner.
5. Let it dry completely before turning the device back on.
If the problem persists, the potentiometer may need replacement.
This answer is automatically generated