Table of Contents
Advertisement
Available languages
Available languages
Quick Links
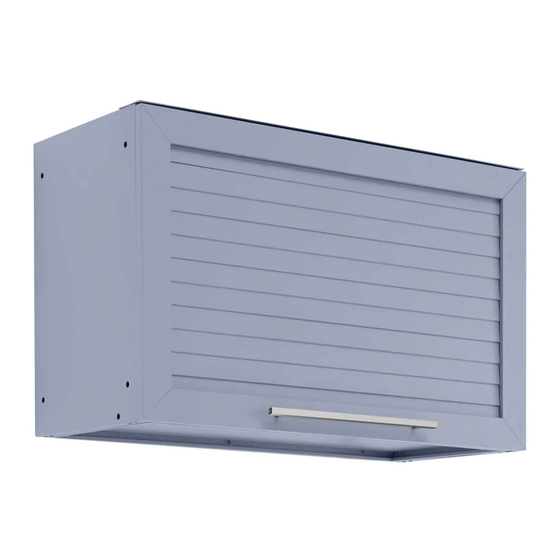
OUTDOOR KITCHEN 32" Wall Cabinet Aluminum Coastal Gray
Use two or more people to move, assemble or install cabinets and locker to avoid back injury.
Do not leave children unattended near cabinets. High risk of tipping if cabinets are installed
incorrectly: securely attach cabinets to the wall to avoid serious injury.
For assistance, call 1.877.306.8930; for UK 0800.031.4069; e-mail at info@newageproducts.com
STOP
Warning: Excessive weight
hazard!
Use two or more people to move, assemble, or
install cabinets to avoid back injury. Do not
leave children unattended near cabinets. High
risk of tipping if cabinets are installed
incorrectly: securely attach cabinets to the
wall to avoid serious injury. For assistance, call
1.877.306.8930; for U.K 0800.031.4069: e-mail at
info@newageproducts.com.
ATTENTION
Need help or spare parts? For fastest service,
contact NewAge Products at 1-877-306-8930;
or support@newageproducts.com.
Do not return to the retailer.
: Is your cabinet damaged?
65413-INSTL-01-Rev.00
Advertisement
Table of Contents

Related Manuals for NewAge Products 65413

Summary of Contents for NewAge Products 65413
- Page 1 For assistance, call 1.877.306.8930; for U.K 0800.031.4069: e-mail at info@newageproducts.com. ATTENTION : Is your cabinet damaged? STOP Need help or spare parts? For fastest service, contact NewAge Products at 1-877-306-8930; or support@newageproducts.com. Do not return to the retailer. 65413-INSTL-01-Rev.00...
-
Page 2: Weight Capacity
Weight Capacity lbs. lbs. lbs. 32" - Wall Cabinet Max 200 lbs. -
Page 3: Parts Supplied
Unpacking • Begin by placing the package on a protected fl at surface. • Remove all cardboard, foam packaging material and clear plastic bags. • Dispose / recycle all packaging materials. • Verify all the contents in the box and gather the required tools. See “Parts” and “Tools Needed” in the list below. Parts Supplied Wall Cabinet... -
Page 4: Limited Warranty
If a product is properly installed, operated, and maintained fails to meet the below limited warranty, NewAge Products, Inc (“NewAge”) will replace the defective product or parts. Subject to the limitations and disclaimers set forth below or in other product documentation, NewAge... -
Page 5: Tools Needed
OTHER NOTES TO CONSUMER: Discoloration due to the high heat, for example beside a grill, is a trait of stainless steel and is not covered. Surface rust resulting from acid rain or environmental chemicals are not covered. (Please see maintenance information to combat surface rust). -
Page 6: Installing The Handles
Installing the Handles Align handle to holes on doors Parts Needed. or drawers. Stainless Handle Bolt Steel M4 x 25mm Handles Screw in bolts. - Page 7 Securing Cabinets on Note: Do not load cabinet Studded Wall without first securing to the wall. Use stud finder to locate the Gather parts. studs and mark a line on the wall with a pencil at desired height. Wall Screw Wall Washer (¼”...
- Page 8 Fastening Cabinets(to each other) Remove plastic caps from cabinets. Parts Needed. 4 X Hex Nut(M6) 4 X Hex Bolt (M6 x 50mm) Align bolts, tighten lightly. Level cabinets and tighten all bolts.
-
Page 9: Adjusting The Door Hinges
Adjusting The Door Hinges Using a Philips screwdriver, the doors can be adjusted: Left, right, forwards and backwards. To adjust the doors left or right, turn the screw (A) clockwise or counterclockwise. To adjust the gap between the doors and frame, turn the screw (B) clockwise or counterclockwise. - Page 10 Care and Maintenance of your Stainless Steel Cabinets Perform Regular Maintenance Wash regularly with clean fresh water, mild detergent and a micro fi ber cloth. After washing rinse in clean water and wipe the surface dry with your cloth remembering to go with the grain on brushed stainless steel.
- Page 11 1.877.306.8930; au R.-U., composer le 0800.031.4069; ou envoyer un courriel à l’adresse info@newageproducts.com. ATTENTION : Est votre armoire ARRÊT endommagée? Avez vous besoin d’aide ou de pièces de rechange? Contactez NewAge Products a 1-877-306-8930; ou support@newageproducts. com. Ne pas retourner au détaillant. 65413-INSTL-01-Rev.0...
- Page 12 Capacité de poids lbs. lbs. lbs. Armoire en aluminium troix tiroirs de 32 po – 200 lb max.
-
Page 13: Pièces Fournies
Déballage • Pour commencer, posez l’emballage sur une surface plane protégée. • Enlevez tous les matériaux d’emballage en carton et en mousse, ainsi que les sacs de plastique transparent. • Jetez ou recyclez tous les matériaux d’emballage. • Vérifi ez tout le contenu de la boîte et assemblez tous les outils requis. Voir les rubriques intitulées « Pièces fournies » et «... -
Page 14: Garantie Limitée
Si un produit ayant été correctement installé, utilisé et entretenu ne répond pas aux conditions de la garantie limitée ci-dessous, NewAge Products, Inc. (« NewAge ») remplacera les pièces ou le produit défectueux. Sous réserve des limitations et des exclusions énoncées ci-dessous ou dans la documentation d’un autre produit, NewAge garantit à... -
Page 15: Outils Requis
AUTRES REMARQUES ADRESSÉES AU CONSOMMATEUR : L’altération de couleur causée par la chaleur élevée, par exemple près du gril, est une caractéristique de l’acier inoxydable et n’est pas couverte par la garantie. La rouille superfi cielle résultant des pluies acides ou de la présence de substances chimiques dans l’environnement n’est pas couverte. -
Page 16: Installation Des Poignées
Installation des poignées Aligner la poignée sur les trous Pièces requises. de la porte ou du tiroir. Poignée en boulon de la acier poignée inoxydable M4 x 25mm Serrer la vis. - Page 17 Remarque: Montages des armoires sur Ne pas charger l’armoire sans avoir d’abord fixer au clouté mur mur. Utiliser le localisateur de montants pour Rassembler les pièces. repérer les montants et tracer une ligne sur la cloison avec un crayon. Vis murales Rondelle murale (¼”...
- Page 18 Fixation des armoires (les unes aux autres) Enlevez les bouchons en plastique Pièces requises des armoires. 4 X écrous 4 X Hex Bolt hexagonaux (M6) (M6 x 50mm”) Alignez les boulons, puis serrez-les légèrement. Mettez les armoires de niveau, puis resserrez tous les boulons.
- Page 19 Réglage des charnières de portes Il est possible de régler les portes avec un tournevis Phillips : vers la gauche, la droite, l’avant ou l’arrière. Pour régler les portes vers la gauche ou la droite, tourner la vis (A) dans le sens des aiguilles d’une montre ou dans le sens inverse des aiguilles d’une montre.
- Page 20 Entretien des armoires en acier inoxydable Faites régulièrement l’entretien – Lavez régulièrement les armoires avec de l’eau claire, un détergent doux et un chiff on microfi bre. Rincez ensuite à l’eau claire et essuyez la surface avec le chiff on, en suivant le grain de l’acier inoxy- dable brossé.
Need help?
Do you have a question about the 65413 and is the answer not in the manual?
Questions and answers