Table of Contents
Advertisement
Available languages
Available languages
Quick Links
Advertisement
Chapters
Table of Contents

Subscribe to Our Youtube Channel
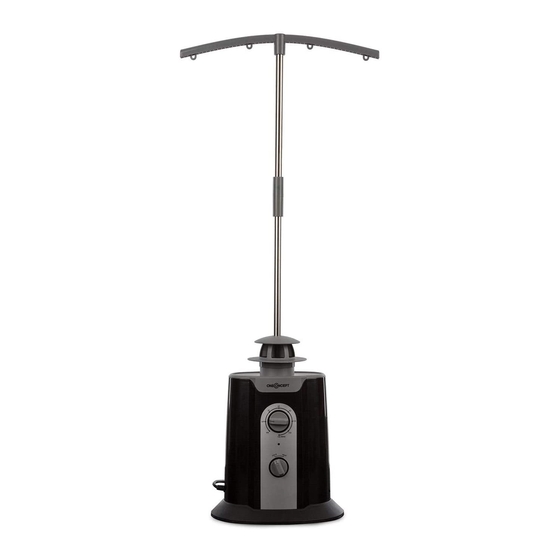
Summary of Contents for oneConcept ShirtButler
- Page 1 ShirtButler Automatischer Shirt-Trockner Automatic Shirt Dryer 10032909 10032910...
-
Page 3: Table Of Contents
Sehr geehrter Kunde, wir gratulieren Ihnen zum Erwerb Ihres Gerätes. Lesen Sie die folgenden Hinweise sorgfältig durch und befolgen Sie diese, um möglichen Schäden vorzubeugen. Für Schäden, die durch Missachtung der Hinweise und unsachgemäßen Gebrauch entstehen, übernehmen wir keine Haftung. Scannen Sie den QR-Code, um Zugriff auf die aktuellste Bedienungsanleitung und weitere Informationen rund um das Produkt zu erhalten. -
Page 4: Sicherheitshinweise
SICHERHEITSHINWEISE • Halten Sie das Gerät von Wasser und Feuer fern. Stellen Sie es auf einen ebene, stabilen Untergrund an einem gut belüfteten Ort auf. • Wischen Sie das Gerät nur mit einem weichen Tuch ab, reinigen Sie e,s nicht mit Wasser. •... -
Page 5: Geräteübersicht
GERÄTEÜBERSICHT Motor Stützrohr Bedienfeld Verbindungsstück Timer Klammern Regler Obere Halterung Basis Luftsack für Kleidung Luftauslass... -
Page 6: Zusammenbau
ZUSAMMENBAU Setzen Sie den Motor auf die Basis. Öffnen Sie den Reißverschluss des Luftsacks und setzen Sie die Abdeckung auf den Motor. Befestigen Sie die Luftauslassöffnung am Motor. -
Page 7: Bedienung
Installieren Sie die beiden Stützrohre mit Hilfe des Verbindungsstücks. Setzen Sie die obere Halterung mit den Clips auf das Stützrohr und schließen Sie den Luftsack.. Hinweis: Gehen Sie beim Auseinanderbauen in umgekehrter Reihenfolge vor. BEDIENUNG • Stecken Sie den Stecker in die Steckdose. -
Page 8: Tipps
TIPPS Achten Sie darauf, dass das Hemd bzw. das Oberteil formschlüssig und glatt auf dem Luftsack sitzt. FEHLERSUCHE UND FEHLERBEHEBUNG Problem Mögliche Ursache und Lösungsansatz Die Trocknungszeit ist Die Kleidung ist sehr dick. ungewöhnlich lang (> 180 Die Kleidung wurde vorher nicht geschleudert. Minuten) Der Luftsack wurde nicht richtig geschlossen und dadurch entweicht Luft. - Page 9 Dear Customer, Congratulations on purchasing this equipment. Please read this manual carefully and take care of the following hints to avoid damages. Any failure caused by ignoring the items and cautions mentioned in the instruction manual is not covered by our warranty and any liability. Scan the QR code to get access to the latest user mannual and other information about the product CONTENT...
-
Page 10: Safety Instructions
SAFETY INSTRUCTIONS • Keep the unit away from water and fi re. Place it on a level, stable surface in a well-ventilated place. • Wipe the unit with a soft cloth only, do not clean e,s with water. • Dry only spun laundry with the appliance, no wet laundry that is still dripping. -
Page 11: Product Overview
PRODUCT OVERVIEW Motor Supporting tube Control panel Connector Timer Clips Knob Top rack Base Air bag for clothes Outlet vent... -
Page 12: Assembly
ASSEMBLY Put the motor on the fixed base. Open the zip of air bag, and put the cover on to motor, install the outlet vent on the motor. -
Page 13: Operation
Install the two supporting tubes with the connector, and put the top rack on the supporting tube with the clips and zip the clothes air bag. Note: When disassembling, proceed in reverse order. OPERATION • Insert the power plug into power. •... -
Page 14: Tips
TIPS Please make the sure the shirt/cloth is formfitting and smooth on the air bag. TROUBLESHOOTING Problem Possible Cause and suggested Solution Drying time too long Clothes may be very thick. (>180minutes) Clothes may not have been dewatered. Cover may not have been closed properly and hot air escaped.


Need help?
Do you have a question about the ShirtButler and is the answer not in the manual?
Questions and answers