Table of Contents
Advertisement
Advertisement
Table of Contents

Related Manuals for FLAMENT INNOVATIONS BFP-ICARUS

Summary of Contents for FLAMENT INNOVATIONS BFP-ICARUS
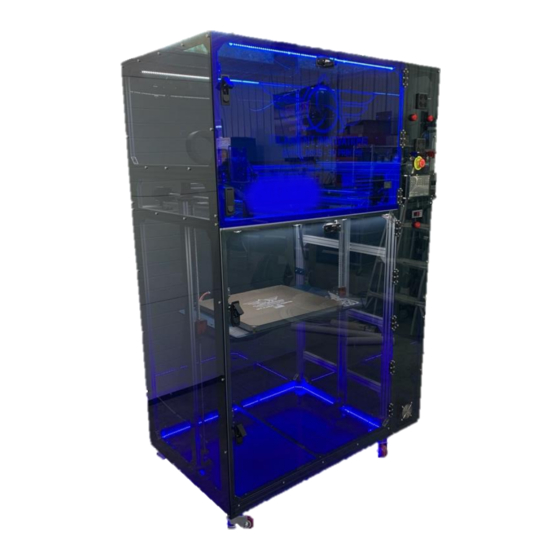
- Page 1 BFP-ICARUS Manual Gen 3 - 4 V1.0 (6/17/20)
-
Page 2: Table Of Contents
Table of Contents Introduction................................. 3 Quick Fact Guide .............................. 4 Quick Start Guide............................. 5 Unboxing ................................6 Component Names and Locations........................7 Touchscreen Interface ............................. 10 Initial Setup and Calibration ........................11 Tools and Accessories .......................... 12 Leveling the Machine ........................... 12 Powering the Unit On, Off, and Troubleshooting ................ -
Page 3: Introduction
Introduction To our newest Filament Innovations customer, Congratulations on owning your very own BFP-ICARUS 3D Printer! These 3D Printers are built to fill a clear need in the 3D Printing sector: large-scale, affordable, and reliable machines. These 3D Printers combine the latest technology and hardware into one unit. -
Page 4: Quick Fact Guide
Quick Fact Guide The following quick fact guide will give you a brief overview of your printer and its components. Machine Size: ICARUS Size: 47 x 29 x 72 (in) Right Door Swing: 27 (in) Front Door Swing: 37 (in) Print Envelope: ICARUS Print Area: 470 x 381 x 915 (mm) -
Page 5: Quick Start Guide
Quick Start Guide The following guide allows you to check and monitor the progress of setting up your ICARUS unit. It is recommended to check each step off here to ensure everything is done in order and correctly. 1. Remove the four L-brackets from the bottom of the printer that attach it to the crate. -
Page 6: Unboxing
Unboxing The BFP-ICARUS 3D Printer ships in a wooden crate, weighing between 500 - 550 lbs. The crate dimensions are as follows: ICARUS-X Crate Size: 56 x 48 x 76 (in) Using the tools and instructions listed below, you should be able to easily remove your ICARUS from the palette and remove the shrink wrap. -
Page 7: Component Names And Locations
Component Names and Locations Before we go any farther, let us take a few minutes to understand the various components of your ICARUS unit. These components will be referenced later in the manual. At this time, the unit should NOT be powered on. - Page 8 Detects when filament has Filament run out and cleans it as it Sensor passes through. This is found in the control case on the right side. Allows the printer to roll or be locked in place with Casters retractable feet. The feet can be raised and lowered by rotating the leveling feet.
- Page 9 Removable print surface for 16 PEI Print Plate easy remove prints. The plate that is heated by 17 MIC6 Plate the heated bed. Retains heat from the Insulation heated bed. Adjustable bed levelers. Leveling These are factory set by Springs Filament Innovations staff.
-
Page 10: Touchscreen Interface
Touchscreen Interface The BFP-ICARUS is equipped with a 7” PanelDue7i LCD touchscreen from Duet3D to easily interact with the printer. In this section, we will cover the basics required to understand how to operate your printer using the touchscreen. For more in depth documentation, refer to the... -
Page 11: Initial Setup And Calibration
Initial Setup and Calibration Initial Setup and Calibration... -
Page 12: Tools And Accessories
Tools and Accessories Your printer has come with the following tools and accessories: Toolbox Contents Accessories • Metric Allen Key Set • 110VAC Power Cord • Bubble Level • Filament • Snips/Pliers • Wyze IP/Internet WebCam Leveling the Machine Using the supplied bubble level, a 19 mm wrench, and the stabilizer feet on the bottom, level the machine with the earth. -
Page 13: Powering The Unit On, Off, And Troubleshooting
Powering the Unit On, Off, and Troubleshooting The ICARUS printers run on 110 VAC power, the standard USA household electricity – the unit needs a 15A circuit for operation. The switches on the front of the control box are responsible for turning on and off the printer. As a reminder, the function of each control is listed below. - Page 14 3. Flip the red toggle switch down to power the unit off. Troubleshooting the Power The BFP-ICARUS is a straight forward machine to power on and off, however there may be times when troubleshooting may occur. • 20amp Breaker – A breaker is located inside the control box, on the bottom right.
-
Page 15: Bed Height Adjustment And Automatic Leveling
Bed Height Adjustment and Automatic Leveling Keeping a level bed is critical for accurate 3D Printing. Every ICARUS unit comes equipped with mesh bed leveling to ensure a flat bed. Even though your bed leveling, and Z-offset is factory set, it is important to check that no damage occurred during shipping. -
Page 16: Automatic Bed Leveling And Baby Z Stepping
Automatic Bed Leveling and Baby Z Stepping 3D Printing requires a very flat bed surface for large, successful prints. Because of this, we have included two forms of bed leveling for your machine. This section of the guide is to inform you of what these two bed leveling options do. -
Page 17: Moving The Printhead
Moving the Printhead The print head can be moved using the Move tab on the touchscreen. After selecting the Move button on the home screen on the touchscreen, the Move window appears. This gives a variety of options for moving the printer a certain number of millimeters in all directions. -
Page 18: System Preheating
System Preheating In order to preheat the entire system, the desired temperature needs to be set for the hotend and heated bed individually. Other than preheating for a print, the heated bed must be preheated for Mesh Bed Leveling, and the hotend must be preheated when changing filament. -
Page 19: Filament Loading
Filament Loading To begin printing with your printer, or to change filament, it is important to know how to load filament into your ICARUS. Follow the two guides below for Loading Filament for the First Time and Changing Filament. Loading Filament for the First Time 1. - Page 20 Steps to Changing Filament 1. Preheat the hotend to the correct temperature. If you are switching between different materials (i.e. PETG to PLA), it is suggested to load the filament at a temperature between the two ranges. This will soften the PETG enough for getting it out of the hotend and the PLA will not be burned when you load it.
-
Page 21: Software And Internet Setup
Software and Internet Setup Software and Internet Setup... -
Page 22: Wifi Connectivity
WiFi Connectivity The Duet2 WiFi board comes with built in WiFi connectivity for 2.4 GHz networks (it will not work on 5 GHz networks). Since initial connectivity tests are performed before the unit is shipped, all that needs to be done is to type in your SSISD and Password for your WiFi network. - Page 23 WiFi module is connected to access point NetworkName, IP address 192.168.1.239 5. Log onto a computer and ensure it is connected to the same WiFi network as the printer. Type the IP address of your printer (the number similar to 192.168.1.239) into an internet browser. 6.
-
Page 24: Duet Web Control
Duet Web Control The Duet Web Control is designed to allow users to monitor their printer from an advanced web interface. After you connect the unit to the internet, you will get an IP address, and this will be entered into a browser to access the web interface. -
Page 25: Software Slicers And Profiles
Software Slicers and Profiles Steps for Setting up with Simplify3D 1. In Simplify3D, under the following extension, select the correct profile for your unit and import it. File > Import FFF Profile 2. Check that the Start and End gCode sequences are correct under Edit Process Settings >... - Page 26 Start G-Code M561 ; clear any bed transform G28 ; home all G32 ; check bed tilt G29 ; mesh map M116 S5 ; wait for hotend and bed to reach temperature to 5 degrees End G-Code M104 S0 ; extruder heater off M140 S0 ;...
-
Page 27: Offline File Uploading And Printing
Offline File Uploading and Printing Every Touchscreen is equipped with a MicroSD port which allows for offline printing. The following guide details how to print via this method. Steps for Setting up Offline Printing 1) Acquire a MicroSD card (or an SD card with a MicroSD to SD extender). -
Page 28: Maintenance And Support
Maintenance and Support Maintenance and Support... -
Page 29: General Maintenance
General Maintenance This section will cover general maintenance of your printer to ensure it remains in great shape. Your ICARUS unit needs very little maintenance, but as with any machine, some maintenance is required to keep it in optimal condition. General Cleaning Debris, such as filament pieces, should be removed from the machine weekly. -
Page 30: Pei Plate Prep And Use
PEI Plate Prep and Use The PEI print plate surface has a powder coated surface which makes it extremely durable; however, the print plate is classified as a consumable item and is good for approximately 300 prints before it needs to be replaced. Prints are easily removed when the plate reaches room temperature and is cooled down. -
Page 31: Z-Offset Tuning
Z-Offset Tuning The Z-Offset is the space between the nozzle and the print platform after your 3D Printer has homed itself. The Z-Offset tells the printer to raise the build plate until the nozzle touches the build plate and gives the perfect first layer when a print will start. - Page 32 7. Find the Z-Probe section locate line that begins with G31. In the image below, locate Z5.85, which is our value, for this example. Your printer will have a different number here. Replace that number with the number you recorded in step 5. If you recorded 5.50, then the new line of code should read: G31 P25 X45 Y0 Z5.50 8.
-
Page 33: Heater/Pid Tuning
Heater/PID Tuning As you continue to use your printer, it is not uncommon to have to re- calibrate your thermistor to read the correct temperatures the heater cartridge is performing. You will know it is time to re-calibrate it if you receive any heater or temperature related error messages on the touch screen. -
Page 34: Icarus Print Out
ICARUS Print Out General Print Settings: Max Print Retraction Retraction Hotend Filament Speed Length Speed (ºC) (ºC) (mm/s) (mm) (mm/s) 225 - 240 100 - 110 0.50 - 1.00 10 - 35 230 - 245 80 - 110 0.50 - 0.75 10 - 35 BVOH 190 - 225... -
Page 35: Wiring
Wiring This section will provide diagrams on the wiring and electronics systems within your ICARUS unit. No maintenance or adjustment is required on these systems, but if you suspect there may be a problem or have questions about the system’s capabilities, these diagrams can be referenced. - Page 36 Duex 2 Connections...
- Page 37 Gen 4 Closed Loop BFP-ICARUS Motherboard Wiring Diagram...
- Page 38 Gen 3 – 3.5 BFP-ICARUS Motherboard Wiring Diagram...
-
Page 39: Helpful Links And Documentation
Helpful Links and Documentation The 3D Printing community is like no other. There has been a tremendous amount of information released on 3D Printing over the years. Here are some helpful links and resources to help you be an expert. •... -
Page 40: Frequently Asked Questions (Faq)
Frequently Asked Questions (FAQ) Do BFP-ICARUS 3D Printers use proprietary filament? Absolutely not – you are free to use any 1.75mm filament. Because you may be printing larger scale items, we highly recommend using quality filament to ensure that large prints finish accurately. - Page 41 Where can I find software updates? We have the latest files on our website under the Support section. All updates are done through the Duet Web Control interface via Settings – Upload Files. How can I tune the Z Height? My hotend is too high off the print bed and Baby Stepping isn’t helping? This manual includes a dedication section for tuning your Z-Offset.
- Page 42 The blue LED is on for the WiFi network, but I cannot connect to it through the Duet Web Control? Sometimes a router will assign the unit a new IP address. Open the Console, type M552, and press enter – this command will show you the new address.
Need help?
Do you have a question about the BFP-ICARUS and is the answer not in the manual?
Questions and answers