
Summary of Contents for Atling AXI Series
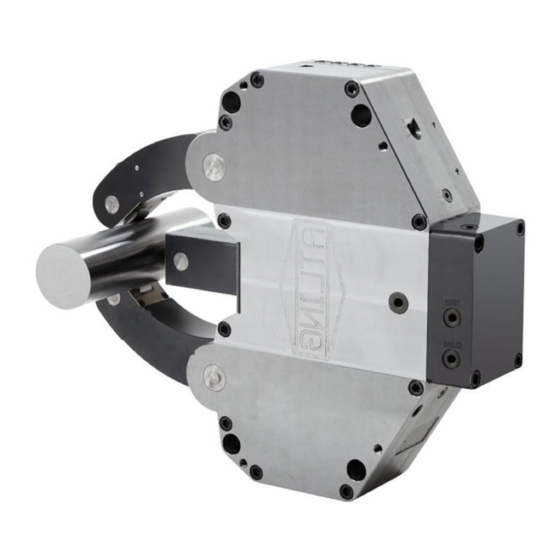
- Page 1 Rev-01 Steady Rest Installation manual www.atling.com Self-Centering Steady Rests Hydraulic AXI, ASI, AXE, ASE, ANE- series Before using the machine read and fully understand the contents of this manual...
- Page 2 Your expectations. How to install the Atling Steady Rest, and to using it, we recommend you to read and fully understand the contents of this book, and also the Operator´s Manual. This, for you as a customer, to take full advantage of all built in features of the Steady Rest.
-
Page 3: Table Of Contents
Steady Rest Installation Manual 1 Safety Instructions ......................... 4 2 Control of delivery ........................ 5 3 Control of the machine ......................5 3.1 Necessary equipment ......................5 3.2 Check installing and adjusting of machine ..............5 3.3 Control of Steady Rest Bracket ..................5 3.4 Rinsing of hydraulics ....................... -
Page 4: Safety Instructions
All personnel operating or coming in contact with the steady rest, shall read and fully understand the content of this manual. Atling or nearest supplier shall be contacted if there is any uncertainty. Before installation: ... -
Page 5: Control Of Delivery
Steady Rest Installation Manual 2 Control of delivery Check that all the delivery regarding the Steady rest is okay and without damage, and that all the ordered equipment is there, and are okay. 3 Control of the machine Before starting the installation in the machine check some points first! 3.1 Necessary equipment Check that the machine has necessary equipment according to the delivered Steady Rest, and that it can be used to operate the Steady Rest, as for example: hydraulic unit, hydraulic valve,... -
Page 6: Rinsing Of Hydraulics
Steady Rest Installation Manual 3.4 Rinsing of hydraulics To avoid extraneous particles in the hydraulic system, please connect the hydraulic hoses in the machine for steady rest, to each other, and open the hydraulic valve for steady rest. Then let the hydraulic oil flush through the system and through the hydraulic unit filter and rinsing the hydraulic oil before connecting to the Steady Rest. -
Page 7: Lifting The Steady Rest
Steady Rest Installation Manual 4 Mounting of Steady Rest 4.1 Lifting the Steady Rest Connect the lifting eye to the Steady Rest lift point marked “Lift”, connect the lifting hook to the lifting eye and lift carefully with example a shop crane. 4.2 Mounting of Steady Rest to Bracket / Adapter Plate Lift the Steady Rest to one side of the Steady Rest Bracket / Adapter Plate, and mount one of the mounting screws to one of the mounting holes that best fit, depending of machine. -
Page 8: Mounting Of Adjustment Devices
Steady Rest Installation Manual 4.3 Mounting of adjustment devices Mount all the adjustment devices to the Steady Rest Bracket / Adapter Plate and tighten the adjusting screws and mounting screws only slightly. 5 Connecting points to the Steady Rest 5.1 Connecting hydraulic Open and Close Remove the protecting plug at the steady rest cylinder marked “Open”... -
Page 9: Connecting Of Cooling
Steady Rest Installation Manual …and install the supplied In-Line filters, and also the necessary hoses and couplings to the hydraulic valve. 5.2 Connecting of cooling Remove the plug from the cover, marked “Cool”… …and install the necessary hose and couplings for cooling water or compressed air. -
Page 10: Connecting Lubrication (Automatic Oil)
Steady Rest Installation Manual 5.3 Connecting lubrication (Automatic Oil) Remove the plug marked “Lub” at the rear side of the housing… …and install the necessary hose and couplings for lubrication to the lubrication Unit. Oil Lubrication Unit: Pumping pressure 12-45 bar, Relief pressure: Max 3 bar, lubrication intervals 3-5 minutes. -
Page 11: Centering Of Steady Rest
Steady Rest Installation Manual …and install the necessary hose and couplings for compressed air as a protecting Air barrier (0,5 bar). Sometimes it can also be good to install a filter at the second Air connection point or as an alternative a small short hose, to avoid increasing of pneumatic pressure, during opening process of the steady rest, and in the same time use as drainage. -
Page 12: Mounting Of Gauges
Steady Rest Installation Manual 6.2 Mounting of gauges Install two gauge according to the pictures below, the first one straight in front of the Steady Rest, and the other one 90° to the first one. That makes it easier to adjust the Steady Rest during the centering. -
Page 13: Remove Tailstock
Steady Rest Installation Manual 6.4 Remove Tailstock Remove the Tailstock from the working piece, rotate the working piece slowly a little, and check again if the gauges is affected. 6.5 Adjusting the Steady Rest When clamping the working piece with the Steady Rest according the description above it´s almost necessary that the Steady Rest needs to be adjusted more, because of the opposite conditions regarding hanging and pushing. -
Page 14: Notes
Steady Rest Installation Manual 7 Notes...
Need help?
Do you have a question about the AXI Series and is the answer not in the manual?
Questions and answers