Advertisement
Quick Links
1
2
7/13/2016
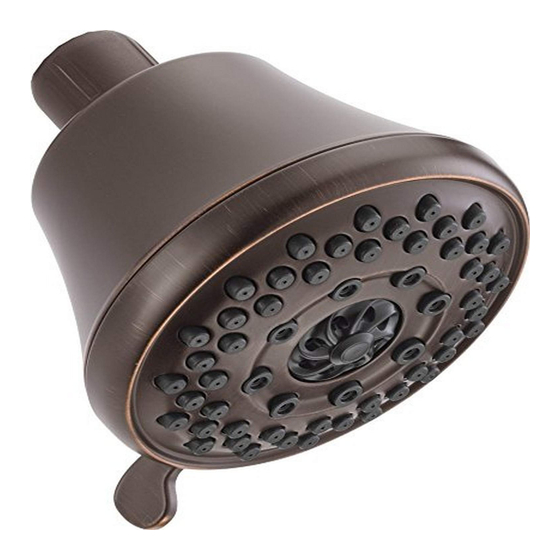
Peerless Shower System Installation Instructions
Instrucciones para la instalación del sistema de ducha Peerless
Instructions pour I'installation du système de douche Peerless
1. Remove Shower Head
Turn the existing shower head counter-clockwise with adjustable wrench or pliers. Use care not to unscrew the shower arm; hold
the shower arm secure. Note: If your shower arm has a ball on the end of it, it will not work with this shower unit and will need
to be replaced with a standard shower arm.
1. Retire el cabezal de ducha
Gire el cabezal de ducha existente en dirección contraria a las manecillas del reloj con una Have ajustable o pinzas.Tenga
cuidado de no desenroscar el brazo de la ducha; sujete el brazo de la ducha y manténgalo fijo. Nota: Si el brazo de la ducha
cuenta con una bola en el extremo, éste no funcionará con la unidad de ducha y deberá reemplazarse por un brazo de ducha
estándar.
1. Retirez la pomme de douche
Tournez l'ancienne pomme de douche dans le sens contraire des aiguilles d'une montre à l'aide d'une clé à moiette ou d'une paire
de pinces. Prenez soin de ne pas devisser le bras de douche; maintenezle en place. Remarque : Si le bras de douche est muni d'une
bille à son extrémité, cette pomme de douche ne pourra y être fixée et vous devrez le remplacer par un bras de douche ordinaire.
2. Install Shower Head
Hand tighten the shower head onto the shower arm. Ensure the washer is installed in the female nut on the Shower Head.
Do not use a wrench or pliers.
Notice: Removal of or tampering with the flow restrictor may result in showerhead failure and will void the warranty.
2. Instale el cabezal de ducha
Apriete a mano el cabezal de la ducha en el brazo de la ducha. Asegúrese de que la arandela esté instalada en la tuerca
hembra en el cabezal de la ducha. No utilice una Have o pinzas.
AVISO: El retiro o manipulación del limitador del flujo puede resultar en una falla de la cabeza de la regadera y anulará la
garantía.
2. Installez la pomme de douche
Serrez manuellement la pomme de douche sur bras de douche. Assurez-vous que la rondelle est en place dans l'écrou
prisonnier de la pomme de douche. N'utilisez pas de clé ni de pinces.
Note : La dépose ou la modification du limiteur de débit peut entraîner un bris de la pomme de douche et annuler la
garantie.
1
69463 Rev. C
Advertisement

Related Manuals for PEERLESS 76651RB


Summary of Contents for PEERLESS 76651RB
- Page 1 Peerless Shower System Installation Instructions Instrucciones para la instalación del sistema de ducha Peerless Instructions pour I’installation du système de douche Peerless 1. Remove Shower Head Turn the existing shower head counter-clockwise with adjustable wrench or pliers. Use care not to unscrew the shower arm; hold the shower arm secure.
- Page 2 This warranty excludes all industrial, commercial, and business usage (including but not limited to use in multi-family housing), whose purchasers Peerless Faucet Company will replace, FREE OF CHARGE, during the warranty period, are hereby extended a five-year limited warranty from the date of purchase,...