Table of Contents
Advertisement
Quick Links
Advertisement
Table of Contents
Troubleshooting

Summary of Contents for Pleasure-Way 2020 TOFINO
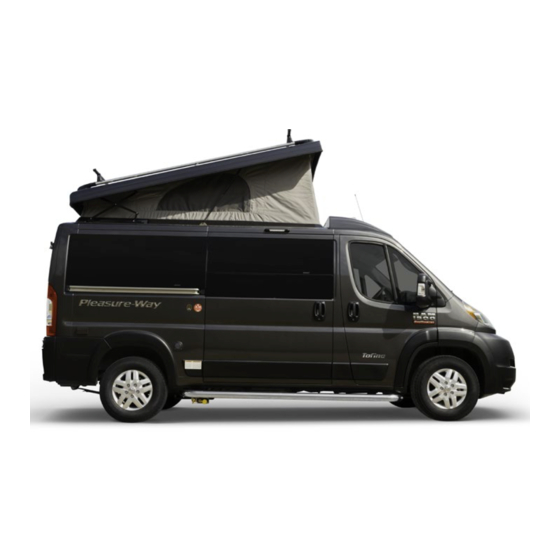
- Page 1 2020 TOFINO Ram ProMaster 1500 OWNER’S MANUAL...
- Page 2 WARNING IT IS NOT SAFE TO USE COOKING APPLIANCES FOR COMFORT HEATING. Cooking appliances need fresh air for safe operation. Before Operation: Open overhead vent or turn on exhaust fan. Open Window. FAILURE TO COMPLY COULD RESULT IN DEATH OR SERIOUS INJURY. Unlike homes, the amount of oxygen supply is limited due to the size of the recreational vehicle, and proper ventilation when using the cooking appliances(s) avoids dangers of asphyxiation.
- Page 3 Pleasure-Way assumes no responsibility for errors or omissions in the accuracy in the content of this manual. Tofino We know that you will enjoy your new Pleasure-Way and we wish you many miles of pleasant and carefree driving. Happy Travels!
-
Page 4: Table Of Contents
TABLE OF CONTENTS WARRANTY/POLICIES MAINTAINING YOUR MOTORHOME SAFETY TRAVEL PREPARATION Occupant And Cargo Carrying Capacity MOTORHOME SYSTEMS Smoke Detector LP Gas System Fire Extinguisher LP Tank Gauge LP/Carbon Monoxide Detector LP Fill and Bleeder Valve GFCI Outlet BBQ Quick Connect Refueling How To Use The LP Appliances Filling the LP Gas Fuel Cylinder... - Page 5 LIVING AREA ELECTRICAL SYSTEM MOTORHOME INTERIOR Voltage Chart Interior Cockpit Map Light AC 110-120 Volt Power Refrigerator Inverter/Charger USB Charging Port Inverter Display / Control Panel Solar Panel Package AC Electrical Distribution Panel Table GFCI Outlets Bed Layout DC Load Center and Breakers Overhead Bunk DC Breakers Raising and Lowering the Roof...
-
Page 7: Warranty/Policies
It is your responsibility and obligation to return your motorhome to your authorized purchaser from an Authorized Pleasure-Way Dealer. Warranty shall be fulfilled by an Authorized Pleasure-Way Dealer or Pleasure-Way dealership for warranty service repairs. Authorized Pleasure-Way service facility. - Page 8 To learn more about the specific automotive chassis not covered under the Pleasure-Way Warranty • Failure of the coach and /or chassis resulting in incidental please contact your authorized selling dealer, Pleasure- damages, such as but not limited to: goods stored both Way Industries Ltd.
- Page 9 • Painted plastic exterior body molding and bumpers. service facility without Pleasure-Way pre-authorization, it is at Painting exterior moldings magnifies the original Pleasure-Way’s sole discretion whether or not to reimburse the equipment manufacturer condition of the plastic molding. claim. Some conditions of the plastic, such as but not limited to, body attachment points and texture may be more visible when painted.
- Page 10 To obtain warranty repairs, you must contact your authorized Warranty repairs must be with in the five year or 60,000 miles Pleasure-Way dealer and schedule an appointment. It is best if / 100,000 kilometers (whichever comes first) limited warranty. you have a written list of defects or items in need of repair. As...
-
Page 12: Safety
SAFETY For your safety while traveling with your Pleasure-Way All Pleasure-Way Motorhomes in Canada are CSA (through motorhome, we have provided safety components throughout QAI) and CMVSS certified, and may exceed the approved the vehicle. In order for your vehicle to maintain the safest installation criteria. -
Page 13: Fire Extinguisher
FIRE EXTINGUISHER A 3-pound capacity fire extinguisher is provided and located at the side door main entrance for ease of accessibility from the interior or exterior. : This fire extinguisher is a type “ABC”, which will WARNING extinguish flammable liquids and electrical fires, but not wood, paper and cloth fires. -
Page 14: Refueling
REFUELING When refueling your fuel tank or your propane system, ensure that your vehicle and your main LP valve is shut off. Ensure that the pilot lights have been extinguished as well. Some appliances in your vehicle have auto ignition. Ensure the appliances are shut off so ignition will not activate. -
Page 15: Road Safety Strap
ROAD SAFETY STRAP The roof must be lowered and the latches and safety strap locked in place before moving the vehicle. The safety latch much remain locked while the vehicle is in motion. SEAT BELTS Only forward-facing seats equipped with factory installed seatbelts are to be occupied while the vehicle is in motion. -
Page 16: Motorhome Exterior
MOTORHOME EXTERIOR MOTORHOME SPECIFICATIONS Your motorhome is larger than your standard van or automobile, so please be careful when entering underpasses, garages, parkades, etc. 3.6 litre Pentastar V6 featuring 280 HP / 260 LB-FT Torque 6 Speed Automatic Transmission 220 Amp Alternator Class IV Hitch and Wiring 136”... - Page 17 Appliances and options may change without notice and some appliances and equipment may be optional. • Due to Pleasure-Way’s policy of continuous improvement, Pleasure-Way Industries Ltd. reserves the right to make product changes at any time without incurring obligation. •...
-
Page 18: Tire And Loading Information
TIRE AND LOADING INFORMATION The tire load information is located on the driver side door pillar. Please check the label on your vehicle for exact tire pressures and Occupant and Cargo Carrying Capacity (OCCC). PROPANE FILL, BREATHER VALVE AND BBQ QUICK CONNECT The fill and breather valve is located below the passenger side running board under the sliding door. -
Page 19: Furnace Vent
FURNACE VENT Located on the driver side exterior, this vent gives off the exhaust of the furnace. Ensure this vent is free and clear of any obstructions NOTE: at all times. EXTERIOR 110-VOLT PLUG Located on the passenger side panel behind the rear wheel, this plug will only function if power is supplied through the inverter or shore power. -
Page 20: Maintaining Your Motorhome
MAINTAINING YOUR MOTORHOME It is recommended that you regularly maintain your Pleasure-Way Motorhome in order to get the maximum benefits from your unit. The life and performance of each component depends upon proper use, operation and maintenance. With a regular maintenance schedule you should be able to identify any components that may need attention, allowing you to have many years and miles of trouble-free traveling. -
Page 21: Travel Preparation
TRAVEL PREPARATION BEFORE YOU LEAVE Prior to heading off on your adventures, you should always check to ensure that: • The LP gas is turned OFF at the main valve • The gray waste water tank is empty with the dump handles closed •... -
Page 22: Motorhome Systems
MOTORHOME SYSTEMS LIQUID PROPANE GAS SYSTEM LP appliances are: Furnace and BBQ Quick Connect Your motorhome is equipped with a Liquid Propane (LP) gas system that provides a fuel source to the appliances which are designed to use this gas for operation. The storage tank is located under the chassis on passenger side. -
Page 23: Lp Tank Gauge
LP TANK GAUGE This gauge indicates how full the LP tank is. The LP gauge is located on the tank with a sending unit that sends levels to the touchscreen control panels. LP FILL VALVE & LP BLEEDER VALVE The bleeder valve allows pressure to vacate the LP tank when 80% full. -
Page 24: How To Use The Lp Appliances
HOW TO USE THE LP APPLIANCES Turn ON the 12 volt battery disconnect switch. (located on the lower sofa bench.) Turn ON the LP electric valve. (located in the driver side utility center) FURNACE Please refer to the manufacturer’s operating instructions for further information. -
Page 25: Fresh Water System
FRESH WATER SYSTEM The water system built into your motorhome provides full service similar to the system in your home. A 12-Volt self- priming pump draws pressurized water from the fresh water tank to all cold faucets and rear quick connect sprayer. An automatic pressure switch located in the water pump maintains a positive line pressure between 20 to 30 psi. -
Page 26: Water Pump & Trouble Shooting
WATER PUMP AND TROUBLE SHOOTING Located in the cabinet below the kitchen sink. The water pump has a removable filter that should be checked regularly. The inline flow filter is located on the inlet side of the water pump. If the pump will not prime, ensure: •... -
Page 27: Kitchen Faucet
KITCHEN FAUCET Huntington Brass - K1102701 With the faucet handle turned off, the faucet may continue to drip for a short period of time or when the vehicle is motion. Water is retained in the faucet spout. SPRAY PORT & HOSE Access to this spray port is through the passenger rear door, located in the rear storage area. -
Page 28: Winterizing
WINTERIZING WINTERIZING THE WATER SYSTEM To drain the fresh water tank, open the white drain tap. Drain and flush the grey water holding tank. Remove the water line from the inlet side of the water pump (this is the plastic line going into the water pump filter). -
Page 29: Winter Storage Electrical
WINTER STORAGE ELECTRICAL Fully charge the engine starting and coach batteries. Turn OFF the charge line disconnect switch (red key). Turn off the battery disconnect switch on the sofa. • It is recommended that you start and run your vehicle for a short period of time each month. -
Page 30: Living Area Electrical System
LIVING AREA ELECTRICAL SYSTEM 12 VOLT OR DC EQUIPMENT The motorhome living area, electrical system is designed for convenience. It is capable of supplying the vehicle Inverter/Charger with at least two sources of power: 12 volt DC power and Refrigerator when on DC 110-120 volt AC power. -
Page 31: Ac 110-120 Volt Power
AC 110-120 VOLT POWER A 25 foot, 30 amp power cord is provided on the rear door. To activate all power circuits, connect and lock the power cord to your coach in the driver side utility center and to an adequate 110-120 volt power source. The power cord connections are rated for 30-amp 110-120 volts. -
Page 32: Inverter Display / Control Panel
INVERTER DISPLAY / CONTROL PANEL This control panel is located on the kitchen upper end panel next to the switch panel. • This control panel will turn the inverter ON or OFF • Neither the 12 volt battery disconnect nor the charge line disconnect will turn the inverter off •... -
Page 33: Ac Electrical Distribution Panel
AC ELECTRICAL DISTRIBUTION PANEL The Pleasure-Way Tofino is equipped with an AC distribution panel that houses the breakers for the 110-120 volt system. The distribution panel is located on the driver storage compartment wall. The breakers act like a household breaker;... - Page 34 DC LOAD CENTER BOARD (SPYDER CONTROLS)
-
Page 35: Dc Breakers
DC BREAKERS These are resettable breakers. When a breaker is tripped a black lever will swing out below the center bar. To reset the breaker push the lever back up under the center bar. To manually trip a breaker, press the red button. 80 AMP INPUT AND OUTPUT BREAKERS FOR THE 80 AMP CHARGER OUTPUT MASTERVOLT DC-DC CHARGER... -
Page 36: Touchscreen Control Panel And Remote
MASTERVOLT DC-DC CHARGER The DC-DC charger is located under the sofa, mounted next to the inverter/charger. The DC-DC charger takes 12 volt charge from the alternator and converts it to optimal charging for the coach batteries. The DC-DC charger has a 2 amp trigger fuse located on the right hand side of the Mastervolt. - Page 37 • Read your battery voltage Monitor the battery voltage and use this meter to determine the state of your battery. Once the voltage gets close to 12 volts the battery should be recharged. Your vehicle may also be equipped with the battery loss gain meter. This allows you to monitor charge rate or depletion of your batteries.
-
Page 38: Trouble Shooting The Dc/12 Volt System
TROUBLE SHOOTING THE DC/12 VOLT SYSTEM Confirm that the 12 volt battery disconnect switch is in the ON position. Confirm that there is 12 volt power from the coach battery (check battery voltage or start the engine). Confirm that the inverter breaker is not tripped in the AC breaker panel. -
Page 39: Chassis Battery
Battery Working Temperature: -20℃~45℃ discharging, while voltage for a lead-acid battery decreases. For warranty or replacement contact Pleasure-Way Ind. A lithium battery can use 100% of its storage capability (measured as Amp-Hour, Ah); while a lead-acid battery typically only uses 50%. Lithium batteries power level will not -ION drop-off, and it will last longer. - Page 40 BATTERY MANAGEMENT SYSTEM The Eco-Ion Earth Smart batteries feature a built in battery management system (BMS). The BMS automatically provides: • Short circuit protection • Low voltage protection • Cell balancing • Overcharge protection • Temperature protection CHARGING Removal of cover plate by See user guide before using unauthorized personnel will The Freedom XC inverter/charger and the Mastervolt DC-...
- Page 41 Mastervolt DC-DC Charger Alternator 80 Amp Charger Mastervolt Charge Line Battery Stint Coach Batteries 80 Amp Charger Output Breaker DC to DC Disconnect Fuse Input Breaker Charger (red key) Inverter DC Charging System Distribution Panel Shore Distribution Panel Inverter DC Battery Stint Coach Batteries Power...
-
Page 42: Motorhome Interior
MOTORHOME INTERIOR INTERIOR COCKPIT MAP LIGHT Please refer to the vehicle manual for further information. This is the Ram ProMaster map light system. The cockpit map lights operate off the chassis battery. COOKTOP The vehicle is equipped with a single burner flush mount induction cooktop located in the kitchen countertop. -
Page 43: Usb Charging Port
USB CHARGING PORTS The left side of the kitchen cabinet, the face of the kitchen cabinet and overhead bunk each feature a USB charging port. Each charging port features 2 USB slots that will fit a USB type A connector. The 12 volt battery disconnect switch (red key) must be ON to power the USB ports, and are protected by a resettable breaker found on the DC Load Center. -
Page 44: Table
TABLE Remove table leg from the rear storage area. Remove the tripod base and table top from behind the driver seat. Place the table leg into the tripod base and set the table top on the leg. BED LAYOUT Main Bed Area: 54” wide X 72” long Remove the two bed bars from behind the sofa and place them in the back two sets of holes. -
Page 45: Raising And Lowering The Roof
RAISING AND LOWERING THE ROOF Raising: Unlatch the safety strap located at the front of the roof. Pull down and release the spring latches on each side of the roof. Push up on the roof until the pneumatic lifts take over. Allow the canvass to fully extend. -
Page 46: Ladder
LADDER Please refer to the vehicle manual for further information. (150kg / 330lb weight capacity) The ladder is located in the rear storage area of the vehicle. Set the ladder on the vinyl floor and against the raised carpet area between the front seats of the vehicle. Lift the ladder from the third lowest rung ensuring that each rung is locked in place as the ladder is raised. -
Page 47: Tire Safety
TIRE SAFETY The following information has been acquired from the NHTSA website. EVERYTHING RIDES ON IT SAFETY FIRST–BASIC TIRE MAINTENANCE Properly maintained tires improve the steering, Studies of tire safety show that maintaining proper tire pressure, observing tire and vehicle load limits (not stopping, traction, and load-carrying capability of your vehicle. - Page 48 UNDERSTANDING TIRE PRESSURE CHECKING TIRE PRESSURE AND LOAD LIMITS It is important to check your vehicle’s tire pressure at least once a month for the following reasons: Tire inflation pressure is the level of air in the tire that provides it with load-carrying capacity and affects the Most tires may naturally lose air over time.
- Page 49 STEPS FOR MAINTAINING PROPER TIRE SIZE TIRE PRESSURE To maintain tire safety, purchase new tires that are the same size as the vehicle’s original tires or another size Locate the recommended tire pressure on the recommended by the manufacturer. Look at the tire vehicle’s tire information placard, certification label, information placard, the owner’s manual, or the sidewall or in the owner’s manual.
- Page 50 UNIFORM TIRE QUALITY GRADING SYSTEM (UTQGS) To help consumers compare a passenger car tire’s treadwear rate, traction performance, and temperature resistance, the federal government requires tire manufacturers to grade tires in these three areas. This grading system, known as the Uniform Tire Quality Grading System, provides guidelines for making relative comparisons when purchasing new tires.
- Page 51 INFORMATION ON PASSENGER Next Number This two- or three-digit number is the tire’s load index. VEHICLE TIRES It is a measurement of how much weight each tire can support. You may find this information in your owner’s Please refer to the diagram below. manual.
- Page 52 Tire Ply Composition and Materials Used ADDITIONAL INFORMATION The number of plies indicates the number of layers of ON LIGHT TRUCK TIRES rubber-coated fabric in the tire. In general, the greater the number of plies, the more weight a tire can support. Tire manufacturers also must indicate the materials in the tire, which include steel, nylon, polyester, and others.
-
Page 53: Maintenance Log
MAINTENANCE LOG MODEL: VIN#: YEAR: DATE PURCHASED: DATE WORK PERFORMED MILEAGE NOTES... - Page 54 DATE WORK PERFORMED MILEAGE NOTES...
- Page 55 DATE WORK PERFORMED MILEAGE NOTES...
- Page 56 302 P O RTAG E AV E N U E S AS K ATO O N S K, CAN A DA S7 J 4 C6 T E L: 80 0. 36 4.0189 FA X : 8 00 .93 4 .70 8 5 W WW.
Need help?
Do you have a question about the 2020 TOFINO and is the answer not in the manual?
Questions and answers