Table of Contents
Advertisement
Quick Links
Advertisement
Table of Contents

Related Manuals for Prebena PKT-7-RK90

Summary of Contents for Prebena PKT-7-RK90
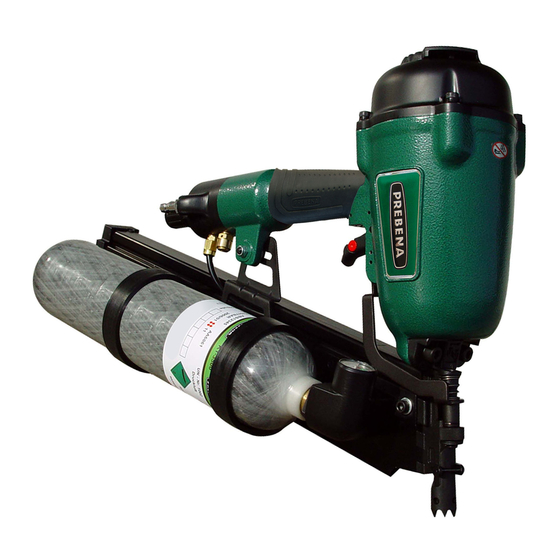
- Page 1 Original Operating Manual for the Pneumatic Tool PREBENA PKT-7-RK90 PREBENA Wilfried Bornemann GmbH & Co. KG Seestraße 20 – 26, 63679 Schotten, Germany Tel.: +49 (0) 60 44 / 96 01 – 0, Fax: +49 (0) 60 44 / 96 01 – 80 eMail: info@prebena.com...
- Page 2 • advantageous • use of the pneumatic tool, PKT-7-RK90 and PKT-7-RK90-S. We assume that every user of the pneumatic tool has experience handling devices that are powered by compressed air, and experience with the materials used. Those who do not have this experience must be instructed in the operation of the pneumatic tool.
-
Page 3: Table Of Contents
Table of Contents Organizational Features ..............5 General Organizational Features ..........5 Features of the safety instructions ..........6 Basic safety instructions ............7 Proper Use ................... 7 Hazard - avoid fatal injuries ............8 Avoid explosion hazards .............. 8 Avoid injury hazards .............. - Page 4 Ordering additional compressed air cartridges ......54 Ordering other accessories ............55 Pneumatic tool disposal ............... 56 Technical data ................57 Pneumatic tool PKT-7-RK90 ............57 KT-3500 compressed air cartridge ..........57 Manufacturer's address ..............58 Guarantee ..................59 Index....................60...
-
Page 5: Organizational Features
Organizational Features Organizational Features General Organizational Features Different elements of the operating manual have specific organizational features. These features make it easy to differentiate normal text,Text, listings, or action steps. These instructions contain additional information, such as special tips on economical use of the pneumatic tool. -
Page 6: Features Of The Safety Instructions
Organizational Features Features of the safety instructions All safety instructions contained in this operating manual are structured on the same pattern. To the left there is a symbol that indicates the type of hazard. To the right a signal word that indicates the seriousness of the hazard. -
Page 7: Basic Safety Instructions
PREBENA WILFRIED BORNEMANN GMBH & CO. KG assumes no liability for damage that occurs due to improper use. -
Page 8: Hazard - Avoid Fatal Injuries
Basic safety instructions Hazard - avoid fatal injuries Never point the pneumatic tool at people, animals, or body parts. Only release the pneumatic tool when the nose of the tool is firmly pressed against the material. Do not let children play with packaging; there is risk of suffocation. -
Page 9: Avoid Damage To The Pneumatic Tool
Basic safety instructions Avoid damage to the pneumatic tool Never open the pneumatic tool. Only have qualified specialists perform repair work. Do not use the pneumatic tool if it has fallen down or is damaged. Have it checked by qualified, specialized personnel before you operate it again. -
Page 10: Description
Description Description Device overview and scope of delivery... - Page 11 14 Safety valve for the operating pressure with release at 10 bar 15 Housing head with thread for suspension hook 16 KT-3500 compressed air cartridge, (only for PKT-7-RK90-S) 17 Four Allen wrenches (sizes 3, 4, 5 and 6) 18 Protective goggles –...
-
Page 12: Function
Description Function The pneumatic tool drives single nails into a piece of wood. You can use either a compressed air cartridge mounted on the pneumatic tool, or a pressure hose for the compressed air supply. Excess pressure is discharged through pressure relief valves. You can adjust depth-of-drive by regulating the air pressure or with the adjusting wheel for the safety device. -
Page 13: Safety Fixtures
Description Safety fixtures Safety device The pneumatic tool has a safety device on the tool nose. Discharge is only released when the safety device is pushed in. WARNING The most serious injuries are possible when operating the pneumatic tool without a functioning safety device. - Page 14 Description Warning signs attached to the pneumatic tool The following modes of implementation are prohibited in the "bump fire" release setting: Work that requires movement over scaffolds, stairs, ladders, or ladder-like structures and using the tool to close crates or bins, as well as for attaching transport safeguards The respective warning symbol is affixed to the front side of the pneumatic tool.
-
Page 15: Accessories
Hose drum (not included in scope of supply) Type RK and RKP round-headed nails (see section "Ordering nails" on page 54). Special PREBENA nailer oil. Rating plate information The rating plate is affixed to the rear of the magazine. It contains the... -
Page 16: Preparing The Pneumatic Tool
Preparing the pneumatic tool Preparing the pneumatic tool Unpacking the pneumatic tool Remove the pneumatic tool from the packaging. Remove all packaging material, such as foil, fill material, and packing box. WARNING A risk of suffocation exists for children when playing with the packaging foil. -
Page 17: Check The Condition
Preparing the pneumatic tool Check the condition WARNING An injury hazard exists when operating a damaged pneumatic tool, or if accessories are not properly mounted. Check the condition of the pneumatic tool prior to each use. Only use pneumatic tools that are in trouble-free condition. -
Page 18: Connecting The Pneumatic Tool To The Compressed Air Supply
Preparing the pneumatic tool Connecting the pneumatic tool to the compressed air supply You can connect the pneumatic tool to a compressed air system or to compressed air cartridge. If you connect the pneumatic tool to a compressed air system, you can economically execute frequent driving processes at the same location. - Page 19 Preparing the pneumatic tool Attaching the compressed air cartridge Unscrew the sealing plug from the connecting thread (1.). Check the connection and the connection thread of the compressed air cartridge for foreign objects and fouling. Clean the connection and the connection thread if necessary. Check the condition of the pneumatic tool (see page 17).
- Page 20 Preparing the pneumatic tool WARNING Operation with unsuitable compressed air cartridges can result in damage to the pneumatic tool. Only operate the pneumatic tool with type KT-3500 compressed air cartridges. Unscrew the sealing cap from the compressed air cartridge. Slide the compressed air cartridge into the holders (2.). Screw the compressed air cartridge hand-tight into the thread on the connection element (3.).
- Page 21 Preparing the pneumatic tool If you use an unsuitable compressed air cartridge, and if both safety valves are defective, then the pressure in this cartridge can exceed the permissible operating pressure of the pneumatic tool. In this case the pointer in the manometer for operating pressure will be in the red area.
- Page 22 If an oiler is not mounted, then the length of the air line can only be 10 m maximum. Otherwise you must add three to five drops of PREBENA special nailer oil daily, directly into the air intake of the pneumatic tool, prior to starting operation.
- Page 23 Preparing the pneumatic tool CAUTION Operation on compressed air systems that do not satisfy the above requirements can result in damage to the pneumatic tool. Only operate the pneumatic tool on suitable compressed air systems. Check the status of the pneumatic tool (see page 17). Remove the plug from the compressed air hose connection.
- Page 24 Preparing the pneumatic tool WARNING Damaged hose lines can burst and result in injuries or property damage due to escaping compressed air. Check the compressed air system and the pneumatic tool for damage before connecting. Only connect the pneumatic tool to a properly functioning compressed air system.
-
Page 25: Filling The Magazine
Do not point the pneumatic tool at people or animals. CAUTION The wrong nails can result in injuries, impair trouble-free function of the pneumatic tool, or damage the pneumatic tool. Only use the PREBENA nails specified in the section "Ordering accessories ". - Page 26 Preparing the pneumatic tool Slide the nails into the magazine from the rear, with the tips pointing forward as shown. Push the nails over the magazine block (1.). CAUTION A crushing hazard is posed by the spring- loaded pusher. Hold the pusher firmly and allow it to slowly slide forward.
-
Page 27: Adjust The Air Discharge
Preparing the pneumatic tool Then let the pusher slowly slide forward. The pusher engages the nails and slides them forward. Release the pusher when the nails are positioned on the forward stop of the magazine. Repeat these steps until you have filled the magazine with the desired quantity of nails. -
Page 28: Check The Function
Preparing the pneumatic tool Check the function Proceed as follows for trouble-free pneumatic tool function: CAUTION A hazard of injury or property damage exists when operating the pneumatic tool. Comply with the safety instructions in the section "Operating the pneumatic tool " starting on page 29. -
Page 29: Operating The Pneumatic Tool
Operating the pneumatic tool Operating the pneumatic tool If both safety valves are defective then the permissible operating pressure of the pneumatic tool can be exceeded. In this case the pointer in the manometer for the operating pressure is in the red area. - Page 30 Operating the pneumatic tool In these cases set the selector switch on "T" (single shot). Proceed as follows to select the release setting: WARNING Inadvertent release when changing the release setting can result in serious or fatal injuries. Do not point the pneumatic tool at yourself, other people, or animals.
-
Page 31: Adjusting Depth-Of-Drive
Operating the pneumatic tool Adjusting depth-of-drive Adjusting the operating pressure You can adjust the depth-of-drive of a nail into the piece of wood by regulating the operating pressure. At higher operating pressure the nails are driven deeper, at lower operating pressure they are not driven so deep. - Page 32 Operating the pneumatic tool Pull the regulator for the operating pressure to the right, away from the handle (1.). Turn the regulator for the operating pressure until the pointer of the manometer is approximately in the middle of the green area (2.).
- Page 33 Operating the pneumatic tool Moving the operating pressure regulator a quarter turn changes the operating pressure by approximately 0.5 bar. In this process check the manometer for the operating pressure Press the regulator for operating pressure on the handle. Check the setting with a single shot on the trial piece of wood. Repeat these steps until you have set the desired operating pressure.
-
Page 34: Driving Nails
Operating the pneumatic tool Driving nails WARNING Injury hazard due to electrical shock. Prior to release, ensure that there will be no contact with electrical lines. WARNING Eye injuries or other injuries are possible due to flying particles during operation. Wear protective goggles and suitable protective clothing when operating the tool. - Page 35 Operating the pneumatic tool WARNING Injury hazard due to nails that glance off of the material, nails that are driven-in too deep, or due to recoil. Only use the pneumatic tool for wooden objects. Ensure that depth-of-drive is not greater than the thickness of the piece of wood.
- Page 36 Operating the pneumatic tool Pneumatic tool single shot Proceed as follows for pneumatic tool single shot: Set the selector switch to "T" (single shot) (see page 29). Place the nose of the tool on the piece of wood and press the pneumatic tool against the piece of wood.
- Page 37 Operating the pneumatic tool Proceed as follows for pneumatic tool bump fire: Adjust the minimum operating pressure so that you just reach the desired depth-of-drive (see page 31). Test the setting with a single shot. Lift the pneumatic tool off of the wood. If necessary adjust the desired depth-of-drive (see page 31).
-
Page 38: Interrupting Operation
Operating the pneumatic tool Interrupting operation You can hang up the pneumatic tool for short interruptions in operation. There is an M8 x 1.25 thread on the housing head for this purpose. CAUTION The pneumatic tool can be damaged if the suspension hook is not firmly anchored. -
Page 39: Reloading The Magazine (Lock-Out Safety Device)
Operating the pneumatic tool Reloading the magazine (lock-out safety device) The pneumatic tool is equipped with a lock-out safety device. The lock-out safety device prevents you from releasing the pneumatic tool if there are less than three to four nails in the magazine. If the lock-out safety device has been tripped then you will not be able to drive any more nails. -
Page 40: After Operation
After operation After operation Execute the steps described below after operation, or if you anticipate longer interruptions in operation. Disconnecting the compressed air supply Remove the compressed air cartridge Unscrew the compressed air cartridge from the connection thread. The compressed air contained in the pneumatic tool will dissipate audibly. -
Page 41: Emptying The Magazine
After operation Emptying the magazine Due to the lock-out safety device the magazine will never empty completely. Consequently you must remove the unused nails from the magazine, if you are no longer using the pneumatic tool. Proceed as follows for this. WARNING Inadvertent release when emptying the magazine can result in severe or fatal injuries. - Page 42 After operation Let the pusher slide forward over the nails contained in the magazine until the stop (3.). Push in the magazine lock and pull the nails out of the magazine from behind over the magazine lock (4.) Repeat these steps until the magazine is completely empty.
-
Page 43: Transporting And Storing The Pneumatic Tool
Transporting and storing the pneumatic tool Transporting and storing the pneumatic tool Packing Pack the pneumatic tool prior to storage or transport in the following situations: Distances greater than 10 m. Distances that lead over unstable substrates Distances that are traversed in unusual body positions. For packing perform the following steps: Disconnect the pneumatic tool from the compressed air supply (see page 40). - Page 44 Transporting and storing the pneumatic tool Place the pneumatic tool and the compressed air cartridges in the transport case as shown. Close the transport case and secure the latch for the lid.
-
Page 45: Transport
Transporting and storing the pneumatic tool Transport The type of transport depends on whether the pneumatic tool will be transported for longer or shorter distances. Transport over short distances Short distances and distances of maximum 10 m. WARNING Inadvertent release can result in serious or fatal injuries. -
Page 46: Storage
Storage Oil all metal parts of the pneumatic tool with a thin application of PREBENA special nailer oil. Pack the pneumatic tool in the transport case. Store the pneumatic tool at room temperature in a dry and dust-... -
Page 47: Maintaining The Pneumatic Tool
Light fouling Wipe off the housing of the pneumatic tool with a dry cloth. Oil all metal parts of the pneumatic tool with a thin application of PREBENA special nailer oil. -
Page 48: Lubricating The Pneumatic Tool
In these two cases add two to five drops of PREBENA special nailer oil directly into the connection for the compressed air source daily before starting operation. -
Page 49: Charging Compressed Air Cartridges
KT-3500 compressed air cartridges must pass a pressure test at PREBENA every five years. This test must be documented in the proper field on the label of the compressed air cartridge. If you recharge the compressed air cartridges yourself with the PKT- FILLMASTER compressor, then you must send these cartridges in to PREBENA. -
Page 50: Troubleshooting
Troubleshooting Troubleshooting WARNING Serious or fatal injuries are possible when operating a damaged or malfunctioning pneumatic tool. Immediately disconnect the pneumatic tool from the compressed air supply. Empty the magazine. Do not use the pneumatic tool until the malfunction has been resolved. CAUTION The pneumatic tool can be damaged if repairs are performed by unauthorized persons. - Page 51 Troubleshooting Symptom Possible cause: Remedy Excessive operating Pneumatic tool Disconnect the cartridge pressure (air audibly damaged or excessive from the pneumatic tool escapes at the safety pressure in the (see page 19). valve for operation with compressed air Attach cartridge with the the compressed air cartridge.
- Page 52 Troubleshooting Symptom Possible cause: Remedy Release is not possible. Insufficient operating Increase the operating pressure. pressure of the compressed air system to 8.3 bar. Then release several times. After release set the desired operating pressure (see page 31). Change the compressed air cartridge (see page 19).
- Page 53 The wrong nails are Empty the magazine loaded in the see page 41). magazine. Fill magazine with PREBENA nails (RK or RKP) (see page 41). The pneumatic tool Add PREBENA special has not been nailer oil in the lubricated properly.
-
Page 54: Ordering Accessories
You can order accessories from the manufacturer (see page 58). Ordering nails The pneumatic tool should only be operated with the PREBENA nails specified on the rating plate; these are type RK 50 - RK 90 and RKP 50 - RKP 90 with a head diameter of 7 mm:... -
Page 55: Ordering Other Accessories
Ordering accessories Ordering other accessories Designation Order number PREBENA special nailer oil Z200.10 Compressor PKT-FILLMASTER 350 PKT-FILLMASTER 350 Spiral hose with 9 mm inside diameter, 12 Z160.12 mm outer diameter, 4 m work length, extended length 7.5 m Compressed hose set with 9 mm inside Z200.20... -
Page 56: Pneumatic Tool Disposal
Pneumatic tool disposal Pneumatic tool disposal CAUTION Improper disposal can be harmful to the environment. Clean the pneumatic tool prior to disposal. Comply with the applicable regulations for disposal of oil. Never dispose of the pneumatic tool or parts of the pneumatic tool in normal household waste containers. -
Page 57: Technical Data
Technical data Technical data Pneumatic tool PKT-7-RK90 Dimensions (L × B × H): 541 × 180 × 364 mm Packaging dimensions (L × B × H): 605 × 190 × 420 mm Weight pneumatic tool (without nails and compressed air cartridge): 4.2 kg... -
Page 58: Manufacturer's Address
Manufacturer's address Manufacturer's address PREBENA Wilfried Bornemann GmbH & Co. KG Fastening Technology Seestr. 20–26 D-63679 Schotten Telephone: +49 (0) 60 44 96 / 01 0-0 Fax: +49 (0) 60 44 / 96 01-80 E-mail: info@prebena.de Homepage: www.prebena.de www.kartuschen-tausch.de... -
Page 59: Guarantee
PREBENA assumes no product liability, and thus there is no guarantee claim. The guarantee does not extend to parts subject to wear, such as O-rings, etc. Prebena will either repair the defective part or ship a replacement at its discretion. -
Page 60: Index
Index Index manometer for compressed air cartridge 20 Accessories manometer for operating compressor PKT- pressure 18, 24 FILLMASTER 55 Checking the condition description 15 external damage 17 nailer oil 55 hose line 17 nails 54 safety device 17 order numbers 55 safety fixtures 17 ordering 54 Checking the function 28... - Page 61 Index maximum operating pressure 22 Hanging up prerequisites for the assembling hooks 38 connection 22 pneumatic tool 38 Connecting compressed air cartridge compressed air hose 23 Left/right and direction Customer service 58 information 12 Lock-out safety device 39 Long distances 46 Lubricating 48 Depth-of-drive adjustment at safety device...
- Page 62 57 Operation Transport 45 adjusting depth-of-drive 31 unpacking 16 adjusting safety device 33 Positioning 8 After operation 40 Prebena 58 bump fire 36 Preparation driving nails 34 Adjusting the air discharge interrupting 38 interrupting operation 38 attaching compressed air...
- Page 63 Index Shot single 36 Rating plate 15 Signs 14 Release quick coupling 40 Storage 46 Removing heavy fouling 48 Removing light fouling 47 Repeated release selecting the release setting Technical data compressed air cartridge pneumatic tool 57 Testing Safety device compressed air cartridge adjusting 33 checking the condition 17...
- Page 64 KONTECXT GmbH www.kx-doku.de ISO 9001:2000 PREBENA Wilfried Bornemann GmbH & Co. KG Seestr. 20 – 26, 63679 Schotten, Germany Tel.: +49 (0) 60 44 / 96 01 – 0, Fax: +49 (0) 60 44 / 96 01 – 80 email: info@prebena.com...
Need help?
Do you have a question about the PKT-7-RK90 and is the answer not in the manual?
Questions and answers