Advertisement
Quick Start Guide Series 600 - Models 610/611/620/621
Computer Requirements
Available Serial Port or USB Port (Serial-to-USB onverter required)
WeatherHawk Setup Procedure
1.
Remove the top foam packing from the WeatherHawk box and verify you have all ordered equipment.
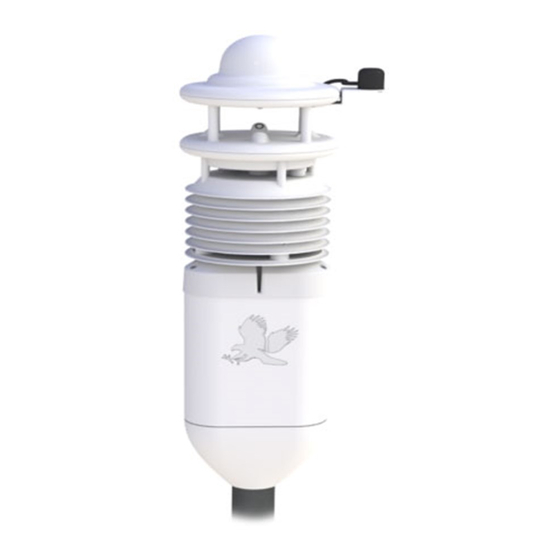
Your system may have a wireless receiver (Model 620/621), and/or a solar panel (P/N 16851). Figure 1
below shows a wireless Model 620 with solar panel. Unpack all equipment and check for physical damage.
a. Lift the WeatherHawk by the main body of the weather station. Removing the station by lifting on
the sensors may damage the sensors (see Figure 1).
b. Avoid striking or resting the WeatherHawk on the domed top of the weather station.
c. Report missing or damaged equipment to WeatherHawk Customer Service before installing your
system.
d. A black rubber mast shim is inside the WeatherHawk
Integral mast mount. This shim reduces the diameter
to accommodate a 1 ¼ inch OD mast. Discard the shim
if using a 1 ¾ inch mast. Fully seat the shim on the mast,
with the flange down, before sliding the WeatherHawk
over the shim/mast.
2.
Install your application software on your computer.
3.
Connect the serial cable male connector to the WeatherHawk RS-232 port and the serial cable female
connector to a computer serial port (Figure 2).
WeatherHawk
®
815 W. 1800 N. Logan Utah 84321-1784, Email:
Toll free in USA: 866-670-5982, International: 435-227-9802, FAX: 435-227-9749
.
Figure 1 Model 620 with solar panel
service@weatherhawk.com
Figure 2: Serial cable (left) and the
WeatherHawk serial port in which the serial
cable male connector connects. A dust cover
must be removed from the WeatherHawk
RS-232 port before connecting the cable.
Copyright © 2004 - 2013
Printed November 2012
Advertisement
Table of Contents

Related Manuals for WeatherHawk 600 Series

Summary of Contents for WeatherHawk 600 Series
- Page 1 Model 620 with solar panel. Unpack all equipment and check for physical damage. a. Lift the WeatherHawk by the main body of the weather station. Removing the station by lifting on the sensors may damage the sensors (see Figure 1).
- Page 2 If you’re connecting the cable to a USB port, a serial-to-USB converter is required and optionally available from WeatherHawk (P/N 16878, USB-AD). On the underside of the WeatherHawk, turn the on/off switch to the on position (Figure 3), and observe that the circular red Scan light will briefly flash.
- Page 3 (Figure 3 above). Start your application software. Monitor the sensor displays. After a few minutes, numeric values should appear if the WeatherHawk and radio are communicating. Also indicator lights on both the RF4xx radio and the WeatherHawk will occasionally blink.
Need help?
Do you have a question about the 600 Series and is the answer not in the manual?
Questions and answers