Table of Contents
Advertisement
Quick Links
Recommended Tools
-Ruler or Square
-Drill w/ bits
-Ratchet
-3/8" Extended socket
-3/8" Wrench
-Flat or Phillips head screwdriver
DO NOT USE THE SPAEASE 100 IN HIGH WIND CONDITIONS. DOING SO COULD CAUSE THE COVER TO FALL. DAMAGE TO THE SPA/COVER/
SPAEASE 100, OR INJURY TO THE OCCUPANTS MAY OCCUR. NEVER LEAVE AN UNCOVERED HOT TUB OR SPA UNATTENTED. NEVER LEAVE A
Hot Tub Products • (860) 469-2580 • Info@HotTubProducts.com • 2 Toelles Road, Wallingford, CT 06492 • www.HotTubProducts.com
G
C.
ITEM DESCRIPTION
A. Support Arm
B. Foam Grip
C. Center Coupler
D. Pivot Arm
E. Pivot Arm Foam Handle
F. Bushing
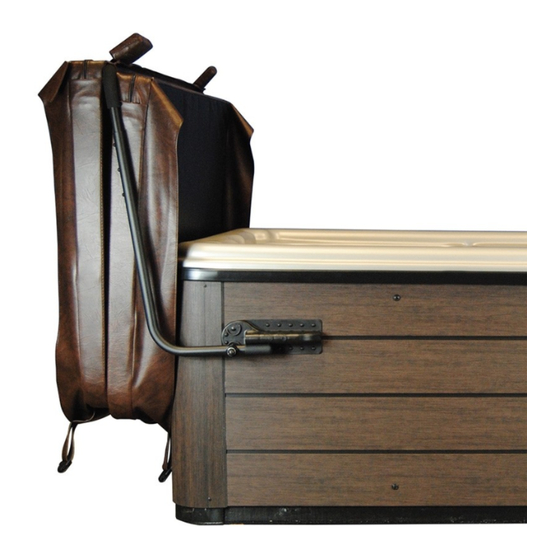
G. Mounting Bracket
H. Towel Holder
I. 3/8" x 3" Hex Cap Bolt
J. 3/8" Nylon Locknut
K. 3/8" Flat Washer
L. #10 x 5/8" Self Tapping Screws
M.#10 x 1" Mounting Screws
N. Large Black Dome Caps
O. Small Black Dome Screw Caps
P. 7/16" Plugs
CAUTION!!
COVERED HOT TUB OR SPA UNLOCKED.
H.
G.
I.
N.
F.
H
C
P.
E.
O.
A.
B.
B
D.
A
D
J.
K.
AMOUNT
2
2
1
2
2
4
2
1
2
2
4
13
Not Shown
24
Not Shown
2
37
4
Advertisement
Table of Contents

Summary of Contents for Hot Tub Company SpaEase 100
- Page 1 CAUTION!! DO NOT USE THE SPAEASE 100 IN HIGH WIND CONDITIONS. DOING SO COULD CAUSE THE COVER TO FALL. DAMAGE TO THE SPA/COVER/ SPAEASE 100, OR INJURY TO THE OCCUPANTS MAY OCCUR. NEVER LEAVE AN UNCOVERED HOT TUB OR SPA UNATTENTED. NEVER LEAVE A COVERED HOT TUB OR SPA UNLOCKED.
- Page 2 Installation Instructions Step 1: Position the spa cover (in closed position) on the spa, making sure that all four corners are properly positioned and square on the spa. (See Fig 1) Step 2: Connect the Pivot Arms to the Mounting Brackets (See Fig 2.) After the Pivot Arms are connected, tilt them back into the upright position.
- Page 3 Support Arms (A) Step 6: Lay the SpaEase 100 on the spa cover as shown in (See Fig 7). Adjust the Center Coupler Assembly and the Support Arms so that the Center Coupler Assembly is lying parallel to the spa cover hinge approximately ½” away. (See Fig 8)
- Page 4 (See Fig 10) The SpaEase 100 was designed for a specific use. The SpaEase 100 is not designed to BEND, WARP, or to be ABUSE PROOF. Do Not stand, sit, or lie on, or permit heavyweight to rest on the SpaEase 100. Do not clean with abrasives, solvents, or strong detergents.
Need help?
Do you have a question about the SpaEase 100 and is the answer not in the manual?
Questions and answers