
Summary of Contents for Enertech Bentone B 2 Series
- Page 1 178 032 32-2 2016-05–19 Providing sustainable energy solutions worldwide Installation- and maintenance instruction...
-
Page 3: Table Of Contents
General Table of contents PUMP INSTRUCTIONS GENERAL _______________________________________ Important to think about! Suntec AS47CK____________________________ 18 _____________________________________________ 5.1.1 Technical data __________________________ 18 Safety instructions ______________________________________________________ 5.1.2 Components ____________________________ 18 Warning ____________________________________________________________________ 5.1.3 Filter replacement________________________ 18 Electrical safety 5.1.4 One-pipe system ________________________ 18 __________________________________________________________ 5.1.5 Function AS47CK _______________________ 19 Assembly and Service... -
Page 4: Important To Think About
• Cut the power and shut-off the fuel supply before performing service. • Enertech recommends that the burner be shut down when the oil tank is illed, and for six hours thereafter, to reduce the risk of blockages. -
Page 5: Electrical Safety
Electrical safety • If any electrical connections are made other than those recommended by Enertech, there is a risk of personal injury and equipment damage. • The electrical installation must be carried out according to the high voltage provisions and be performed in a professional manner, so that Warning the risk of oil leakage, ire or personal injury is avoided. -
Page 6: Technical Data
General TECHNICAL DATA Dimensions B 2 1.1.1 Dimensions flanges ø89,5 130-150 1.1.2 Recommended nozzles and pressures Because of the different types of boiler in existence, with varying furnace geometries and furnace loads, it is not possible to commit to any given spray angle or spay pattern. -
Page 7: Model B 2 Ka / Model B 2 Kav
General Model B 2 KA / Model B 2 KAV 2,7-3,3 0,5-1,5 8,0-9,0 Length of blast tube Protrusion from flange, measurement B mm 1.2.1 Burner output kg/h 28,5 - 106,7 -0,5 20,0 40,0 60,0 80,0 100,0 120,0 Burner output kW 1.2.2 Setting the ignition electrodes Proper setting of the electrodes is essential to ensure satisfactory operation... -
Page 8: Model B 2 Ks 76/24 / Model B 2 Ksv 76/24
General Model B 2 KS 76/24 / Model B 2 KSV 76/24 2,3-3,1 0,5-1,5 10,0-11,0 Length of blast tube Protrusion from flange, measurement B mm 1.3.1 Burner output - 11,1 kg/h -0,5 40,0 60,0 80,0 100,0 120,0 140,0 Burner output kW 1.3.2 Setting the ignition electrodes Proper setting of the electrodes is essential to ensure satisfactory operation... -
Page 9: Nozzle Table, 8-15 Bar
General Nozzle table, 8–15 bar Pump pressure, bar kg/h kg/h kg/h kg/h kg/h kg/h kg/h kg/h kW 0,50 1,66 1,76 1,86 1,95 2,04 2,12 2,20 2,28 0,60 2,00 2,12 2,23 2,34 2,45 2,55 2,64 2,73 0,65 2,16 2,29 2,42 2,54 2,65 2,75 2,86... -
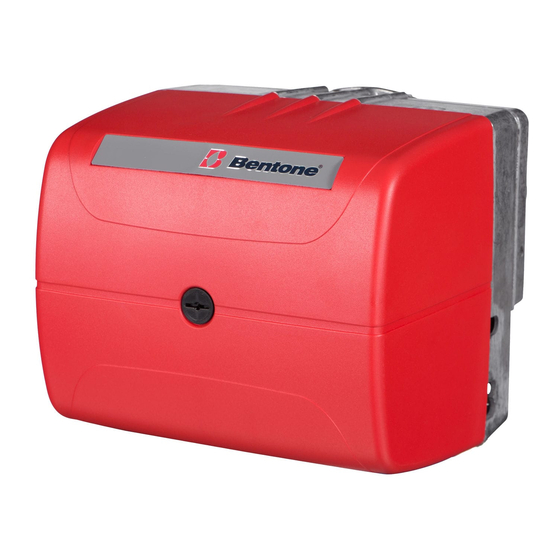
Page 10: Description
General Description Bentone B 2... -
Page 11: Components
General 1.5.1 Components Brake plate Preheater Photoresistor Electric contact X1,X2 (see wiring diagram) Air damper Oil pipe Electrodes Fan housing Adjustment of nozzle assembly Frame Control box Blast tube Oil pump Ignition transformer Motor Air adjustment Fan wheel Fan housing, part Bentone B 2... -
Page 12: Installation
General 2. INSTALLATION Acceptance inspection Ensure that everything is delivered and that there is no transport damage. If there is anything wrong with the delivery, please report it to the supplier. Any transport damage should be reported to the forwarding company. Preparations for installation Ensure that the size and capacity range of the burner are suitable for the boiler. -
Page 13: Basic Settings
General 3. BASIC SETTINGS Nozzle Burner output without preheater B 2 KA / B 2 KS 1,10gph 1,25gph 1,50gph 1,75gph 2,00gph 2,25gph 2,50gph 2,75gph Burner output, kW 3.1.1.1 Adjustment of the nozzle assembly Burner output, kW 3.1.1.2 Air adjustment Burner output, kW 3.1.1.3 Pressure in front of the brake plate Burner output, kW... -
Page 14: Burner Output With Preheater B 2 Kav / B 2 Ksv
General Nozzle Burner output with preheater B 2 KAV / B 2 KSV 1,10gph 1,25gph 1,50gph 1,75gph 2,00gph 2,25gph 2,50gph 2,75gph Burner output, kW 3.2.1.1 Adjustment of the nozzle assembly Burner output, kW 3.2.1.2 Air adjustment Burner output, kW 3.2.1.3 Pressure in front of the brake plate Burner output, kW Bentone B 2... -
Page 15: Burner Servicing
General 4. BURNER SERVICING Cleaning the fan wheel The outer fan housing half is kept irm by 5 screws. Trimming If the size of the nozzle is changed, it is suitable to irst set the nozzle assembly and air according to the recommendations in section Basic settings. -
Page 16: Suspension Of Burner
General Suspension of burner During service the burner can be hung up on the screw in the burner lange. For this there is a hole on the right side of the burner. The blast tube, shrouded disc, nozzle and electrodes are then easily accessible. Removing the blast tube Loosen the two fastening screws one turn. -
Page 17: Service Position Electric Package
General Service position electric package Loosen the hexagon nut from the stud bolt. Pull the electric package backwards and rotate it ca. 90° clockwise. When required the electric package can be suspended in the cables. Pump filter When changing pump ilter, see chapter 06. Bentone B 2... -
Page 18: Pump Instructions
General 5. PUMP INSTRUCTIONS Suntec AS47CK 5.1.1 Technical data Viscosity range: 1,0–12,0 mm Pressure range: 7–12 bar Oil temperature: max. 60°C 5.1.2 Components Solenoid valve Nozzle connection G 1/8” Vacuum manometer connection G 1/8” Manometer connection G 1/8” Filter Suction line G 1/4” Metal plug G 1/4”... -
Page 19: Function As47Ck
General 5.1.5 Function AS47CK Solenoid valve open Solenoid valve closed Pressure adjustment nozzle Shaft seal Side pressure Pressure port gauge Back to suction Gear-set ports By-pass Oil under suction plug inserted Oil under pressure Vacuum gauge port By-passed oil By-pass plug returned to tank, removed Return plugged... -
Page 20: Suction Pipe Tables As47Ck
General 5.1.6 Suction pipe tables AS47CK 5.1.6.1 Overhead Tank One-pipe system Height m Line diameters ø 4 mm Two-pipe system Height m Line diameters ø 6 mm 5.1.6.2 Underlying Tank One-pipe system For reliable operations, use of a Tigerloop is recommended in underlying tanks. -
Page 21: Danfoss Bfp41L3
General Danfoss BFP41L3 5.2.1 Technical data Viscosity range: 1,3–12,0 mm Pressure range: 7–15 bar Oil temperature: –10 to +70°C 5.2.2 Components Nozzle connection G 1/8” Pressure connection G 1/8” Pressure control 4 mm Allen key Cartridge ilter Vacuum gauge connection G 1/8” Return pipe G 1/4”... -
Page 22: Bfp41L3 Operating Principle
General 5.2.5 BFP41L3 operating principle When the pump is started, oil is drawn from the suction port (S) through the ilter (H) to the suction port (C) of the gear-set. The oil then moves to the pressure side of the gearwheel and is thus pressurised. -
Page 23: Suction Pipe Tables Bfp41L3
General 5.2.6 Suction pipe tables BFP41L3 5.2.6.1 Overhead Tank One-pipe system Height m Line diameters ø 4 mm ø 5 mm ø 6 mm Two-pipe system Height m Line diameters ø 6 mm ø 8 mm ø 10 mm 5.2.6.2 Underlying Tank One-pipe system For reliable operations, use of a Tigerloop is recommended in underlying tanks. -
Page 24: Preheater
General 6. PREHEATER Function FPHB 5 When the boiler thermostat closes it supplies power to the preheater PTC element in order to preheat the oil. When the oil reaches the right temperature the preheater thermostat closes, sending the start signal to the burner. -
Page 25: Electric Equipment Lmo1
General 7. ELECTRIC EQUIPMENT LMO1..2..4.. Wiring diagram Alt 2 Alt 3 Alt 4 Alt. 1 According to DIN 4791 Bentone B 2... -
Page 26: List Of Components
General 7.1.1 List of components Oil burner control Operations thermostat Preheater Temperature limiter Fuse, max 10 A Main switch Alarm lamp Ignition transformer Burner motor Solenoid valve Timer (Accessory) Plug-in contact, burner Photocell QRB Plug-in contact, boiler UV-Detector QRC Preheater wiring colours: A Blue B Brown C Black... -
Page 27: Technical Data
General 7.1.3 Technical data LMO14 LMO24 LMO44 Pre-ignition period: 15 s 25 s 25 s Pre-ventilation period: 16 s 26 s 26 s Post-ignition period: 10 s Safety period: < 10 s < 5 s < 5 s Re-connection after release: <... -
Page 28: Colour Codes Lmo14/24
General 7.1.4 Colour codes LMO14/24 When the burner starts, three signal lights in the reset switch indicate the normal sequence, as well as provide indication if something abnormal is happening in accordance with the following table: Preheater in operation Solid yellow Ignition switched on Flashing yellow Normal operation... -
Page 29: Fault Location
General 8. FAULT LOCATION Burner will not start Symptom Causes Remedies Motor starts Unstable lame Burner pre-ventilates Excess air Adjust the damper Low oil pressure Check the oil pressure Flame formed Check the nozzle in relation to the combustion apparatus dimensions and the Burner trips Incorrect combustion apparatus settings ignition electrode position... -
Page 30: Declaration Of Conformity
EU direktiv. Enertech AB declares under sole responsibility that the above mentioned product is in conformity with the following standards or other normative documents and follows the provisions of applicable parts in the following EU Directives. - Page 31 10. OIL BURNERS MAINTENANCE OIL BURNERS MAINTENANCE INSTRUCTIONS INSTRUCTIONS General information If the burner starts but does not ignite Keep the boiler room clean. Ensure that the boiler Make an attempt to start the burner. room has permanent fresh air intake. Switch off before Never make close repeated start attempts.
- Page 32 General Bentone B 2...
- Page 33 General Bentone B 2...
- Page 34 General Bentone B 2...
- Page 36 Enertech AB. P.O Box 309, SE-341 26 Ljungby. www.bentone.se, www.bentone.com...
Need help?
Do you have a question about the Bentone B 2 Series and is the answer not in the manual?
Questions and answers