Table of Contents
Advertisement
Advertisement
Table of Contents

Related Manuals for OXE 125

Summary of Contents for OXE 125
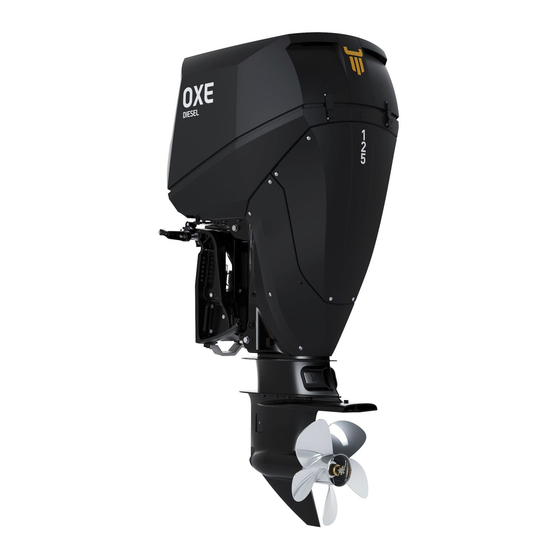
- Page 1 OXE 125/150/175/200 HP USER MANUAL...
- Page 2 “THE OXE POWER HEAD IS A WELL PROVEN DIESEL ENGINE INHERENTLY MORE EFFICIENT THAN GASOLINE ENGINES CONTRIBUTING TO LOW FUEL CONSUMPTION”...
- Page 3 INTRODUCTION Publication No: ODM1005/B...
-
Page 5: Table Of Contents
CONTENT Overview ___________________ 1 Outboard Installation ________ 13 Mounting the outboard _______ 14 About this manual ___________ 1 Mounting height __________ 14 Safety information ___________ 2 Engine connector _________ 15 Symbols and signs _________ 2 Connecting the battery _____ 15 Rotating parts _____________ 2 Engine kill-cord __________ 16 Hot parts _________________ 2... - Page 6 Maintenance schedule _______ 55 Check fuel system ________ 35 OXE Engine Fault codes ______ 63 Evacuating air from OXE Controls Fault Code list ___ 68 fuel system ______________ 35 Trouble shooting ___________ 69 Check cooling system _____ 36 Check water intake ________ 37...
-
Page 7: Overview
ABOUT THIS MANUAL This manual provides you with the information you need to know about starting, operating and maintaining your OXE Diesel engine. Read this manual carefully and learn how to operate your outboard properly. Always contact your dealer if you have any questions. -
Page 8: Safety Information
SAFETY INFORMATION Safety and operating information Do note remove or replace the top that is practiced, along with good cover with the engine running. common sense, can help prevent Hot parts personal injury and product damage. DANGER During and after operation, engine Symbols and signs parts could be hot enough to DANGER... -
Page 9: Engine Exhaust Emissions
Boat performance capacity manufactured or sold by Cimco Marine, may not be designed to be Do not overpower or overload safely used with OXE outboards or your boat. Most boats will carry a OXE outboard operating system. required capacity plate indicating... -
Page 10: Warning And Information Labels
WARNING AND INFORMATION LABELS Label Information Location Heat warning label 1. Placed on the turbo pressure pipe. Warning for hot surfaces, which could 2. Placed on the lower part result in burns. of the intercooler, near the primary belt housing. 30-0300-003 Rotation warning label 1. - Page 11 CIMCO MARINE AB 30-0300-007 Identification label 1. Placed on the starboard side of the engine, just below the middle MODEL: OXE 200 cowling. MODEL NR: P3XL200 SERIAL NR: 00001 BLOCK NR: 17B68420 2. Placed on page 2 in the D.O.M:...
-
Page 12: Main Components
MAIN COMPONENTS AIR FILTER ENGINE OIL FILLER CAP EXPANSION TANK SEAWATER STRAINER INTERCOOLER BELT HOUSING HYDRAULIC PUMP AND FILTER GEARBOX ADAPTER 25 in. PROPELLER SHAFT... - Page 13 TURBO CHARGER ENGINE CONTROL FUEL FILTER UNIT (ECU) SEAWATER PUMP ENGINE CONNECTOR ENGINE OIL DIP STICK ENGINE OIL FILTER TRANSOM MOUNT WITH ANTI CAVITATION TILT AND TRIM PLATE CYLINDERS WATER INTAKE...
-
Page 14: Instrumentation
INSTRUMENTATION CONTROL HEAD For instruments and gauges, refer The control head engages both gear to corresponding Display manual. shifting and acceleration. Depending on single installation or multi installation of outboards, the boat is equipped with a single or twin shift control head. This description comprises a single shift control head only. -
Page 15: Control Head Operation
CONTROL HEAD OPERATION Neutral indicator lamp WARNING The neutral indicator lamp (7) has Be very cautious when first four states: engaging the gears to establish – Fast flashing in combination that FORWARD is truly forward with lamp (4) indicates and REVERSE is truly reverse. A a critical fault which may quick in-and-out of the gear test result in limited or no system... -
Page 16: Control Head Range
Control head range Neutral Throttle Warmup Neutral Throttle Warmup (NTW) allows to control the engine throttle Forward Neutral without gear engagement, in order idle Reverse idle to warm up the engine at a higher rpm. Full speed Full speed NOTE! Maximum rpm is limited to forward reverse 2400 rpm. -
Page 17: Low Speed Control
Low Speed Control Trolling propeller rpm range: Zero to idle rpm LSC propeller rpm range: Full engagement 0 to idle rpm Normal propeller propeller rpm range rpm range: idle to 20% of max rpm idle to max rpm Low Speed Control (LSC) A very slow flashing (one second enables unprecedented control on, one second off) neutral indicator... -
Page 18: Adjustable Lever Feel
Adjustable lever feel Shift detent Throttle friction The friction drag on the lever and the force required to move in and out of the shift detents can be set according to operator preference. Turn the throttle friction screw clockwise to increase the friction on the lever, counter-clockwise to reduce the friction. -
Page 19: Outboard Installation
OUTBOARD INSTALLATION The information presented in this WARNING section is intended as reference Exceeding the boat’s maximum only. For more detailed information, power rating can cause serious refer to Installation Manual. injury or death. Overpowering the Safe and proper mounting depends boat can affect boat control and on experience and the specific flotation characteristics or break... -
Page 20: Mounting The Outboard
MOUNTING THE OUTBOARD The outboard should be mounted The optimum mounting height is in such a way that the boat is well determined by the boat/outboard balanced. Otherwise it could be combination in addition to the difficult to steer. Mount the outboard required use. -
Page 21: Engine Connector
Engine connector Connecting the battery Connect the helm harness to CAUTION the engine harness. Refer to Make sure the main switch is OFF Installation Manual. before working on the battery connections. Connect the largest cable, black, (black connector) (1) to the upper end pin connector. -
Page 22: Engine Kill-Cord
BREAKING IN THE Engine kill-cord ENGINE START The OXE Diesel outboard, as well as all new engines, needs a period of breaking in. This is to allow mating surfaces of moving parts to wear in evenly. Correct break-in will help to ensure proper performance and a prolonged engine life. - Page 23 The gear should be shifted a Do an oil and filter change according to Maintenance schedule, 1st minimum of ten (10) times during inspection, after 50 h. the first five (5) hours 5-10hrs: Use varied load and rpm Use oil and filter as specified in the but do not load the engine above Engine Technical Manual.
-
Page 24: Operating
OPERATING BEFORE START-UP WARNING Risk of accidents! Items in the pre-operation checks not working properly, should always be inspected and repaired before operating the outboard. Checking the fuel level Controls – Check the throttle, shift, and – Check the fuel level. Fill up if steering for proper operation necessary. -
Page 25: Check Engine Oil, Hydraulic Oil And Belt Oils
Check engine oil, hydraulic oil Wait a few minutes until the and belt oils oil has run down. If oil level is above dipstick upper mark CAUTION drain appropriate amount of Ensure that the outboard is in oil. Excess oil level can cause vertical position when checking reduced performance and oil engine oil level, gear oil level and... - Page 26 Visually check oil quality. foamy, water has entered the If the oil looks milky and lower housing. foamy, water has entered the Please contact your local housing. OXE-dealer or OXE- Please contact your local servicecenter immediately. OXE-dealer or OXE- servicecenter immediately.
-
Page 27: Check Fluid Level In Power Trim And Tilt Unit
Check fluid level in power trim and tilt unit Remove the filling plug (3) and seal (4). Check the fluid level in the reservoir. NOTE! If the fluid is correctly levelled, only a small amount of fluid should come out of the filling hole when the plug is removed. -
Page 28: Starting The Outboard
STARTING THE OUTBOARD WARNING WARNING Before starting the engine, make Attach the engine kill-cord in sure that the boat is tightly a secure way to your clothes/ moored and that you can steer floating device or wrist while clear of any obstructions. Be sure operating the boat. -
Page 29: Warming Up The Engine
CAUTION WARNING Never turn the ignition key to Stop the engine immediately if start while the engine is running. an oil-pressure warning is lit on the engine display and the buzzer Do not let the starter turn for sounds. Risk for severe engine more than 5 seconds. -
Page 30: Shifting
Check if the sea-water inlet or outlet is blocked. Clean if necessary. Restart the engine. If the fault still remains may indicate a water pump failure or a blockage in the cooling system. Check the sea water pump impeller and change if broken Place control lever in N or worn. -
Page 31: Power Trim Operation
POWER TRIM OPERATION The OXE Diesel outboard is equipped the effect of trimming. Note the with a hydraulic trim system, with time it takes for the boat to plane, which you can change the angle of watch the speed readings and the the drive in relation to the transom. -
Page 32: Adjusting The Boat Trim
Adjust the outboard trim angle using offset this effect, the trim tab can be the power trim and tilt switch. adjusted. It is easier to accelerate from a standing start onto plane when the bow of the boat is down. Bow up Power trim and tilt switch on single lever... -
Page 33: Bow Down
POWER TILT OPERATION If the outboard is shut off for a Bow down longer period or if the boat is moored in shallow water, the outboard should be tilted up. This is to protect the propeller and lower housing from damage by collision with obstructions, and also to reduce salt corrosion. -
Page 34: Procedure For Tilting Up
Procedure for tilting up Power trim and tilt switch on engine cowling Place the control head lever in neutral position. Trim and tilt switch on cowling The power trim and tilt switch is located on the starboard side of the bottom engine cowling. -
Page 35: Maintenance
MAINTENANCE OUTBOARD CARE TRANSPORTING THE OUTBOARD It is important that your outboard receive the periodic inspections DANGER and maintenance listed in the Maintenance Schedule, in order to Never get under the lowered keep the outboard in best condition. outboard while it’s tilted, even if a support bar is used. -
Page 36: Cleaning The Outboard
CLEANING THE OUTBOARD After operating in demanding Drain the cooling seawater conditions, flush the cooling completely out of the engine. seawater passages with fresh water to prevent them from becoming corroded or blocked by buil-up of salt. Refere to Flushing the power unit. -
Page 37: Flushing The Power Unit
With the engine off, turn on Flushing the power unit the water flush through the Perform this procedure right after cooling passages for about 15 operation to achieve the best result. minutes. Turn off the water and disconnect the garden hose WARNING adapter from the garden hose Do not perform this procedure... -
Page 38: Storing The Outboard
STORING THE OUTBOARD When storing your OXE Diesel Winterization of the outboard outboard for a longer period of When storing an engine for a time (2 months or more), some prolonged period of time or in important procedures must be... - Page 39 Open connection (4) and fill Another alternative is to connect with coolant fluid of sufficient a rubber hose (2) to the seawater grade temperature-wise until strainer connector (1). Insert it exits from connection (1). the other end of the hose into a Undo the hose on the seawater container filled with cooling fluid pump (3) and drain the...
-
Page 40: Checking And Other Maintenance
CHECKING AND OTHER MAINTENANCE Check air intake system Check electric system It is of great importance that the – Check connections on the intake system is intact. Broken and outboard. leaking pipes can drastically shorten – Remove corrosion from access the life of the engine. -
Page 41: Check Fuel System
Check fuel system Air could have entered the system in any of the following ways: The engine ran out of fuel. – The fuel lines have damaged/ leaking joints. The filter was removed for service or replacement. The fuel lines were removed or disconnected for servicing. -
Page 42: Check Cooling System
Check cooling system 1. Seawater strainer Check the system regularly. 2. Seawater pump – Check hoses for fissures and 3. Heat exchanger and hydraulic damage. Replace, if necessary. oil cooler – Check that the water intake is not 4. Intercooler blocked. -
Page 43: Check Water Intake
Check water intake Check coolant level and mixture Expansion tank Water intake Check the cooling level, 4 cm below the filler neck edge. (2). Make sure that the sea water The cooling system of the engine is intakes are not clogged by seaweed to be filled with a mixture of distilled or obstacles. -
Page 44: Check Power Trim And Tilt System
Check power trim and tilt system Check that the tilt rod and trim rods are free from corrosion or WARNING other flaws. Never get under the lower unit Activate the tilt-down switch while it is tilted. Risk for severe until the rods have retracted injury if the outboard accidentaly completely into the cylinders. -
Page 45: Check Propeller
Check propeller Propeller checkpoints – Check each of the propeller WARNING blades for erosion or other You could be seriously injured damage. if the engine accidentally starts – Check the propeller shaft for when you are near the propeller. damage. Before inspecting, removing, or –... -
Page 46: Check The Top Cowling
Check the top cowling CAUTION Make sure that the top cowling is Check the fitting of the top cowling. securely closed and that there are Reinstall if the fit is not complete. no gaps. A loose or improperly Contact your dealer/manufacturer if fitted cover could allow water to it is still loose. -
Page 47: Inspect Anodes
Inspect anodes Anodes on the rig The OXE Diesel outboard is CAUTION protected from corrosion by Do not paint anodes as it would sacrificial anodes. Inspect the make them ineffective. external anodes (1) periodically and remove scale from the surface. - Page 48 Anodes under the cowling The heat exchanger and the Inspect the anodes (2) periodically intercooler are located under the and remove scale from the surface. cowling. Both units are equipped Replace at service intervals or when with sacrificial anodes to protect anodes are reduced to 2/3 of their from corrosion.
-
Page 49: Change Fluids And Filters
CHANGE FLUIDS AND FILTERS Prevention of environmental damage Engine or hydraulic oil and filter elements / cartridges, fuel / fuel filter Dispose of used oil according to local environmental legislation. Take strict precautions to ensure that no oil or Diesel fuel contaminate soil or drainages. -
Page 50: Drain The Fuel Filter
Drain the fuel filter Replace fuel filter element Apply a suitable container (2) Apply a suitable container (3) in order to collect the fuel- in order to collect the fuel- water mixture that drains from water mixture that drains from the fuel filter. -
Page 51: Replace Hydraulic Oil And Filter
Replace hydraulic oil and filter Refill hydraulic oil Unscrew the oil filling plug. WARNING Use an oil filling device to fill up hydraulic oil through the oil The hydraulic oil filter is filler pipe. pressurised. Before removing it the pressure must be released. Wipe clean. -
Page 52: Clean Seawater Strainer
Clean seawater strainer Replace air filter Remove the clamp holding the filter. Pull off the air filter. Fit a new air filter. Reinstall the clamp. Remove the lid. Pull out the strainer. Clean the strainer, reinstall and close the strainer lid. -
Page 53: Change Engine Oil
Change engine oil Replace engine oil filter Place a suitable container below the oil filter. NOTE! Use a 6-point socket to remove the oil filter cap. Remove the oil filter cap (1). Remove the oil draining plug and washer. Drain the engine oil into a suitable container. -
Page 54: Filling Up Engine Oil
Filling up engine oil Change lower belt oil Fill up the engine oil through the oil filler neck. Check engine oil level. Refer to section OPERATION. Remove the magnetic plug and Close the filling cap and wipe washer (1) above the anti- clean. -
Page 55: Change Coolant
Change coolant Remove the sight glass and washer. Fill up with Hydraulic oil until the oil comes out at the upper oil plug (1). Refer Remove the cap (1) of the to Recommended fluids and expansion tank (2). grease. Fit a hose (4) to the coolant Clean the sightglass. - Page 56 Repeat this procedure until no WARNING! more coolant can be added. Use only approved fluids, DANGER! lubricants etc. see Recommended fluids and grease. Otherwise If, in an exceptional case, the the manufacturer’s warranty will coolant level has to be checked become null and void.
-
Page 57: Replace Thermostat
Replace thermostat WARNING! When the cover is opened with working valves, there is a danger that it is not properly sealed when closed again. The required overpressure is no longer set up in the cooling system. Premature simmering and loss of coolant result. -
Page 58: Replace Propeller
Remove the propeller nut (1). NOTE! We recommend a using a new hub kit when mounting a Remove the propeller and propeller. Contact your OXE Diesel propeller washer. dealer or propeller manufacturer! - Page 59 NOTE! Some outboards are NOTE! Do not reuse the cotter pin equipped with a Nyloc locking installed. Otherwise the propeller nut (1) and do not have a cotter pin. can come off during operation. Do NOT reuse a Nyloc locking nut! NOTE! If the propeller nut does not align with the propeller shaft hole after tightening to the specified...
-
Page 60: Lubricating And Greasing
LUBRICATING AND GREASING Power trim and tilt unit Fill the seatings with grease for smoother tilt operation. Use grease according to Recommended fluids and grease. Use a grease gun and fill up with recommended grease until the grease comes out at the joints or ends of shaft.Refer to Recommended fluids and grease. -
Page 61: Maintenance Schedule
MAINTENANCE SCHEDULE DAILY CHECK-UP Checklist Check daily Check Fill up Clean Refer to Before start-up if neces- Clean Seawater strainer - Seawater strainer sary if neces- Engine oil and oil filter - Engine oil dip stick sary replacement - Water separator, Engine oil and oil filter Drain engine oil filter... - Page 62 INSPECTION PRIOR TO EACH SERVICE EVENT Checklist Check Fill up Clean Change/ Refer to Replace Starting and warming up engine – Water/oil/fuel leakage – Power trim, function and leakage – No DTCs are triggered (diagnostic tool) – Unusual engine/ transmission sounds Stop engine User’s Manual Change fluids and filters...
- Page 63 FIRST INSPECTION Checklist 1st inspection, after 50 h Check Fill up Clean Change/ Refer to Replace Condition of rubber hoses, pipes, connections and clamps (leakage, wear, aging) Workshop Manual – Coolant hoses Outboard views – Hydraulic hoses – Fuel hoses –...
- Page 64 SERVICE AT 200 HOURS Checklist Every 200 h or once a year Check Fill up Clean Change/ Refer to Replace Condition of rubber hoses, pipes, connections and clamps (leakage, wear, aging) - Coolant hoses Workshop Manual Outboard views - Hydraulic hoses - Fuel hoses - Exhaust hoses Display/gauges function...
- Page 65 Checklist Every 200 h or once a year Check Fill up Clean Change/ Refer to Replace User’s Manual Coolant level and mixture Check cooling system User’s Manual Engine oil and filter Change fluids and filters Upper belt tension Workshop Manual Upper belt oil, magnetic plug, Workshop Manual seal...
- Page 66 SERVICE AT 800 HOURS Checklist Each 800 h/once every 3rd Check Fill up Clean Change/ Refer to year minimum Replace Condition of rubber hoses, pipes, connections and clamps (leakage, wear, aging) Workshop Manual - Coolant hoses Outboard views - Hydraulic hoses - Fuel hoses - Exhaust hoses Display/Gauges, function...
- Page 67 Checklist Each 800 h/once every 3rd Check Fill up Clean Change/ Refer to year minimum Replace User’s Manual Engine oil and filter Change fluids and filters Workshop Manual Upper belt Upper belt tension Upper belt housing, gear pulleys, bearings, gaskets Workshop Manual and sealings, engine adapter Upper belt replacement...
- Page 68 Checklist Each 800 h/once every 3rd Check Fill up Clean Change/ Refer to year minimum Replace Workshop Manual Propeller shaft oil seal Propeller replacement Propeller shaft, check Workshop Manual straightness and splines Lower belt replacement condition. Workshop Manual Lower belt tension Check lower belt tension Upper belt oil Workshop Manual...
-
Page 69: Oxe Engine Fault Codes
OXE ENGINE FAULT CODES Column 1 shows the Suspect Parameter Number (SPN). Column 2 shows the Failure Mode Indentifier (FMI). Column 3 gives a short description of the fault. Description Water in fuel is detected. Engine oil pressure - Data valid but below normal operational range... - Page 70 Description Engine coolant temperature sensor - Voltage above normal, or shorted to high source Engine coolant temperature sensor - Voltage below normal, or shorted to low source Gearbox oil pressure - Data valid but above normal operational range Gearbox oil pressure - Data valid but below normal operational range Gearbox oil pressure - Voltage above normal, or shorted to high source Gearbox oil pressure - Voltage below normal, or shorted to low...
- Page 71 Description Engine oil temperature sensor - Voltage above normal, or shorted to high source Engine oil temperature sensor - Voltage below normal, or shorted to low source Gearbox oil temperature - Data valid but above normal operational range Gearbox oil temperature - Voltage above normal, or shorted to high source Gearbox oil temperature - Voltage below normal, or shorted to low source...
- Page 72 Description 5324 Glow Plug - Fault 521104 Controlhead communication timeout 521105 PSU Glow Plug Module - Current above normal or grounded circuit 521106 PSU Trim/Tilt - Current above normal or grounded circuit 521107 Actuator feedback message not received (ECU-ECU) 521108 Engine speed control error 521109 Gear position error Fwd or Rev...
- Page 73 Description 521129 Any SWSUP High 521130 Fuel rail pressure valve - Current above normal or grounded circuit 521131 521132 Trim angle sensor - Voltage above normal, or shorted to high source 521132 Trim angle sensor - Voltage below normal, or shorted to low source 521133 Glow Plug or Module Error 521134...
-
Page 74: Oxe Controls Fault Code List
OXE CONTROLS FAULT CODE LIST J1939 J1939 Description 521344 Control head 0 port lever pot failure 521345 Control head 1 port lever pot failure 521360 Control head 0 port lever pot mismatch 521361 Control head 1 port lever pot mismatch... -
Page 75: Trouble Shooting
TROUBLE SHOOTING Refer to Workshop Manual. -
Page 76: Technical Data
Diesel, L4 Displacement 1956 cc 122 cu in Intake VGT turbocharged, intercooled Max. power 92/110/129/147 kW 125/150/175/200 HP at engine speed 4100 RPM Max. engine torque 376/380/380/415 Nm 510/515/515/563 lb ft at engine speed at 2500 rpm Fuel Diesel Dry weight... -
Page 77: Recommended Fluids And Grease
2.1 quarts Fully Synthetic Transmission Fluid - ATF / Dexron HP Refer to Workshop Manual Volumes for engines 125 and 150 HP Volumes for engines 175 and 200 HP For cold climate, select viscosity according to table OXE Engine oil Viscosity. -
Page 78: Diesel Fuel
DIESEL FUEL The composition of the fuel is vital for operation of the OXE outboard, its service life, and emissions. To meet the performance specified and to run the boat cleanly and quietly, it is important that fuel as recommended in table Recommended fluids and grease is used. -
Page 79: Engine Oil Viscosity
ENGINE OIL VISCOSITY Select viscosity according to table. The temperature values refer to stable ambient temperatures. - Page 80 NOTES ______________________________________________________________ ______________________________________________________________ ______________________________________________________________ ______________________________________________________________ ______________________________________________________________ ______________________________________________________________ ______________________________________________________________ ______________________________________________________________ ______________________________________________________________ ______________________________________________________________ ______________________________________________________________ ______________________________________________________________ ______________________________________________________________ ______________________________________________________________ ______________________________________________________________ ______________________________________________________________...
- Page 81 NOTES ______________________________________________________________ ______________________________________________________________ ______________________________________________________________ ______________________________________________________________ ______________________________________________________________ ______________________________________________________________ ______________________________________________________________ ______________________________________________________________ ______________________________________________________________ ______________________________________________________________ ______________________________________________________________ ______________________________________________________________ ______________________________________________________________ ______________________________________________________________ ______________________________________________________________ ______________________________________________________________...
- Page 82 NOTES ______________________________________________________________ ______________________________________________________________ ______________________________________________________________ ______________________________________________________________ ______________________________________________________________ ______________________________________________________________ ______________________________________________________________ ______________________________________________________________ ______________________________________________________________ ______________________________________________________________ ______________________________________________________________ ______________________________________________________________ ______________________________________________________________ ______________________________________________________________ ______________________________________________________________ ______________________________________________________________...
- Page 84 Cimco Marine AB Metallgatan 17 B Ängelholm, SE-262 72 Ängelholm, SWEDEN +46 (0)431-37 11 30, www.oxe-diesel.com Printed in Sweden 2019. Copyright © 2019 Cimco Marine AB.
Need help?
Do you have a question about the 125 and is the answer not in the manual?
Questions and answers